
The idea is fairly simple but keeping a six-layer cake level and in one piece, especially when serving, is hard to execute. I am by no means a proficient cake-maker, but I like cake, and I feel like that is half the battle. It's not the half that makes your cake stand up straight, though, I discovered.
You need:
- 2 batches of the cake recipe of your choice! It should be a white cake so that the colours stand out well. You can even use two box mixes! But, if you do this, I recommend adding two boxes of vanilla pudding (dry) to the mix - you'll end up with a richer, more structurally sound cake.
- red, yellow, green, and blue GEL food colours. I don't recommend using liquid food colours as you'll have to add too much and the cake consistency will change.
- icing recipe of your choice - you will need a LOT of icing. More than you think. Again, feel free to use disgusting canned icing.
- decorations of some sort! icing of various colours and/or a piping bag will do the trick.
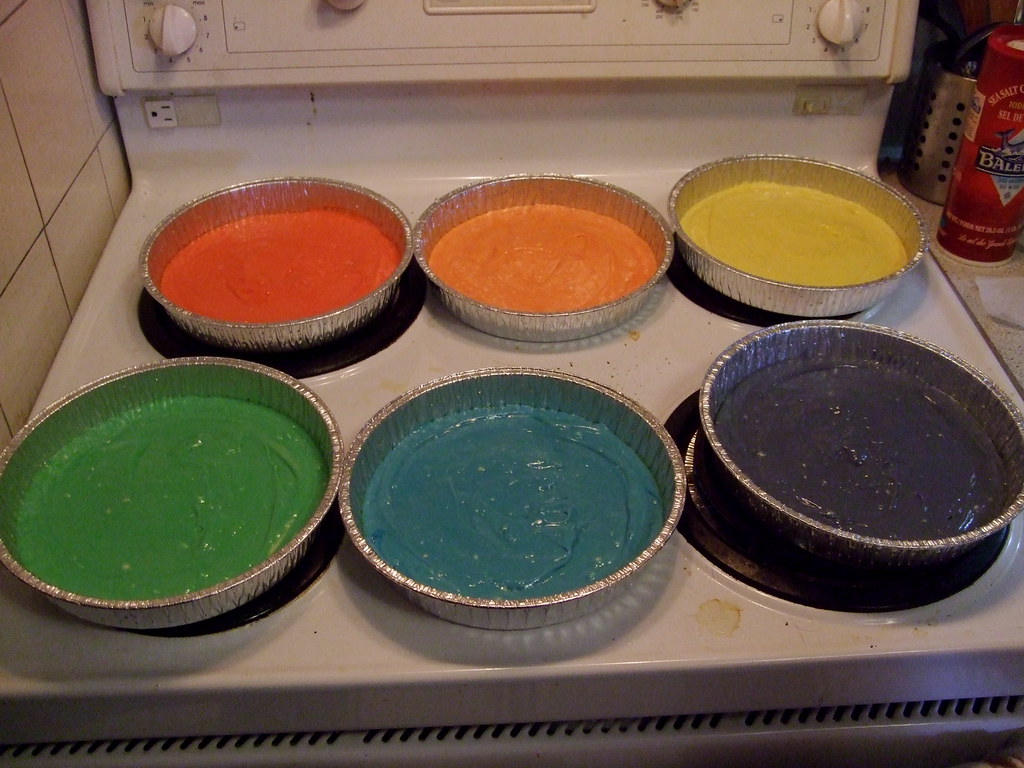
1. Mix your batter according to the directions. Measure the volume of the batter and divide that number by 6 for your six layers. I ended up needing 1 and 1/3 c of batter per colour as I had 8 cups of batter total. Preheat your oven to the indicated temperature. Grease six 8" cake pans well.
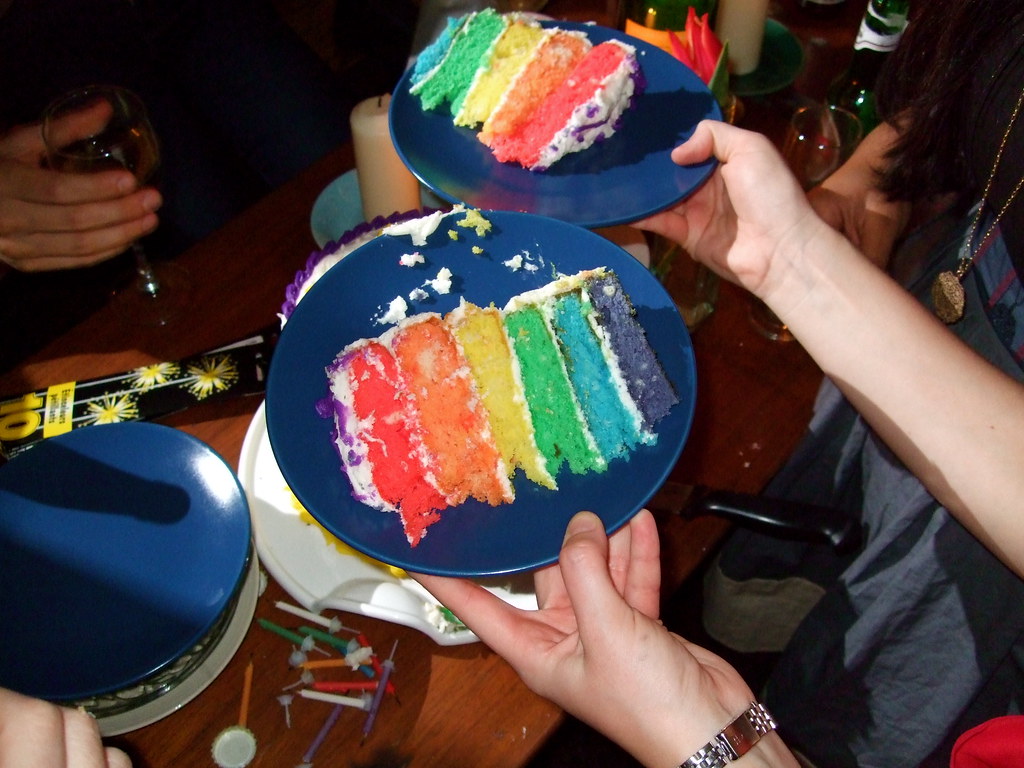
2. Divide the batter into 6 glass or ceramic bowls. Plastic might take some of the colour from the food dye - I'd be careful. Add a few drops of gel food colouring to each bowl, according to the colour you want, and mix well. I needed three drops for red, 2 drops of yellow and one drop of red for orange, three drops of yellow for yellow, two drops for green, three drops for blue, and two drops of blue plus two drops of pink for purple.

3. Pour each colour of batter into a cake pan, and bake! Mine took 20 minutes to be done through.
4. Let the cake cool for a long time. The cake must be cool before you start assembling your cake or it will be fail cake. While you're waiting, make your icing. My recipe is a few tbs of butter, a bag of icing sugar, a tbs of vanilla, and enough milk to make it icingy.
5. Using a sharp cerated knife or cake leveller, level off the tops of the cakes. They must be flat or your cake will fall over. Put the purple layer on the tray you're going to serve it on. Tuck a few pieces of parchement paper underneath so that no icing will get on the serving tray. You'll tug them out later when you're done icing. Ice the top but not the sides of the purple layer. Stack the blue layer on top, and ice its top. Repeat with green, yellow, orange, and red.
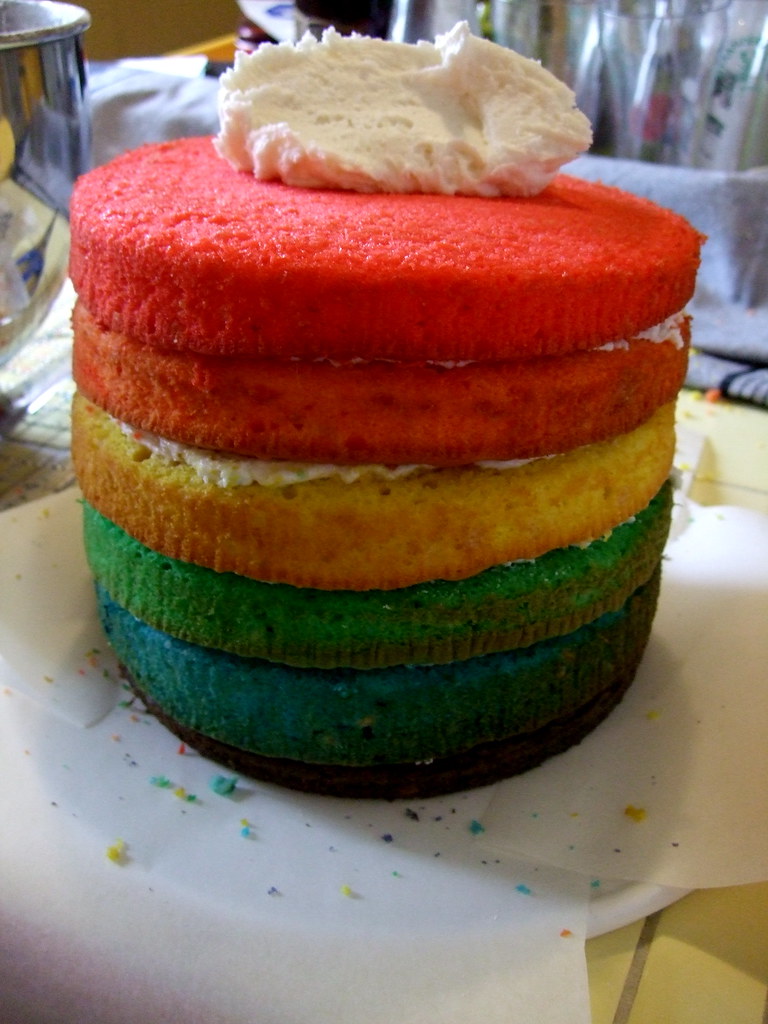
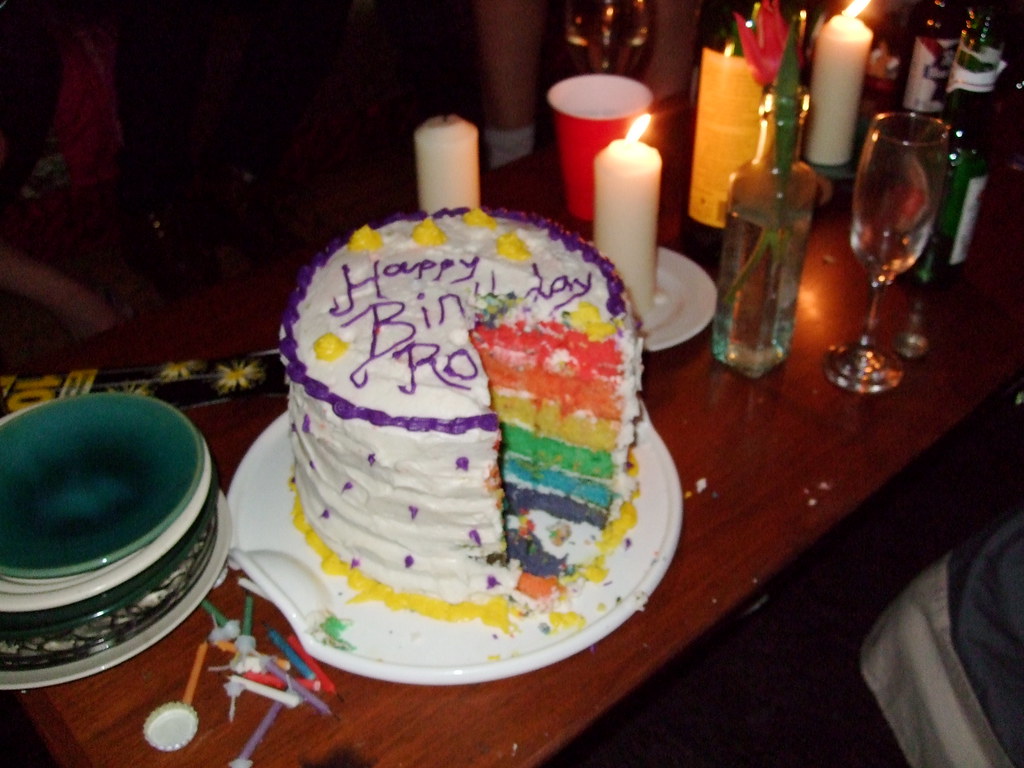
6. When you get to red, pile lots of icing on the top and spread it evenly, pushing it over the edges. Then ice the sides. Now you can decorate the cake however you like - those icing scribblers they sell are useful for this, or you can put chocolate chips or sprinkles or whatever! I like to make mine as garish as possible. :)
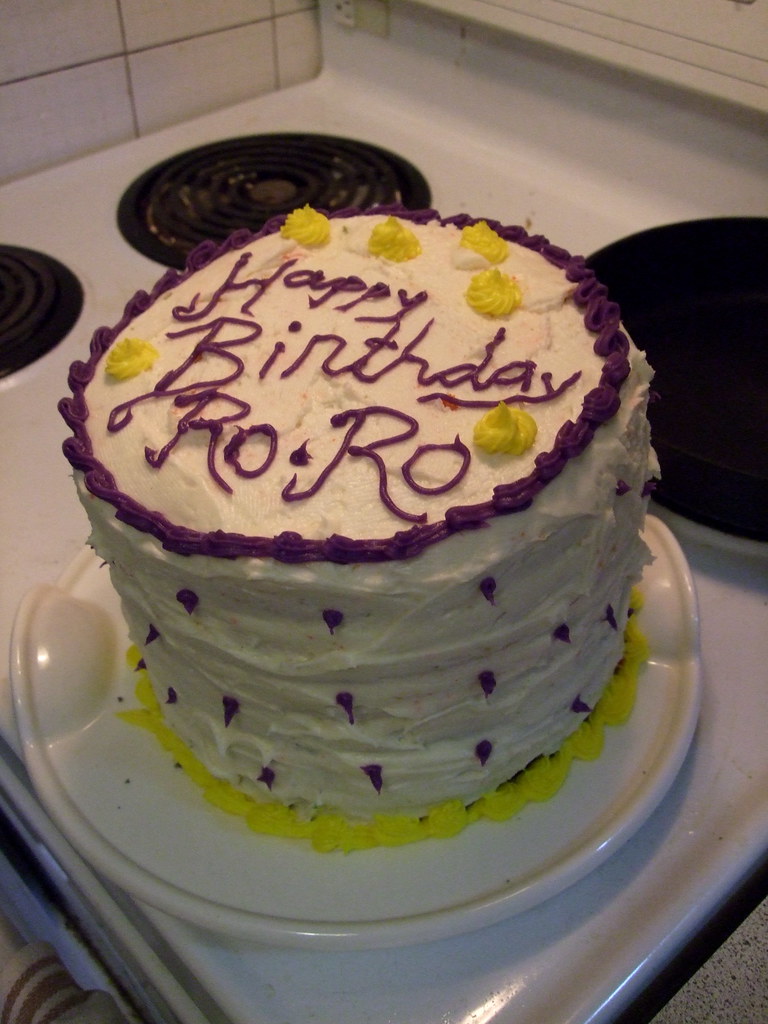
7. Tug out the parchment pieces, and serve your beautiful cake to your adoring fans!


This looks so cool, I'm very impressed, I can barely play jenga.
ReplyDeleteThis is gorgeous! What a fun idea!
ReplyDeleteThanks for sharing! I will be making this soon!
SO COOL!
LOL the last two pictures scared me!
ReplyDeleteIs your boyfriends name Romano? or Roman? or something xD
I was like"Ro-Ro?" Le gasp, shes making cake for my boyfriend... but then i realized it's probably a common name :P
Haha, @machinemedusa - the cake was for my good friend Roxy. Don't worry. :)
ReplyDeleteI've been eyeing Nom's cake for a while now! Glad to see the experiences of others first!
ReplyDeleteMariel
www.oneshetwoshe.com
OH. *gasp* MY. *gasp* DAYS!!!!!
ReplyDeletei think i might have wet myself a little bit, this is awesome, i expect one of these for my birthday.
Positive site, where did u come up with the information on this posting?I have read a few of the articles on your website now, and I really like your style. Thanks a million and please keep up the effective work. nothing bundt cakes huntsville al
ReplyDelete