Wednesday, September 23, 2009

Ginger Tofu Steaks

Yes that's right - tofu. Don't knock it - it's the best flavour absorber out there!

This is my friend Leila's recipe that she handed down to me years ago. It's excellent and I urge you to try it. Not only will you like it a lot, you will also feel very pleased with yourself for eating healthy and yummy things for dinner. Or lunch!

Ginger Tofu Steaks


--

You need:

2 large garlic cloves, minced
1.5" knob of ginger, minced
1/2 tsp red pepper flakes
2 tbs sesame oil
4 tbs brown sugar
3 tbs soy sauce
1 package of firm or silken extra-firm tofu

--

1. In a small bowl, mix together all the ingredients but the tofu.

2. Drain the tofu and slice into 1/2" steaks. Lay them on a rimmed baking sheet and pierce with a fork.

3. Cover with the marinade and leave until you're ready to use, refrigerated - at least 30 minutes but longer is better!

4. Grill in a grill pan or bake at 350ºF for 15 minutes, or until the edges are golden. Basting with the sauce is a good idea.

--

I served this with soba noodles and steamed broccoli and a bit of soy sauce and mirin mixed together for extra sauciness.

Digg Technorati Delicious StumbleUpon Reddit BlinkList Furl Mixx Facebook Google Bookmark Yahoo

Sunday, September 20, 2009

Devil's Food Cake with Salted Caramel Frosting

Before yesterday I had never made any type of caramel at all. This was a serious adventure for me and it turned out really really well! I got a cake at the end of it! :)


No, those are not shards of amber-coloured glass on top - those are shards of delicious crystal-clear caramel! It took me three tries to get it right, but I can now make caramel and I will tell you my story.

So there are three components to this cake. First, the cake itself. Then the salted-caramel frosting. And finally, the caramel shards on top. The cake recipe is from The Better Homes and Gardens Cookbook. I go there for my cake recipes because it is the high-end version of the church-ladies-auxiliary cookbook. When you want a good cake recipe, you trust Aunt Myrtle's Prize-Winning such and so to point you in the right direction.

From page 157 of my version, we read that we need:

3 eggs
2 1/4 c all-purpose flour
1/2 c unsweetend cocoa powder
1 1/2 tsp baking soda
1/4 tsp salt
1/2 c shortening (I used butter and nothing bad happened to me!)
1 3/4 c granulated sugar
1 tsp vanilla extract
1 1/3 c cold water

1. First, take the eggs out of the fridge (duh) and let them come to room temperature for about 30 minutes. The book says this makes them fluff better. While you're waiting, grease and flour 2 round cake pans. I "floured" mine with cocoa powder because this is a chocolate cake.

2. In a medium bowl, stir the flour, cocoa, baking soda, and salt together. In a large mixing bowl, beat the shortening/butter with a hand mixer for about 30 seconds, then add the sugar and vanilla and beat well.

3. Add the eggs one at a time and beat well after each one. Then, add the flour mixture and the water alternately (so a bit at a time) and mix to combine after each addition.

4. Pour the batter into your pans and bake at 350º for about 30 minutes, until a knife comes out clean.

5. LET THE CAKES COOL ALL THE WAY BEFORE REMOVING THEM FROM THE PANS. Otherwise your cake will crumble and crack and you will be sad. When you've removed them from the pans, let them cool even more before frosting them.


OK now for the frosting. In Canada we call this icing. But whatever. I got my recipe from the website Offbeat Eating and so I direct you there for that.The only thing I changed was that I added more salt because it just didn't seem salty enough. But just taste it and judge for yourself. As s/he says, before you add the icing sugar, it should taste very strongly of caramel and be a bit too salty. Remember that the icing sugar will even out the salt flavour. Also, if I made this again (and I will!) I would use coarse salt instead of fine salt, so that each little salty surprise is wrapped up in the surrounding sweet icing. The icing went down very well - people loved it!

OK the last thing is the scariest part: making hard clear caramel. This took me three tries to get right and I just have to say it is a good thing that sugar is cheap. I have a book just on caramel and in that book it says there are two ways to make caramel - the authentic way, and the cheats way. As usual, I prefer the cheats way, and so I dissolved my sugar in a bit of water before heating it.

Here's what you do: First, get a piece of parchment paper and lay it flat on a baking sheet. Get a deep-sided pan that your pot will fit in and fill it half way with ice water. Then, in a cool pot, combine 1 c of sugar, 1/4 tsp lemon juice, and 1/4 c cold water. Make sure the sugar dissolves as much as possible before heating it over medium-high heat. Make sure you have a little pastry brush and a dish of warm water near by.

Bring the sugar mixture to a boil. Don't stir it, but do use the brush to dissolve any crystals of sugar that are clinging to the side of the pot. You do NOT want crystals - your liquid sugar, when it begins to boil, should be clear, not cloudy. If it's cloudy you have crystals and you have to start again.

When the edges of the sugar mixture start to get a little golden, give the pot a swirl to even out the cooking. Watch it so so carefully because you do not want to burn your precious caramel! When it's a medium amber colour, take the pot off the heat and put the bottom of the pot in the pan of ice water to stop it cooking. Working quickly, before the candy has time to harden, take a spoon and drizzle the caramel onto the parchment paper in a swirly pattern to make a beautiful spider-web of caramel, or pour out the candy onto the parchment to be shattered after it cools fully. The candy is really super hot at this point, so even though it looks delicious, if you try and taste it you will burn yourself quite badly and the thing that burned you will be stuck to your finger and/or tongue.

So then what you should do to assemble your cake is first trim the cake rounds so that they are flat on top and not domed. Use a serrated knife to carefully cut off the domed top of the cake. You can eat that part. :) Get out the serving plate you're going to serve the cake on and put a few scraps of parchment paper all around the edges so that they will come about 1" under the edge of the cake when you put it on. Put your first layer on the tray and plop about a third of the icing on it and smooth it out to the edges. Put your second layer on top, making sure the formerly domed and now cut side is down. Ice the sides of the cake with about a third of the icing. The parchment paper makes sure your serving plate doesn't get covered in icing while you're doing this! So clever! Last, use the rest of the icing for the top. You can decorate with the shards or with the spider-web of sugar - it's your call! You can even put some shards in a ziplock and smash them into gold dust and use that. Above all, enjoy!

Digg Technorati Delicious StumbleUpon Reddit BlinkList Furl Mixx Facebook Google Bookmark Yahoo

Wednesday, September 16, 2009

Grilled Lemon Pork Chops

This one is an easy one, but so good.


You need for the main:

two 4oz pork loin chops (or chicken, or turkey, etc.)
1/4 c lemon juice
1/4 c olive oil
1 tsp coarse salt
2 tsp dried oregano
copious fresh ground pepper

On the side:
2 cups of broccoli
a small spaghetti squash


1. The night before (or an hour before you want to eat, but longer is better), put the meat in a shallow dish or a ziplock bag and add the marinade ingredients (lemon juice, oil etc). Just let that sit in the fridge.

2. 40 minutes from when you want to eat, split your spaghetti squash in two lengthwise and clean out the seeds.

3. Arrange skin-side up on a baking tray and put into a preheated 350º oven for 30 minutes.

4. Cut up your broc so it's all ready for when you need it.

5. When your squash has 5 minutes left, preheat your grill. I just got a new grill pan and this was its inaugural use and I am very pleased with its performance!

6. When the grill or pan is hot, toss on your meat. It should sizzle - that way you'll get nice grill marks! At this point it's probably time to remove your squash and turn on the broc to steam. You can let the squash cool on the counter for a little while.

7. When you have nice grill marks on one side of the meat (this should only take 4 minutes or so), flip it and do the other side. When the other side is done, so should the meat be, but if you're cooking with pork you should just make a little cut and check: no pink for pig!

8. Cut up your squash, plate your dinner, and you're good to go! Easy!

Note: One spaghetti squash is a lot for two people. Unless you're cooking for more, you'll have leftovers. But fear not! You can freeze the flesh! Just take it off the skin, put it in a baggie and you're good to go. :) Digg Technorati Delicious StumbleUpon Reddit BlinkList Furl Mixx Facebook Google Bookmark Yahoo

Monday, September 14, 2009

Dosas with Chickpea Filling and Coconut Sauce


This recipe was my first assignment in the Daring Cook's Challenge. Every month, a challenge is assigned and cooks and food bloggers all try their hands at what might be something completely new and unfamiliar.

This month, the challenge, assigned by Debyi of 
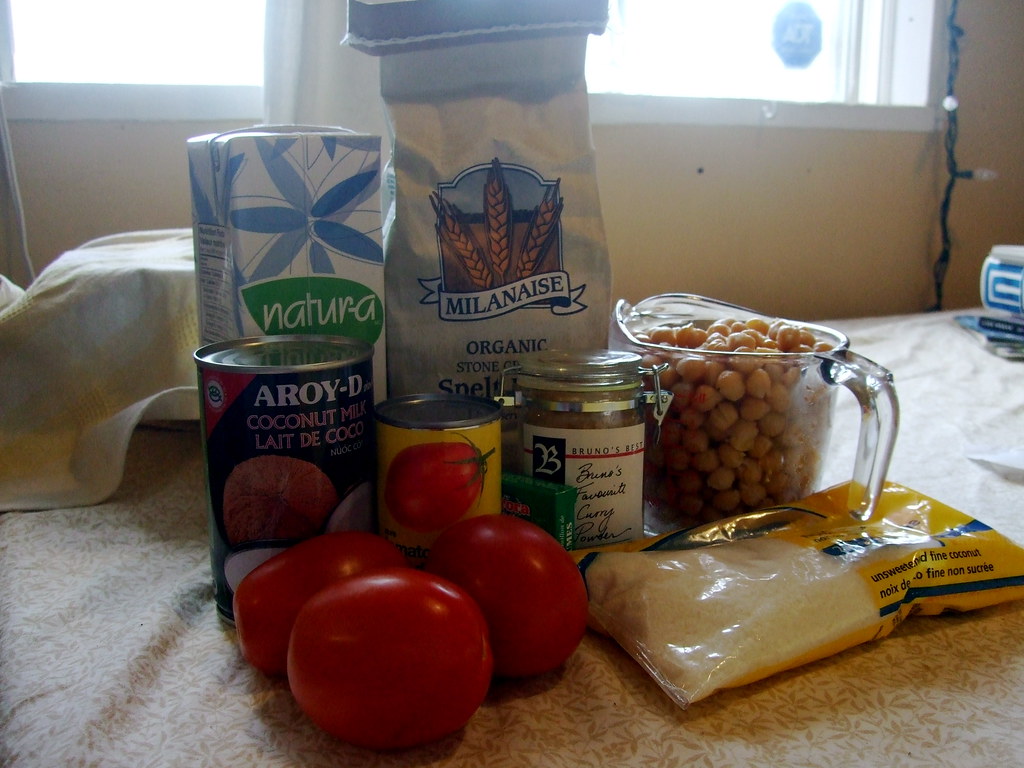
The Healthy Vegan Kitchen, was a wonderful vegan Indian dish composed of spelt flour pancakes (dosas), a chickpea curry, and a coconut and tomato sauce to finish. I admit that I grumbled about having to go out and buy soy milk, but the meal was delicious and will definitely become one of my go-to special dinners.


The amounts here will feed at least five hungry people (we were only three and have enough left over for lunch and dinner for two!), but the chickpea filling freezes well and the dosas are actually quite easy to make, so a little extra wouldn't go amiss.

First, for the Chickpea Filling, you need:

5 cloves garlic, crushed and minced.
1 medium onion, peeled and finely diced
1 largish carrot, peeled and finely diced
1 green pepper, finely diced (red, yellow or orange are fine too)
2 medium hot banana chilies, minced (I couldn't find any hot peppers so I omitted them. Still yum.)
2 TBSP ground cumin
1 TBSP dried oregano
1 TBSP coarse sea salt (remember that if you use fine, you should use less!)
1 TBSP turmeric
4 cups cooked or canned chick peas (about 2 cans)
½ cup (one small can) tomato paste


1.Heat 1 TBS canola oil in a large saucepan over medium to low heat. Saute the onion and the spices with the carrot until the onions are softened. Then add the garlic and peppers and continue to cook until soft, stirring occasionally.

2.Mash the chickpeas by hand, with a hand blender like I did, or in a food processor. They don't have to be completely mashed - I left a bunch (maybe a third) whole to make a better texture.

Add the chickpeas and tomato paste to the saucepan, stirring until heated through. At this point mine was a bit dry, so I added about 3/4 c water - you may wish to do this also.


Second, make your coconut sauce:

1 onion, peeled and finely diced
2 cloves garlic, smashed and minced
½ ground cumin
¾ tsp coarse sea salt
3 TBSP curry powder (mild or hot - whatever you like!)
3 TBSP spelt flour (you can use whole wheat flour if you can't find spelt)
3 cups vegetable broth (you can use chicken if you don't mind it no longer being vegan!)
2 cups coconut milk
3 large tomatoes, diced

1. Heat a little oil in a large saucepan over medium heat. Add the onion and garlic, cooking for 5 minutes, or until soft.

2. Add the spices, cooking for 1 minute more. Add the flour and cook for 1 additional minute.

3. Gradually stir in the vegetable broth to prevent lumps. Once the flour has been incorporated, add the coconut milk and tomatoes, stirring occasionally.

4. Let it simmer for half an hour.


At this point, you are ready to start your pancakes. For the Dosas, you need:

1 cup spelt flour (or whole wheat, or gluten free)
½ tsp regular salt
½ tsp baking powder
½ tsp curry powder
½ cup soy milk (or almond, or rice, etc.)
¾ cup water
cooking spray, if needed (I needed.)

1. Combine the dry ingredients in a bowl. Slowly add the soy milk and water, whisking until smooth.

2.Heat a nonstick skillet over medium heat. Spray your pan with a thin layer of cooking spray, if needed. It's important that the pan is hot enough - you will end up with sad pancakes if your pan is not hot. We had a few sad pancakes, but they were eaten anyways, so I guess they weren't that sad! :)


3.Ladle 2 tablespoons of batter into the center of your pan in a circular motion until it is a thin, round pancake. (If you have made crepes before, it is the same technique.) When bubbles appear on the surface and it no longer looks wet, flip it over and cook for a few seconds. Remove from heat and repeat with remaining batter. Makes 8 pancakes. (We ended up with about 12 pancakes, but they were on the smaller side.)


I arranged the pancakes on a plate and served the chickpeas and the coconut sauce separately so that people could assemble their own. The basic idea is that the chickpea filling goes inside the dosa like a burrito, and then the sauce either can go on top, enchilada style, or inside before you wrap it up. You could even dip, I suppose. Either way, this was a popular dinner in my house and I am very excited to have expanded my cooking skills! Look for another Daring Cook post next month at this time!

Digg Technorati Delicious StumbleUpon Reddit BlinkList Furl Mixx Facebook Google Bookmark Yahoo

Wednesday, September 9, 2009

Back!

Hello, dear readers!

I have returned from my travels and I have a recipe for you. I have a food-review to post shortly about all the delicious (and sometimes surprising) things I ate, but I'm still working on it.

For now, inspired by the Spanish tortillas I ate while in Spain, I have concocted a lunch or breakfast recipe that makes packing a lunch or grabbing something to eat in the morning pretty easy. You could easily make amendments to this recipe to include other types of cheese, sliced ham, red peppers, etc, or the traditional potato found in Spanish tortillas, so if you have success with variations, let me know! :)

Mini Tortillas con Queso (and Spinach) (Makes 12)


You need:

6 eggs
3 tbs chopped chives (or green onions)
1.5 c chopped baby spinach (or arugula)
3 oz sharp cheese, like cheddar, parmesan, or gruyere, grated.
2/3 c dairy - i used 10% cream but you could use milk or yogurt or something else.
a 12-cup muffin tin
cooking spray

1. Preheat your oven to 400ºF and spray the muffin tin with cooking spray, or grease it with butter. You could put muffin liners in, but I don't know how well the egg would come off the paper.

2. With a whisk or a hand mixer, beat the eggs with the milk/cream until foamy.

3. Stir in the chives and spinach.

4. Using a 1/4c measuring cup, fill each muffin cup with the egg mixture.

5. Divide grated cheese among the cups and bake 15-20 minutes, until puffy and golden brown on top.


Mine deflated a lot after I took them out of the oven, but they're still really tasty!

These tortillas freeze really well, too. I just packed all of mine up in individual ziplocks and put them all in a big freezer bag. Just pop it in the toaster oven to warm it up the morning of, or at work/school if you have access a toaster oven. I imagine the microwave would work out OK too, but they might get a bit rubbery.

Digg Technorati Delicious StumbleUpon Reddit BlinkList Furl Mixx Facebook Google Bookmark Yahoo