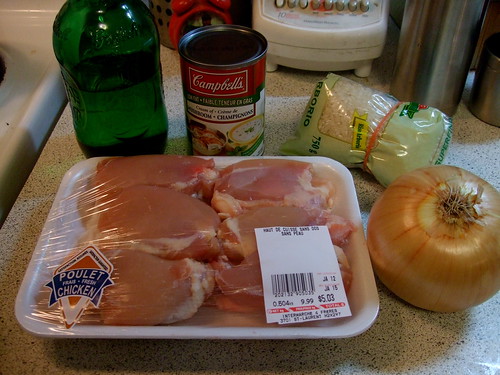
Tuesday, March 31, 2009

Veggie Lasagne

Warmer weather means that I have fewer hankerings for large pieces of meat and long-braised stews. But I'll always love cheese.


You need:

1 tin tomatoes, diced or crushed (depending on how chunky you want your sauce)
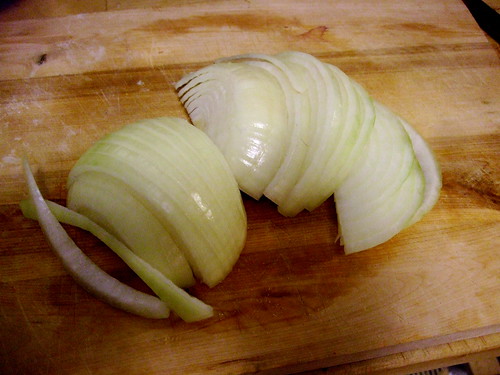
1 medium onion, finely diced
3 cloves of garlic, minced
1/2 c red wine (optional)
1/2 c stock of some sort... i used chicken
1 tbs olive oil
1 or 2 bay leaves
1 or two carrots, grated
1/2 a red or yellow pepper, thinly sliced into 2" pieces
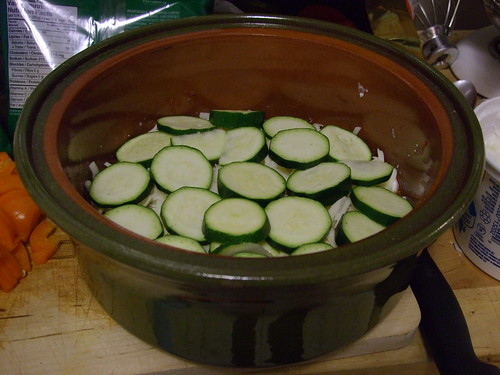
1 smallish zucchini/courgette, thinly sliced
2 handfuls spinach or 1/2 pack frozen spinach, diced
2 handfuls fresh arugula (optional)
some lasagna noodles (i used oven-ready ones; if you aren't you'll have to boil them first)
250 ml cottage cheese (it is tradition in my family to use cottage cheese. please don't kill me!)
250 g grated mozzarella
4 tbs parmesan cheese

1. Saute the onion and garlic in the olive oil over medium heat.

2. Add the tomatoes, carrot, spinach, stock, and wine, if using. if you're not using the wine, add a bit more stock. I like to add grated carrot to the sauce because the sweetness of the carrot takes the edge off the acidity of the tomatoes, and you don't have to resort to sugar, as some do. The sauce will be delicious on its own, and if you chicken out at this point, you can always eat it over other pasta. It's a good default sauce.

3. Simmer until reduced a bit; I used this time to chop my other veggies.

4. In a casserole dish, layer sauce, then noodles, then cheese (some cottage, some mozza), then zucchini; then sauce, then noodles, then cheese, then peppers and arugula, if using; then sauce, then noodles, then sauce, then the rest of the mozza and all the parmesan.


5. Cover with a lid or tinfoil and bake in a 375ºF oven for 30-40 minutes; then uncover and bake another 15 minutes, until the cheese is toasty on top.

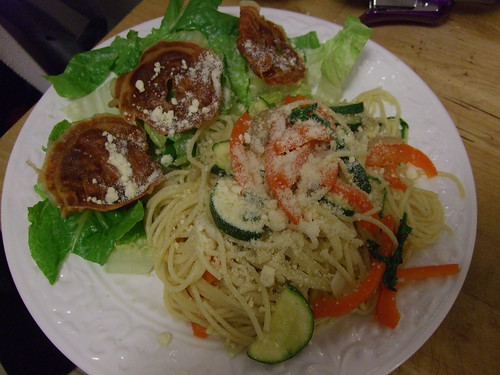
There is no "served" photo because I actually think it's impossible to make a lasagne stand up properly as they do on the box of noodles. :) But it was delicious and you'd never know there was no meat. :)

Digg Technorati Delicious StumbleUpon Reddit BlinkList Furl Mixx Facebook Google Bookmark Yahoo

Sunday, March 29, 2009

Spaghetti Primavera

This is such an easy and healthy dinner.


That is, until I smothered it with parmesan cheese!

You need:

Enough pasta for 4 people (or two people, or one person etc. My amounts are for 4 because we like leftovers.)
Red bell pepper, quartered and thinly sliced
Zucchini, halved lengthwise and thinly sliced
3 cloves of garlic, minced
Half a red onion, quartered, then thinly sliced
1 cup arugula or baby spinach
3 tbs olive oil
salt and pepper

1. Put on a big pot of water and while you're waiting for it to boil, chop up your veggies.

2. Saute your onion and garlic in 1 tbs of the oil in a pan.

3. When water is boiling, put your pasta in that pot, and at the same time, put the red pepper and zucchini in with the onions and garlic.

4. When the pasta is cooked, drain it, then put it back in the pot with the other 2 tbs of olive oil. Add your veggies on top, and the arugula. Season to taste and toss to coat the pasta in the "sauce".

5. Drench in parmesan cheese, and eat up!

I served this with homemade bread and a caesar salad with pancetta. (The pancetta is really easy - all you do is separate out your pancetta slices and arrange them on a paper towel on a plate. Put it in the microwave for about 2 minutes. That pancetta will crisp up like nobody's business and you can put it on anything! Pasta, salads, in sandwiches...! YUM!)

Digg Technorati Delicious StumbleUpon Reddit BlinkList Furl Mixx Facebook Google Bookmark Yahoo

No-Knead Bread

Well, I bit the bullet and tried out Mark Bittman's famous no-knead bread. And I have to say, I think it's more trouble than it's worth, but that may just be my own circumstances.

I had no container in which I could bake the bread. Baking the bread in a dutch oven or a cast-iron pot keeps the steam in with the bread, making the crust nice and chewy, like real French bread. So in the end, after shaping and resting the bread, I baked it directly on my baking stone, using a tray of ice cubes on the bottom shelf to create steam. The crust was nice and chewy but the crumb left something to be desired, even after having risen for 24 hours. The flavour was good, but wasn't very salty, and didn't have the lovely nutty texture a long rise usually gives.


If you want to make delicious French bread and have absolutely no time whatsoever to be at home and supervise, then for sure, go this way. You'll get rave reviews and people will still love you.

But, if you have a day when you're going to be home anyways, working or doing chores, or watch TV etc, then I suggest you follow this method. This bread is almost as easy, does not require a dutch oven (although I'm sure it would be nice baked in there, too!), and can be shaped into lovely baguettes which are useful for impressing boyfriends, guests, et al.


If you can't see the recipe, first of all you should join The Fresh Loaf because it's awesome, but I'll reproduce it here, too.

Poolish
1 cup flour
1 cup water
1/4 teaspoon instant yeast

Final Dough
1 pound flour (about 4 cups)
10-12 ounces water (by weight, not volume!)
1 teaspoon instant yeast
2 teaspoons salt
all of the poolish

Combine the ingredients for the poolish in a small bowl the night before baking. Cover the bowl with plastic wrap and leave the poolish out at room temperature overnight.

The next day, prepare the final dough. Combine all the ingredients except for the poolish in a bowl and let it sit for 25 minutes. This develops the gluten in the bread and makes nice holes in the crumb. Then add the poolish in and mix them together until you have a VERY wet dough. Your hands will look like you put them in ... well, a lot of flour and water.

Knead the dough as best you can. Then put the dough in an oiled bowl, cover it, then leave it for 45-60 minutes. Come back and fold it ever 45 minutes to an hour, so about 6 times.

Shape the dough how ever you like and put the shaped loaves on parchment paper to rise. The Fresh Loaf has great shaping tutorials, not to mention more tips and tricks for French Bread. I usually make two oval loaves out of this amount of ingredients. Cover your loaves and let them rise for another 90 minutes. Meanwhile, preheat your oven to as hot as it can safely go. I usually set mine to 450-475, with my baking stone in right from the start.

Right before you're going to pop those loaves in, get the sharpest knife you have, or a razor blade, and make some slashes about 1/2" deep along the length of the bread. This will help the bread rise up and not split at the bottom. Bake for about 20 minutes. As you put the loaves in, put in a baking dish full of ice cubes. After 5 minutes, turn the temperature down to 450. The loaves should be brown and toasty on the top and sound hollow on the bottom when tapped.

Even though you're going to want to bite those loaves right out of the oven, resist. Leave them cool until they're mostly cold, and only then slice them. The gluten strands that make French bread so delicious continue to develop until the bread is cool. You'll end up with gummy crumb if you cut it too early.


See also: Naan Bread

Digg Technorati Delicious StumbleUpon Reddit BlinkList Furl Mixx Facebook Google Bookmark Yahoo

Friday, March 27, 2009

Flourless chocolate Cake

Unfortunately there is no photo of this one whole, because it was so tasty that it was devoured before I could get one. And by that I mean my hands were too full of cake to hold a camera.

My mom just called to convince me this post needed a photo, so I had to oblige by eating a piece of cake in the middle of the afternoon. It was really difficult, but I care about this blog. :)


If you're looking for a decadent, rich, and wheat-free dessert to impress non-dessert eaters and sweet-teeth alike, look no further!

You need:

  • 4 (1 ounce) squares semisweet chocolate, chopped (I used 2 squares of chocolate and 2 oz of semi-sweet chocolate chips, because that's what I had)
  • 1/2 cup butter
  • 3/4 cup white sugar
  • 1/2 cup cocoa powder
  • 3 eggs, beaten
  • 1 teaspoon vanilla extract
  1. Preheat oven to 300 degrees F (150 degrees C). Grease an 8 inch round cake pan, and dust with cocoa powder.
  2. In the top of a double boiler over lightly simmering water, melt chocolate and butter. Remove from heat, and stir in sugar, cocoa powder, eggs, and vanilla. Pour into prepared pan.
  3. Bake in preheated oven for 30 minutes. Let cool in pan for 10 minutes, then turn out onto a wire rack and cool completely. Slices can also be reheated for 20 to 30 seconds in the microwave before serving.
Digg Technorati Delicious StumbleUpon Reddit BlinkList Furl Mixx Facebook Google Bookmark Yahoo

Roasted Chickpeas with Garlic Salt

All I can say is these are delicious and if you need an alternative to an unhealthy snack food, these are the ticket.


You need:
2 cups of cooked chickpeas
2 tbs olive oil or cooking oil
2-3 tbs of garlic salt (to taste)
Fresh ground pepper, to taste

1. Preheat your oven to 300F

2. Arrange chickpeas in a single layer in one or two rimmed baking sheets

3. Drizzle with olive oil and sprinkle with garlic salt, then toss to coat evenly. Taste a chickpea (yum!) and see if it's garlicky enough for your liking. If you're replacing a bad snack food and don't care about your salt-intake, add lots. Yum yum.

4. Roast for about 60 minutes, then broil for another 10, but watch them. When they get brown and toasty, take them out and let them cool. They should be dry and crunchy when cooled. If they aren't, stick 'em back in.

These are nothing but delicious, but you will have terrible breath after, so be forewarned!

Digg Technorati Delicious StumbleUpon Reddit BlinkList Furl Mixx Facebook Google Bookmark Yahoo

Thursday, March 26, 2009

Coq au Vin

When it's getting to be spring and you start to get a bit nostalgic for the wintery snows that left us only weeks ago, it's nice to get a day that is crispy and overcast because it justifies cooking something rich, hearty, warming, and cozifying.

I love all forms of chicken cooked in wine, and yet I've never made a proper Coq au Vin. Tonight a dear friend is coming, having just returned from overseas. I think she warrants something special; something special that involves bacon. Nothing warms a person's heart like one meat cooked in the fat of another meat. And chicken cooked in bacon and then simmered in a hearty red wine is pretty much the top of the cozy-dinner list.

Words cannot express how delicious, rich, and umami-fied this meal was. If you need a meaty, brothy, scrumptious fix, this is it. Trust me.

I'll say it right now: I don't like mushrooms and nothing anyone can do can induce me to cook with or eat them. Aside from that, and the fact that Provigo doesn't stock peeled, frozen pearl onions and I'm lazy, I'm not going to do any modifications to the classic Coq au Vin à la Julia Child. Sound good, Julia?

Recipe:
A half a pack of low-salt bacon, cut into rectangles about 1/4 inch across and 1 inch long. YUM BACON
6 boneless, skinless chicken thighs
pepper to taste
1/4 c cognac
3 c bold red wine
1-2 c chicken stock
2 tbs tomato paste
2 cloves mashed garlic
3 large carrots, sliced into 1/2" by 3" points
1/2 tsp thyme
2 bay leaves
2 onions, sliced into half-moons
1/2 lb sauteed mushrooms (I'm having none of it)
parsley for garnish

1. Sautee your bacon until it is very lightly browned. Julia wanted me to saute it in 2 tbs butter -- IMAGINE!!! Remove to a side dish. Use a dutch oven or fireproof casserole.

2. Brown the chicken in the hot fat. Season the chicken with salt and pepper and return bacon to the pot. Add the onions and the carrots. Cover, and cook slowly for 10 minutes, turning the chicken once.

3. Pour in cognac (I used brandy). OK and here is a direct quote from Mastering the Art of French Cooking: "Averting your face, ignite the cognac with a lighted match. Shake the casserole back and forth for several seconds until the flames subside." Uh... I'm not so sure I can do this. I'm not sure my landlord or my eyelashes would like it. I did not set my brandy on fire, but feel free to attempt this dangerous culinary feat at your own risk.

4. Pour in the wine (MOAR BOOZE) and add just enough stock to cover the chicken. Stir in the tomato paste, garlic, and herbs. Bring to a simmer and cover for 25-30 minutes, until the chicken is tender and the juices run clear. Skim off the fat. Julia says you should thicken the gravy with flour, but I found that I reduced it enough so that I didn't need to do this.

6. Then boil rapidly until the liquid is reduced to 2 1/4 cup. Discard bay leaf and remove from heat. Serve to your adoring guests!


I served it with roasted potatoes, and lots of wine although Julia also recommends buttered peas. Even though we were only three, and this recipe is supposed to serve 4-6, we polished off all of it and two bottles of wine. The bacon really made this meal, so use turkey bacon if you must, but don't omit it all together!


Digg Technorati Delicious StumbleUpon Reddit BlinkList Furl Mixx Facebook Google Bookmark Yahoo

Tuesday, March 24, 2009

Naan Bread and Chicken Madras


I love naan bread. I love Indian food. So does M.

I made a huge batch of delicious chicken madras the other day and froze some. Tonight we're busting it out for dinner #2, and because I can't seem to eat a dinner without working for it, I decided naan was in order. I made naan about two years ago with a yeast-based recipe, but the one I tried today is yeast-free and relies on baking powder for its puff.

Here's what you need (From BBC Food):

Ingredients
For the dough
250g/9oz plain flour
2 tsp sugar
½ tsp salt
½ tsp baking powder
110-130ml/3½-4½fl oz milk
2 tbsp vegetable oil, plus extra for greasing

1 tbsp butter, melted, to serve

Method
1. For the dough, sift the flour, sugar, salt and baking powder into a bowl. In another bowl, mix together the milk and oil.
2. Make a well in the centre of the flour mixture and pour in the liquid mixture. Slowly mix together the dough by working from the centre and incorporating the flour from the edges of the 'well', to make a smooth, soft dough. Knead well for 8-10 minutes, adding a little flour if the dough is too sticky.
3. Place the dough into an oiled bowl, cover with a damp tea-towel and leave in a warm place for at least an hour, until doubled in size. Then knock the dough back and form into five balls.
4. Preheat the grill to medium and place a heavy baking sheet on the upper shelf of the grill to heat.
5. Roll the dough balls out quite thinly, ideally in a teardrop shape, but really this is just aesthetic. Sprinkle over your chosen topping and press into the surface of the dough. Place the naans onto the hot baking sheet and grill for just 1-2 minutes, or until lightly browned. Brush with butter and serve hot.


My dough is currently sitting for its hour rest right now. A few minutes before dinner, I'll pop them on my baking stone for a few minutes and tell you how they turn out.


Edit: They turned out pretty good. I would cook them at hotter than the 400F I did this time, and for less time. Also, I would poke holes in them with a fork to release some of the air, as they got pretty puffy.


Here's my chicken madras recipe:

2 chicken breasts or equivalent amount of other boneless, skinless chicken, in cubes (Optional! You can use tofu, beef, just have chickpeas, etc!)
4tbs Patak's madras curry paste (yes, yes, it's cheating but it's tasty) or to taste.
2 medium onions, diced
1 green or red pepper, chopped
1.5 c chicken or veggie stock
1 large potato, skin on, diced
1 c chickpeas (optional)
2 c chopped fresh spinach (optional)
1 can diced tomatoes with juices
1 tbs oil

1. In a large cast-iron skillet or deep-sided pan, heat the oil on medium or medium high (medium for cast-iron, medium high for others). Add the chicken and brown on all sides.

2. Add the Patak's paste, the potato, and the onions and fry until onions are soft and everything is coated in paste.

3. Add the tomatoes and the broth, the pepper and the chickpeas, if using. Cover, reduce heat, and simmer until the liquid is reduced by half. Remember to check it every once in a while and scrape the bottom of the pan.

4. Add the spinach, stir, and serve with basmati rice (I cook mine with peas and butter), and the naan you made from the above recipe. I like yoghurt with mine, because I'm a spice wimp. :)

Digg Technorati Delicious StumbleUpon Reddit BlinkList Furl Mixx Facebook Google Bookmark Yahoo

Grandma's Chicken-Rice Casserole

This is a great, comforting, easy winter or fall dinner. You can make it with pork-chops if you prefer, but I'm a chicken kinda girl.


I'm sure this recipe is as old as tinned soup itself, but there's just something deliciously comforting about this meal.

Recipe:


1 can cream of mushroom soup
1 soup-can water
1 soup-can full of uncooked arborio or short-grain rice
as many chicken thighs as you like - i used 6 small boneless skinless thighs
1 tbs oil for frying
1 large raw onion, sliced finely (or more if you like - i used 1.5 because i like onion)
salt and pepper to taste

1. Preheat the oven to 375F.

2. Trim the chicken if you like. Heat oil in the pan to medium/medium high. I use a Le Creuset so it's all in one pan from start to finish, but you can do what you like! A skillet and a casserole dish work just as well, but it's best if the casserole has a lid, or at least a good covering of foil.

3. Sear the chicken on one side until brown and a bit crispy, and then the other side - about 5 minutes per side. Set aside on a plate. While you're doing the chicken, slice up your onion into thin slices.


4. To the same pan, add your can of soup and your water. Reduce heat a bit and deglaze, scraping up the brown bits from the chicken.

5. If you're using the same dish for everything, like I did, pour the soup out into a measuring cup/mixing bowl so that your baking dish is empty. If you're using a different dish for the baking, get it out now.

6. Lay down 1/4 of the onions in your casserole and sprinkle 1/4 of the rice over top. Plop in the chicken pieces, cover with more onion and rice until you've used them up.


7. Pour the soup mixture over the contents, making sure that the rice is covered, especially at the edges. it is not possible for me to take a picture of this step without it looking gross, so I'll leave that one to the imagination.

8. Cover the casserole and stick that baby in the oven. Check it after 45 minutes and test the rice for done-ness. It may need 10 more minutes, it may not. You should have some liquid left over by the time the rice is done.

Serve hot with salad. This makes great leftovers, too, and freezes well.

Digg Technorati Delicious StumbleUpon Reddit BlinkList Furl Mixx Facebook Google Bookmark Yahoo

(To be read aloud in a Julia Child voice)

Here's another one from the archives: Peanut-butter M&M cookies, with grouchy commentary.

------------

I think we've all had a tough day today - I know I have.

So take some time for yourself this evening, and soothe that aching tummy and head by pouring yourself a glass of wine and settling down to some baking. Don't you love baking?

Tonight, since the IBS is acting up after a stressful day, I think we'll make something easy - both on the intellect *and* the gut. I think other sufferers out there will agree with me when I say that a good cure for the daily aches is a high-fat, high-chocolate treat that's fun to eat! (/sarcasm)

So, dear readers, I present you with dithie's not-so-famous-but-nonetheless-yummy no-fail peanut-butter m & m cookies, adapted from that down-to-earth baking blog, kraft.com.

Ingredients:
1 cup PB
1 cup butter*
1 cup white sugar
1 cup packed brown sugar
2.5 cups flour
1 tsp baking powder
1 tsp baking soda
2 eggs
1 tsp vanilla
.5 tsp salt.
3-6 packets of peanut M & Ms

1. Pour yourself a large glass of wine and take three Midols. This step is crucial.
2. Preheat your oven to 350 F or 180 C.
3. Admire your KitchenAid mixer. It's important for it to feel appreciated before you begin.
4. Go to the deppanneur and get butter. I can't believe you forgot to get butter.
5. Soften the butter and cream it together with the PB and sugars.
6. Taste the batter. It's important to taste the batter at every stage.
7. Add in vanilla and eggs. Mix in well.
8. Pretend salmonella is a figment of your mother's imagination and taste the batter again. At this stage, it should be shiney and beyond delicious.
9. Walk to the pantry and knock over your recycling bin.
10. Avoiding the spilled cans and papers, reach for the flour and add it, with the other dry goods, into the delicious PB batter.
11. Taste the batter. Make sure it is delicious. If it is delicious, it is now time to add the M & Ms. If not, taste again until sure.
12. Form perfect little balls of dough with your hands and place them on oiled cookie sheets. Place them at awkward distances from each other, so that you are not sure if, when they bake, they will smoosh together into a Giant Cookie. This adds to the excitement, and is good for your tummy.
13. At this point, you may need to refill your wine glass. Don't worry, I'll wait.
14. Press the cookies down with forks.
15. Bake the cookies with the oven light on. Don't set the timer; just watch them until they look kind of golden, then take them out and look at them. Alternately, you may choose to watch a few minutes of an episode of Buffy. In that case, watch until they figure out that something bad is going to happen, and then take the cookies out. It should be about 10 minutes, depending on the season.
16. Instead of reusing the old pans, get out new cookie pans and put in another batch. This way, there are more dishes to do later.
17. After the pans are cool to the touch, try to find somewhere to cool the cookies. Good luck, because your counter space is probably limitied. I know mine is! Settle for various random surfaces.
17.5. You may have noticed that your cookies have, in fact, glommed into Giant Cookie. Do not let this distress you. Instead, simply mash apart the cookies with your spatula, and pretend that they look just as beautiful as you had imagined.
18. Attempt to eat a cookie and burn your tongue. Patience, patience!
19. At this point, the wine and the midol should have kicked in, and your tummy should feel slightly better. Once this has happened, return to your episode of Buffy, if watching.

* note the butter content: so far, 1:1 with sugar.


Digg Technorati Delicious StumbleUpon Reddit BlinkList Furl Mixx Facebook Google Bookmark Yahoo

Braided Onion Loaf

Here's a post from October, but this bread is yummy any time of year. You can also shape it into a couple of loaves instead of braiding it.

----------

Since it's Canadian thanksgiving this weekend, I made a festive loaf to take to dinner at boy's parents' this weekend.


The recipe is from The Fresh Loaf, which is an amazing resource. Anyways, here's the recipe, copy and pasted:

________________________________________________________________________________

Poolish:
1 cup all-purpose unbleached flour
1 cup water
1/4 teaspoon instant yeast

Dough:
Poolish
3-3 1/2 cups all-purpose unbleached flour
1/2 cup milk
2 teaspoons instant yeast
2 tablespoons butter or shortening
2 tablespoons sugar
1 1 3/8 ounce package of onion soup mix
2 tablespoons grated Parmesan cheese
1 egg

Wash:
1 egg
1 tablespoon milk

The night before, in a bowl, mix together the poolish until it form a batter. Cover with plastic wrap and set aside overnight.

The next morning, combine 2 cups of the flour, the yeast, the sugar, the onion soup mix. Mix in the poolish, the milk, one of the eggs, the butter, and the Parmesan cheese with a wooden spoon. Add more flour a quarter cup at a time until a proper dough forms, one that is dry enough that you can hand knead it yet moist enough that it is still tacky to the touch.

Pour the dough out of the bowl onto a clean work surface and knead the dough for approximately 10 minutes. Return the dough to a clean, greased bowl, cover with plastic, and allow to rise until doubled in size, approximately 90 minutes.

Remove the dough from the bowl and shape it however you like. I tried a braid this time. I'm not good enough that I want to give directions on how to do it yet (for that please see your cookbook).

Cover the loaf with a damp towel or greased plastic wrap and allow it to double in size again, approximately 45 minutes. While you are waiting, preheat the oven (and baking stone, if you have one) to 450.

Just before baking, glaze the loaf with the egg wash. Put it into the hot oven. After 5 minutes, reduce the temperature to 375 and bake for another 15 minutes. Rotate the loaf and bake until the loaf is done. Total baking time may vary based on shape. My loaf took about 45 minutes.
_______________________________________________________________________________________________

Mine didn't take that long. I had to put foil on top for the last few minutes to stop it from overbrowning. It's crazy long. It'll be an adventure taking it on the 2 hour bus ride tomorrow!


I'm afraid I can't really help much with how to braid four strands of dough either, but I found a wonderful (but a bit fast to follow) video tutorial. Generally, people don't seem to mind how "perfect" the braid is - it'll look beautiful even if you make a few slip-ups. And it tastes divine!

Happy thanksgiving, Canadians!
Digg Technorati Delicious StumbleUpon Reddit BlinkList Furl Mixx Facebook Google Bookmark Yahoo

Peter Reinhart's Pizza Dough


Peter Reinhart is a well-established baking god. When he tells you how to make pizza dough, that's how you make pizza dough. Don't argue; he's right.

This pizza dough is easy-peasy to make. If you have a mixer it takes about 15 minutes. If you don't, maybe another 5. Then you stick it in the freezer, and you have delicious, thin, crispy, New York street pizza any day of the week, presuming you can remember to take it out to thaw the night before.

I make this dough about once every two months. My boy will not have any other recipe - he firmly believes in the rightness of Peter Reinhart (that's why I love him).

You can find the directions and recipe here, or you can read what I have to say down below - your choice. Same-same.

You need:
4 1/2 c flour
1 3/4 tsp salt
1 tsp yeast
1/4 c olive oil
1 3/4 c chilled water

1. Stir up your flour, salt, and yeast in the bowl you're using. I'm using my KitchenAid mixer bowl.

2. Add your oil and your water and mix.

3. Knead until the dough is soft, smooth, and pliable, or mix on low for 5-7 minutes in your mixer. The dough should clear the sides of the bowl but not the bottom.

4. Cut the dough into 6 portions. They will look small but never fear. Mine divided up into just over 7 oz each on a kitchen scale this time.

5. Shape each piece into a ball and put into an oiled ziplock baggie.

6. OK now you have a choice. You can either slip all those baggies into a big freezer bag and keep them there until you want to use them, or you can put them in the fridge overnight and use them the next day. YOU MUST REST THAT DOUGH OVERNIGHT NO IFS ANDS OR BUTS! If you keep the dough in the fridge, it'll keep that way for up to three days. In the freezer, about three months. If you put it in the freezer, take it out the night before you want to use it and put it in the fridge overnight.

7. Regardless of what you did up in step 6, your dough should now be in the fridge on the day you want to use it. Two hours before dinner/lunch/pizzatime, take out that dough and put it on the counter.

8. Roll out or press the dough into disks about 1/2" thick and 5" across. Cover them up with saran or a dish towel and leave them for two hours.

9. After an hour and a quarter, come back and preheat your oven with your baking stone (you have a baking stone, right?) to as hot as it will safely go. I go with 500F because I like it like that.

10. Pick up your dough and smile with glee as you find that it is sooo stretchy and nice to shape. Stretch it into a thin round, about 9-12" across, and lay it on a sheet of parchment paper NOT WAX PAPER because that would be gross. Also, I'm assuming you know that I mean you to do all these things with each of the dough portions. One dough portion will feed two not-very-hungry people. I'd advise one per person. They're that good, bb.

11. Be fairly sparing on your toppings. This is thin-crust, people. I go with tomato sauce, light cheese, and spinach, usually.

12. Put your little darlings into the oven and bake for 5-8 minutes. You shold watch them - they're tricksy and burn quickly. Rest them for a few minutes, then eat!


Digg Technorati Delicious StumbleUpon Reddit BlinkList Furl Mixx Facebook Google Bookmark Yahoo

Hi

I've caved and started this thing, this means to destruction for my degree and my waist!

I have a KitchenAid mixer and limited counter-space. I have a deep and passionate love for butter. I am a firm believer that if people 100 years ago could make it themselves, then I can too, today. (One day I'll test this theory with pasta - I have no pasta-maker!)

I cook almost every day and bake almost every week. I bake all the bread my household consumes, and some that other households consume. Mine has only two members, so sometimes my frenzy exceeds our appetites!

I figure there's no real point in keeping this all to myself since the internet is here to facilitate the sharing of my kitchen space. I read a lot of cooking and food blogs, and I have no reason to believe that I can do it better, but I'd like a space to talk about cooking and eating and to show what I can do, however limited.

Digg Technorati Delicious StumbleUpon Reddit BlinkList Furl Mixx Facebook Google Bookmark Yahoo