I have reclaimed Mondays for the living. Everyone hates a Monday - even if you don't have an actual Monday to hate, you have to start back to work after a break at some point. No one is immune from Monday... UNTIL NOW.
Actually it's pretty simple. I plan something fun for Mondays. Usually my friend Emily and I go out for a cocktail and catch up. Last night my sister had just returned from out of town so we had family dinner. And because she is always raving about how awesome fish tacos are, and because I had never even tried them let alone made them, I decided that was what was on the menu.
Now as far as a Monday-night dinner party goes, the menu is pretty do-able. There is a fair amount of chopping and slicing but there's not a whole lot of actual cooking. Even with the Mexican chocolate cake I added, the whole thing took less than an hour from start to finish. Not including eating, of course. I can't guarantee that your Monday night dinner guests won't be so enamoured of you that they won't stay until midnight!
Fish Tacos (serves 4 or 5)

1 lb of white flaky fish.*
1/4 c canola oil
1 Tbs chili powder
1 tsp cumin
1/4 c diced cilantro leaves
the juice of 1 lime
 8 tortillas, flour or corn
sour cream or plain yoghurt
cilantro leaves
sliced green onions
sliced red onions
shaved red cabbage
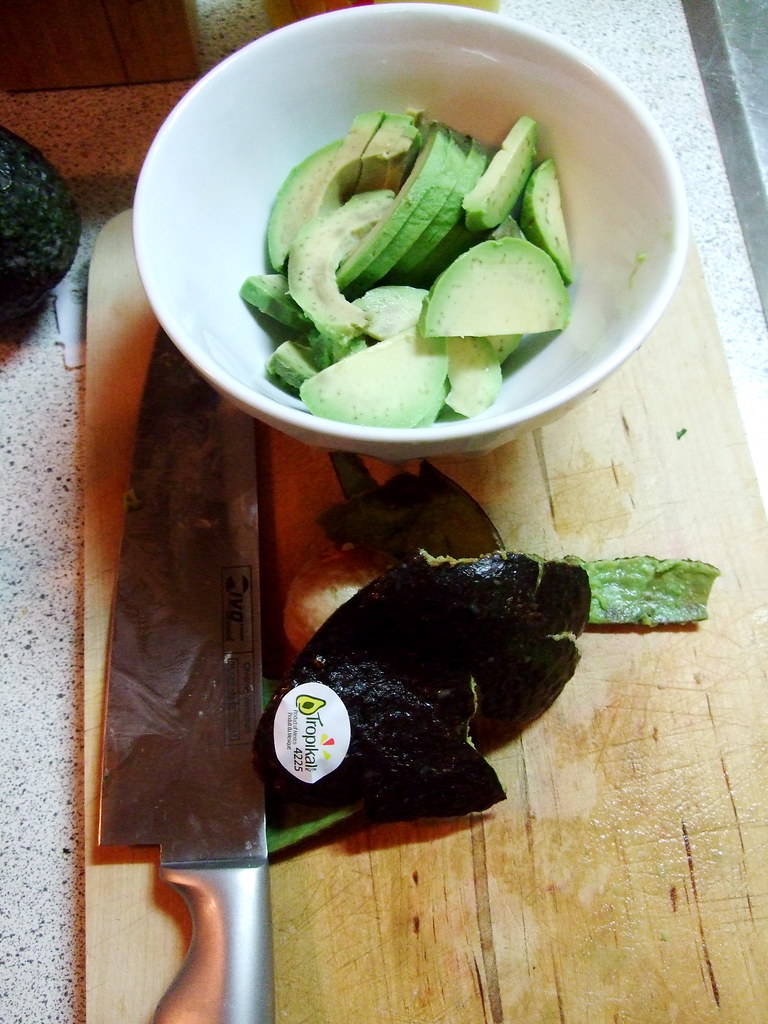
sliced avocado
lime wedges
lettuce
minced fresh hot peppers
 salsa
salsa1. In a baking dish, mix the lime juice, cumin, chili powder, oil, and 1/4 c cilantro leaves. Add the fish on top. Cover and refrigerate 20 minutes, flipping the fish over part way. If you have time to marinate it longer, feel free!
2. Meanwhile, do all your chopping. Put the toppings in little bowls on the table so your guests can top their own. Make sure you have a Simon to slice the avocado. Simons are avocado experts!

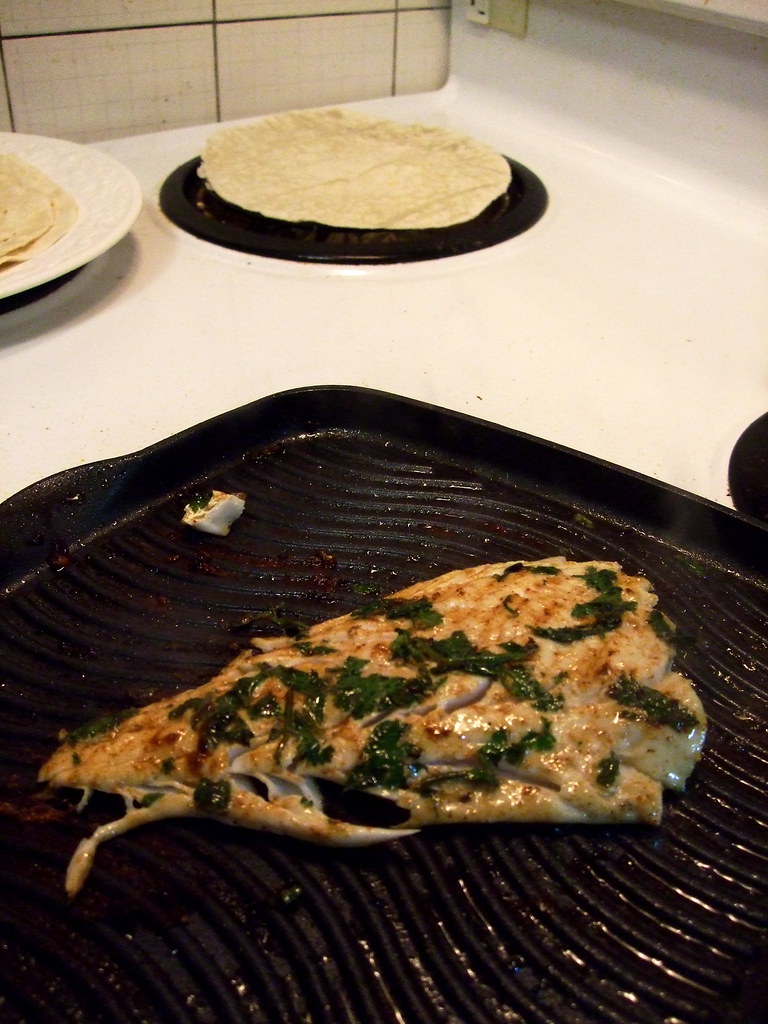
3. When everyone has a beer or a glass of wine, get that fish on the grill pan. Heat it up nice and hot, but not too hot - about medium-high - and grill for about 4 minutes a side or until it's cooked through and there are lovely grill marks.
4. While you're doing this, have your sister heat up the tortillas. Some people might use the conventional "damp towel in the oven" method, but we prefer to live on the wild side so she used the element on medium-low. We also got some lovely grill marks on the tortillas.
 5. And you're done! Pile your tacos high and enjoy! Or stay tuned for spicy chocolate cake.
"Mexican" Chocolate Cake
This is actually a very VERY easy cake. It is so easy that after you make it a few times you will ha ve it memorized. That easy. It's from the Moosewood cookbook and it is in fact VEGAN although no one will be able to tell. It is moist and fluffy and delicious, and very adaptable, as we shall see.
 You need:
1.5 c flour
1/3 c cocoa powder
1 teaspoon baking soda
½ teaspoon salt
½ teaspoon salt
1.5 tsp chili powder
1 Tbs cinnamon
1/2 tsp cumin
1/2 tsp freshly ground black pepper
1 cup sugar
½ cup vegetable oil
1 cup cold water
1 cup sugar
½ cup vegetable oil
1 cup cold water
1 teaspoons vanilla extract
2 tablespoons vinegar of some sort
2 tablespoons vinegar of some sort
1. Mix all the dry ingredients together in a bowl, having preheated your oven to 350ºF. I did this while the fish was marinating and before I sliced and diced my veggies.
2. Add all the wet ingredients EXCEPT the vinegar and mix.
3. Making sure you have a greased cake pan at the ready, quickly fold in the vinegar. Pour directly and immediately into the greased cake pan and stick it in the oven for 30 minutes.

BAM. Easiest cake ever. We served ours with caramel sauce from a jar (!!!) but vanilla ice cream etc would be lovely. If you double the vanilla and leave out the spices, you will have a plain but equally delicious normal chocolate cake.
*Hey! If you are choosing fish for this recipe, DON'T USE COD. They are almost gone. And while you're at it, take a look at this list and see if you can find something sustainable. Thanks! :)
.