This is my grandma when she was around 20:
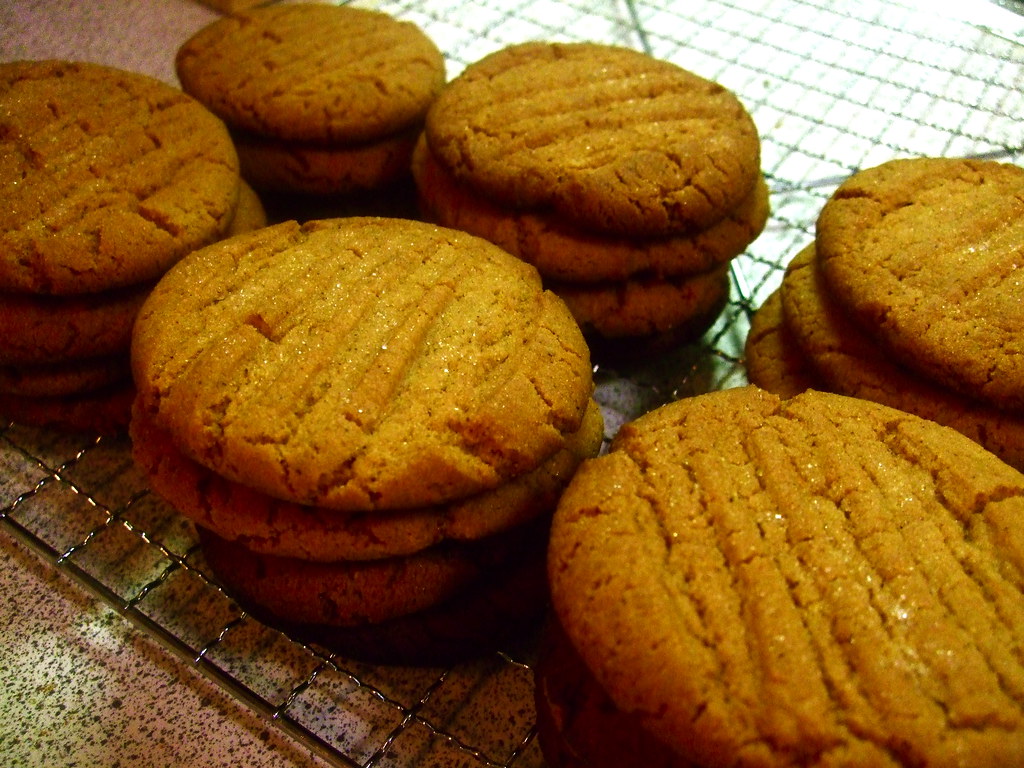
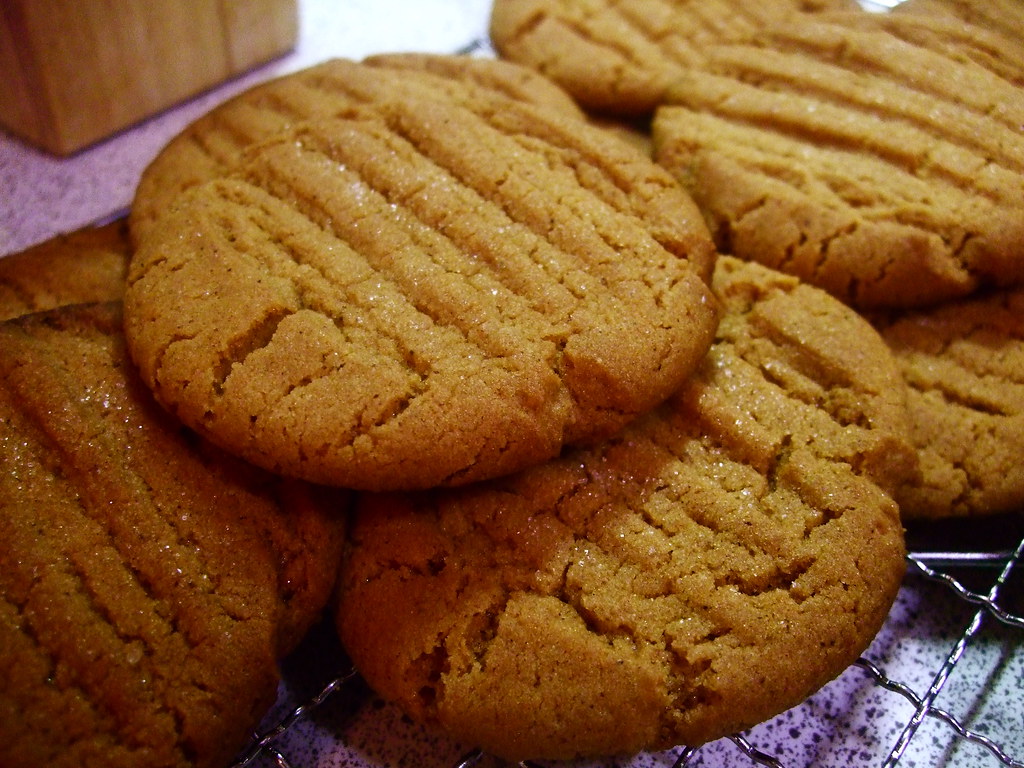
These are her cookies, which she makes every year for Christmas; every year my dad probably eats half of them. Every year I eat the other half. Not really. But I would if I had no decency. I have just enough decency.
These cookies don't have the "snap" that ginger snaps have; the cloves and cinnamon even out the ginger. The end result is a crispy, slightly chewy in the middle cookie that tastes exactly like Christmas. They are also really good on a rainy or snowy afternoon with a cup of tea, any time of the season. Now that I have acquired this highly guarded secret recipe, I can make them for snowy afternoons if I want to!
You need:
3/4 c shortening
1 c white sugar, plus a bit extra
1 egg
1/4 c molasses
2 c flour
1/2 tsp salt
2 tsp baking soda
1 tsp cinnamon
1 tsp ground cloves
1 tsp ground ginger
1. Cream the shortening and 1 cup of sugar; add the egg and molasses and mix until creamy.
2. Mix the dry ingredients together and add the dry to the wet and mix until you get something that looks like cookie dough.
3. Lightly grease a couple of baking sheets, or line them with parchment paper. Make 1.5 tbs balls of dough and roll in some white sugar. Place the dough balls about 1.5" apart on the baking sheet. Press each ball down gently with a fork.
4. Bake for 10-12 minutes (watch them after 10 minutes!) in a 375ºF oven. Let cool, then devour them all and share them with no one. No no. I didn't mean that. I mean wrap them up and give them to friends and family in the spirit of the season.
.
Tuesday, December 7, 2010
Monday, November 29, 2010
Spinach and Pesto Pasta Bake
Sorry I don't update that often. I'm kind of hoping to make some progress on this PhD so this semester has largely seen me staying at the library until it gets really dark outside, then coming home to desperate crock-pot experiments based wishful thinking and miscellaneous pantry items. I don't deem it appropriate nor healthy to post those because then one of you poor souls might actually try to recreate it and hold me responsible.
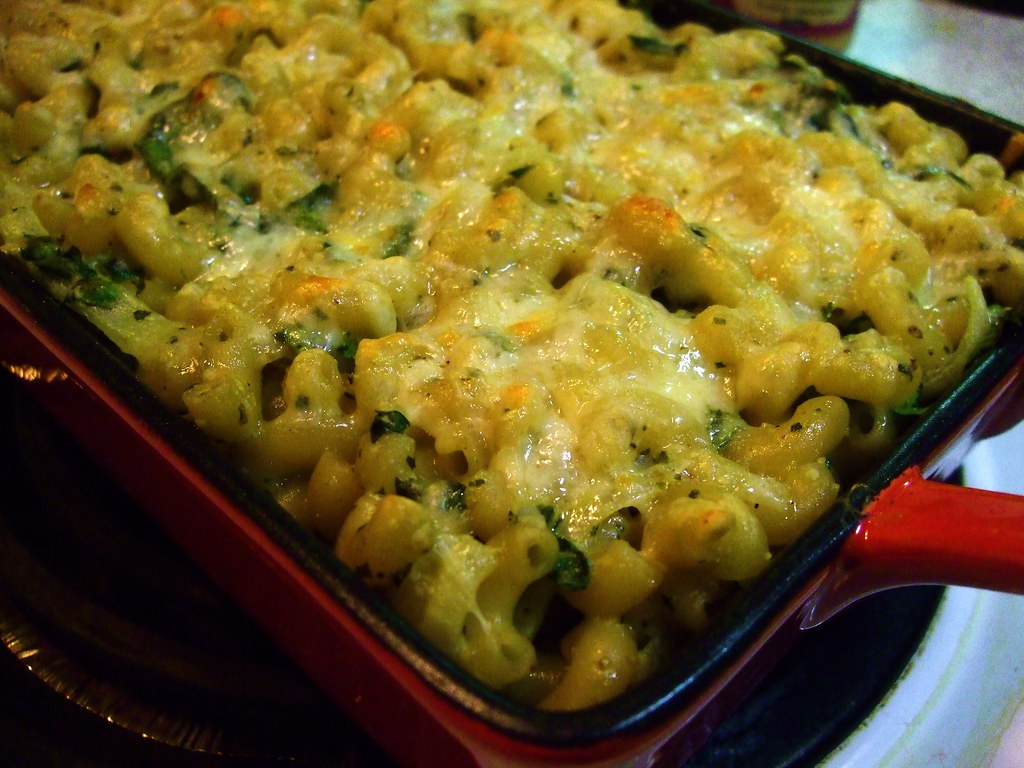
This one is good though. I can vouch for it -- recommend it, even. It's pretty quick to make (good if you are in the throes of PhD studies), and it has spinach in it, which not only is tasty but also makes you strong. Also cheese!
(Serves 2 hungry people or 4 not very hungry people. I guess it would serve three medium-hungry people)
3 cups dry small pasta, like macaroni
1/4 c heavy cream
2 tbs flour
2 tbs basil pesto
1 garlic clove, minced
1 cup grated sharp cheese
1 medium onion in thin slices
2 cups fresh spinach, roughly chopped
2 tbs butter
1/4-1/2 c milk
1. In a cast-iron pan on medium, melt 1 tbs of the butter and saute the onions and garlic until the onions are translucent. Meanwhile, cook your pasta.
2. Turn the heat to low and add the flour to the pan and cook for a minute, then add the cream and the pesto. Stir until combined and cook for 5 minutes, until thickened.
3. Add the spinach and 1/4 c milk and cook until the spinach is wilted and everything looks nice and saucy. Season with salt and pepper.
4. Put the other tbs of butter in a small casserole dish and pour the cooked, drained pasta into it to melt the butter and coat the pasta. This not only greases the casserole, but also keeps the pasta from clumping. Then add the pasta to the pan with the spinach mixture and stir to combine. At this point, if the sauce is too thick, add the rest of the milk and adjust the salt if you need to.
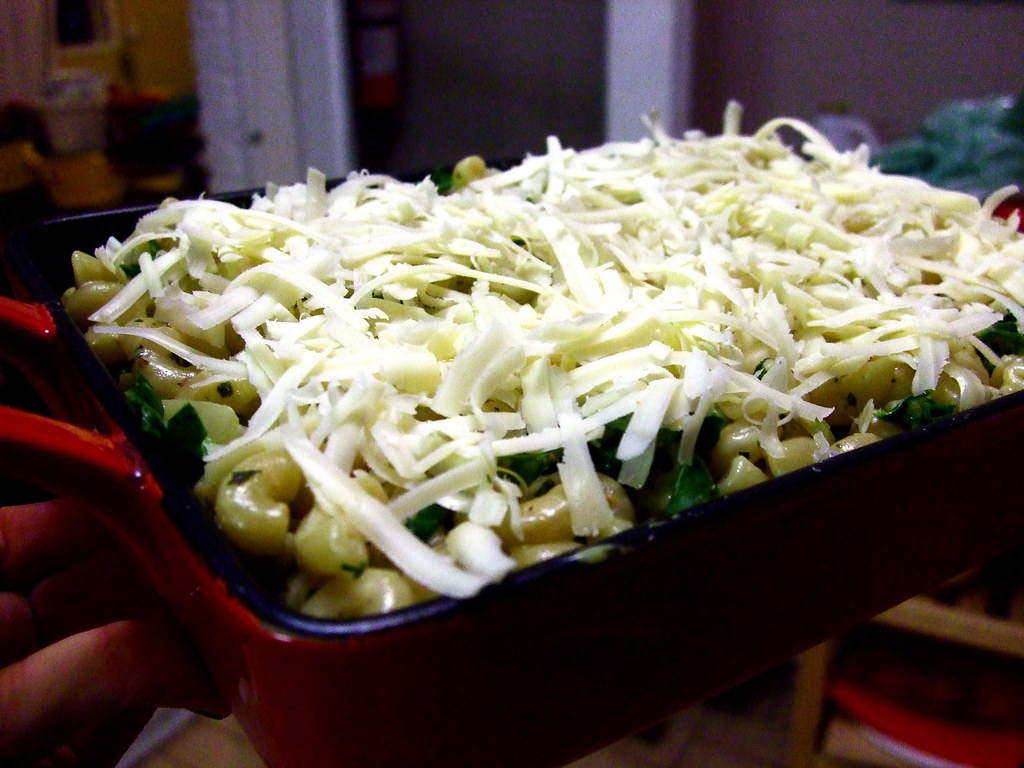
5. Pour the whole shebang back into the casserole dish and top with the grated cheese. Bake in a preheated oven (375 should do it) for 10 minutes, then broil for 2 or 3 more minutes, until the cheesey top is just starting to brown. Do let it cool a bit before digging in.
Sunday, October 31, 2010
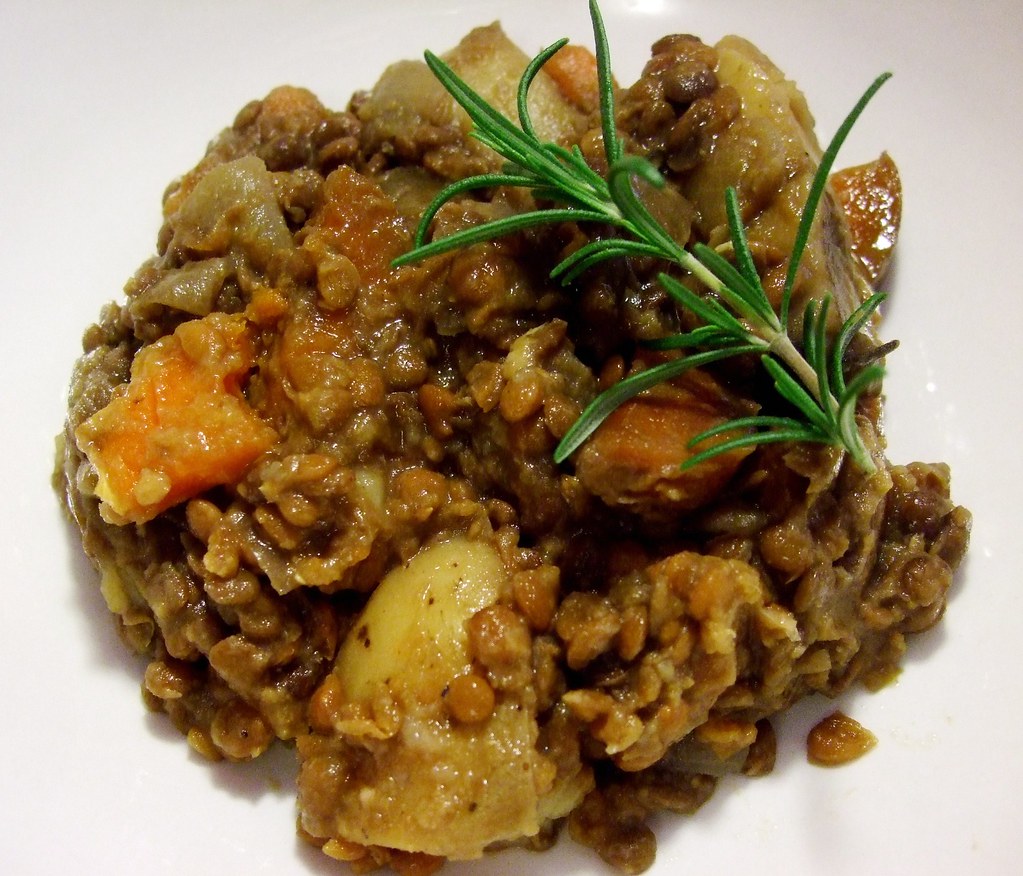
Savoury French Lentil Stew
I admit that this is not the prettiest dish. It wasn't a joy to photograph, let me tell you. But what it lacked in aesthetics it more than made up for in flavour!
It's also so seriously easy to make, largely because of my little friend, the slow cooker. You could also do this in a pot and it would still be really easy and probably just as tasty, too! But these days I just have so much going on that by the time I get home around 6 the thought of *starting* dinner makes me want to eat cookies. So my slow cooker is my friend right now. What strategies do you all use to cope with busy days and hot dinners?
This dish could be vegetarian really easily; I used beef stock because it added a depth of flavour and a richness, but vegetable stock would make this a perfect, hearty vegetarian meal.
You need (Serves 4):
3 quart slow cooker
1 tbs olive oil
1 cup French/Puy lentils, rinsed and picked over*
2 large carrots, cut in coins
3 medium potatoes, in large dice
1 medium onion, diced
2 cloves of garlic, minced
1 sprig of rosemary
1 bay leaf
4 cups beef stock or veggie stock
salt and pepper to taste
To make this in the slow cooker, put all the ingredients in the slow cooker and turn to low. Cook 8-10 hours. Done!
To make this on the stove, heat the oil in a large pot and saute the onions and the garlic until translucent. Add the rest of the ingredients and simmer until the lentils are cooked and the potatoes are soft. Done!
*Because of the long cooking time, Puy or French lentils are important because they hold their shape better than regular brown lentils, but if you don't mind mush then sub other lentils if you like.
.
Monday, October 4, 2010
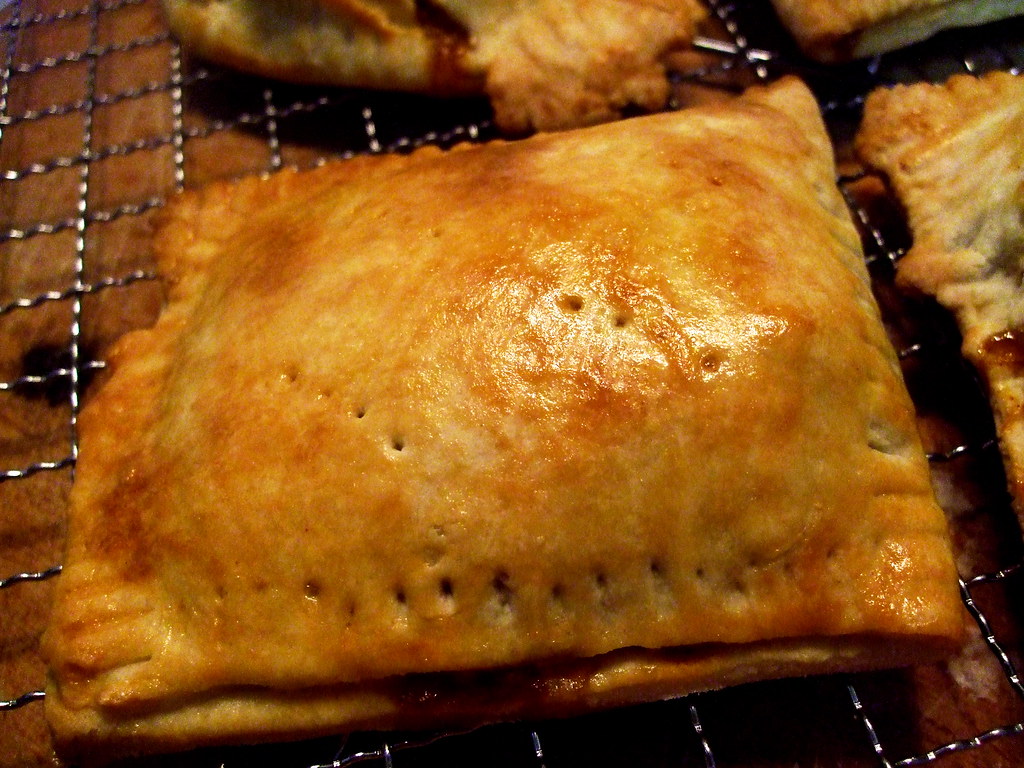
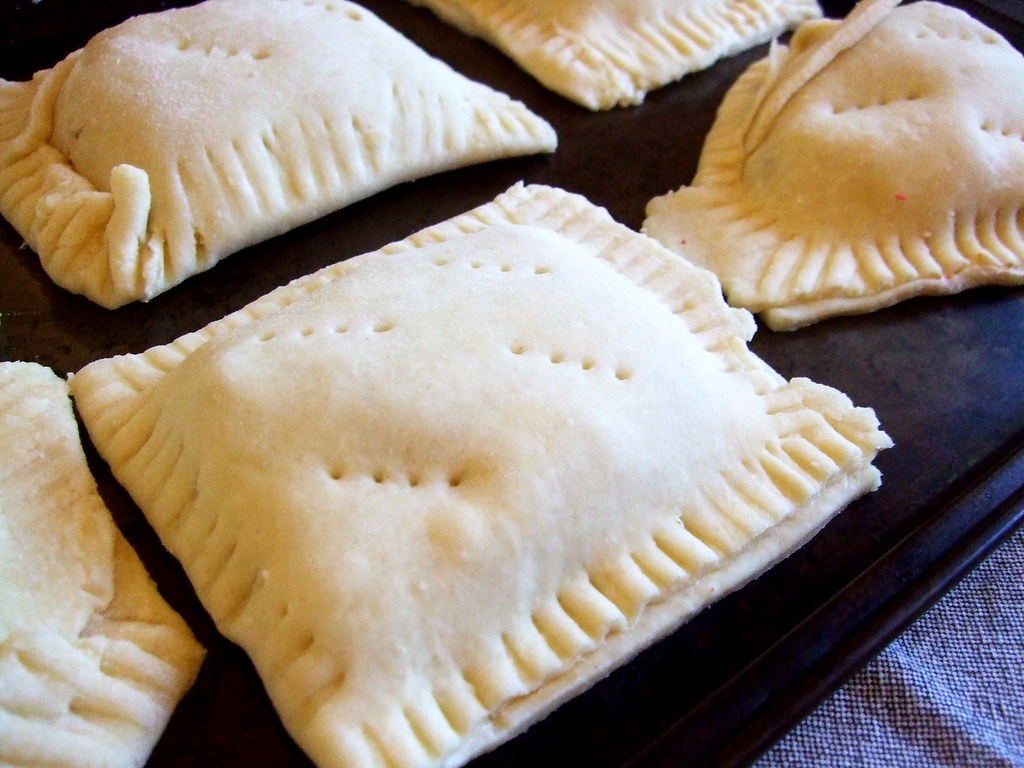
Chili Hand Pies
Or, what to do with leftover chili!
Hand pies are great because they are tiny pies. Everything is better if it is in miniature and/or in pie-form. The hand pie is superior to the regular pie in that the pie crust-to-filling ratio is greater than the traditional pot-pie, for example. This is also a great way to take chili on a picnic or to work/school for lunch, if your life is dull like mine and you don't go on picnics. It is a no mess, no cutlery way to both transport and eat delicious chili, or for that matter, any other stew-like filling.
The pastry, the recipe for which is from here, was delicious. It held together great even with the sloppy filling and was flaky as well as flavourful.
You need:
2 1/4 cups unbleached all-purpose flour
1 1/2 teaspoons salt
1 teaspoon sugar
1/2 cup cold unsalted butter, cut into 1/2-inch cubes
1 egg, slightly beaten
1/3 cup ice cold water
1.5 cups leftover chili
These instructions are from the above link; She said it so well and I followed them exactly, so here we are:
1. In a food processor fitted with the blade attachment, pulse together the flour, salt, and sugar. Add in the butter, and pulse a few times until the mixture is crumbly and resembles coarse meal. Combine the egg and water in a container (remove all ice pieces). While the processor is running, pour the water/egg mixture in and pulse until mixture just comes together.
2. Pour mixture out onto a floured board and knead a few times to bring all the ingredients together. Dough can be rolled out immediately, or it can be wrapped in plastic and refrigerated for up to 2 days.
OK now back to me.
3. Roll out the dough on a lightly floured surface until it is about 18" by 22" and 1/8" thick.
4. Use a knife to cut the dough in half, then each half into thirds so you have six pieces of dough. If they aren't all perfectly square it is fine. Mine weren't all perfectly square and they baked up nicely!
5. Spoon 1/4 cup of chili or filling of your own imagination into one side of the dough, then wet the edges with dampened fingertips and fold over the empty half to cover the filled half. Using a fork, crimp the edges to seal the dough pocket. Poke holes in the top and repeat with the other five pies.
6. Place the pies on a baking sheet and bake for 15 minutes at 425ºF. If you like, brush the tops with a beaten egg prior to baking -- that is how I made mine all shiny like that.
To reheat, ideally a toaster oven would be used, but I didn't have one this afternoon at school and used a microwave; it was still delicious.
.
Sunday, September 19, 2010
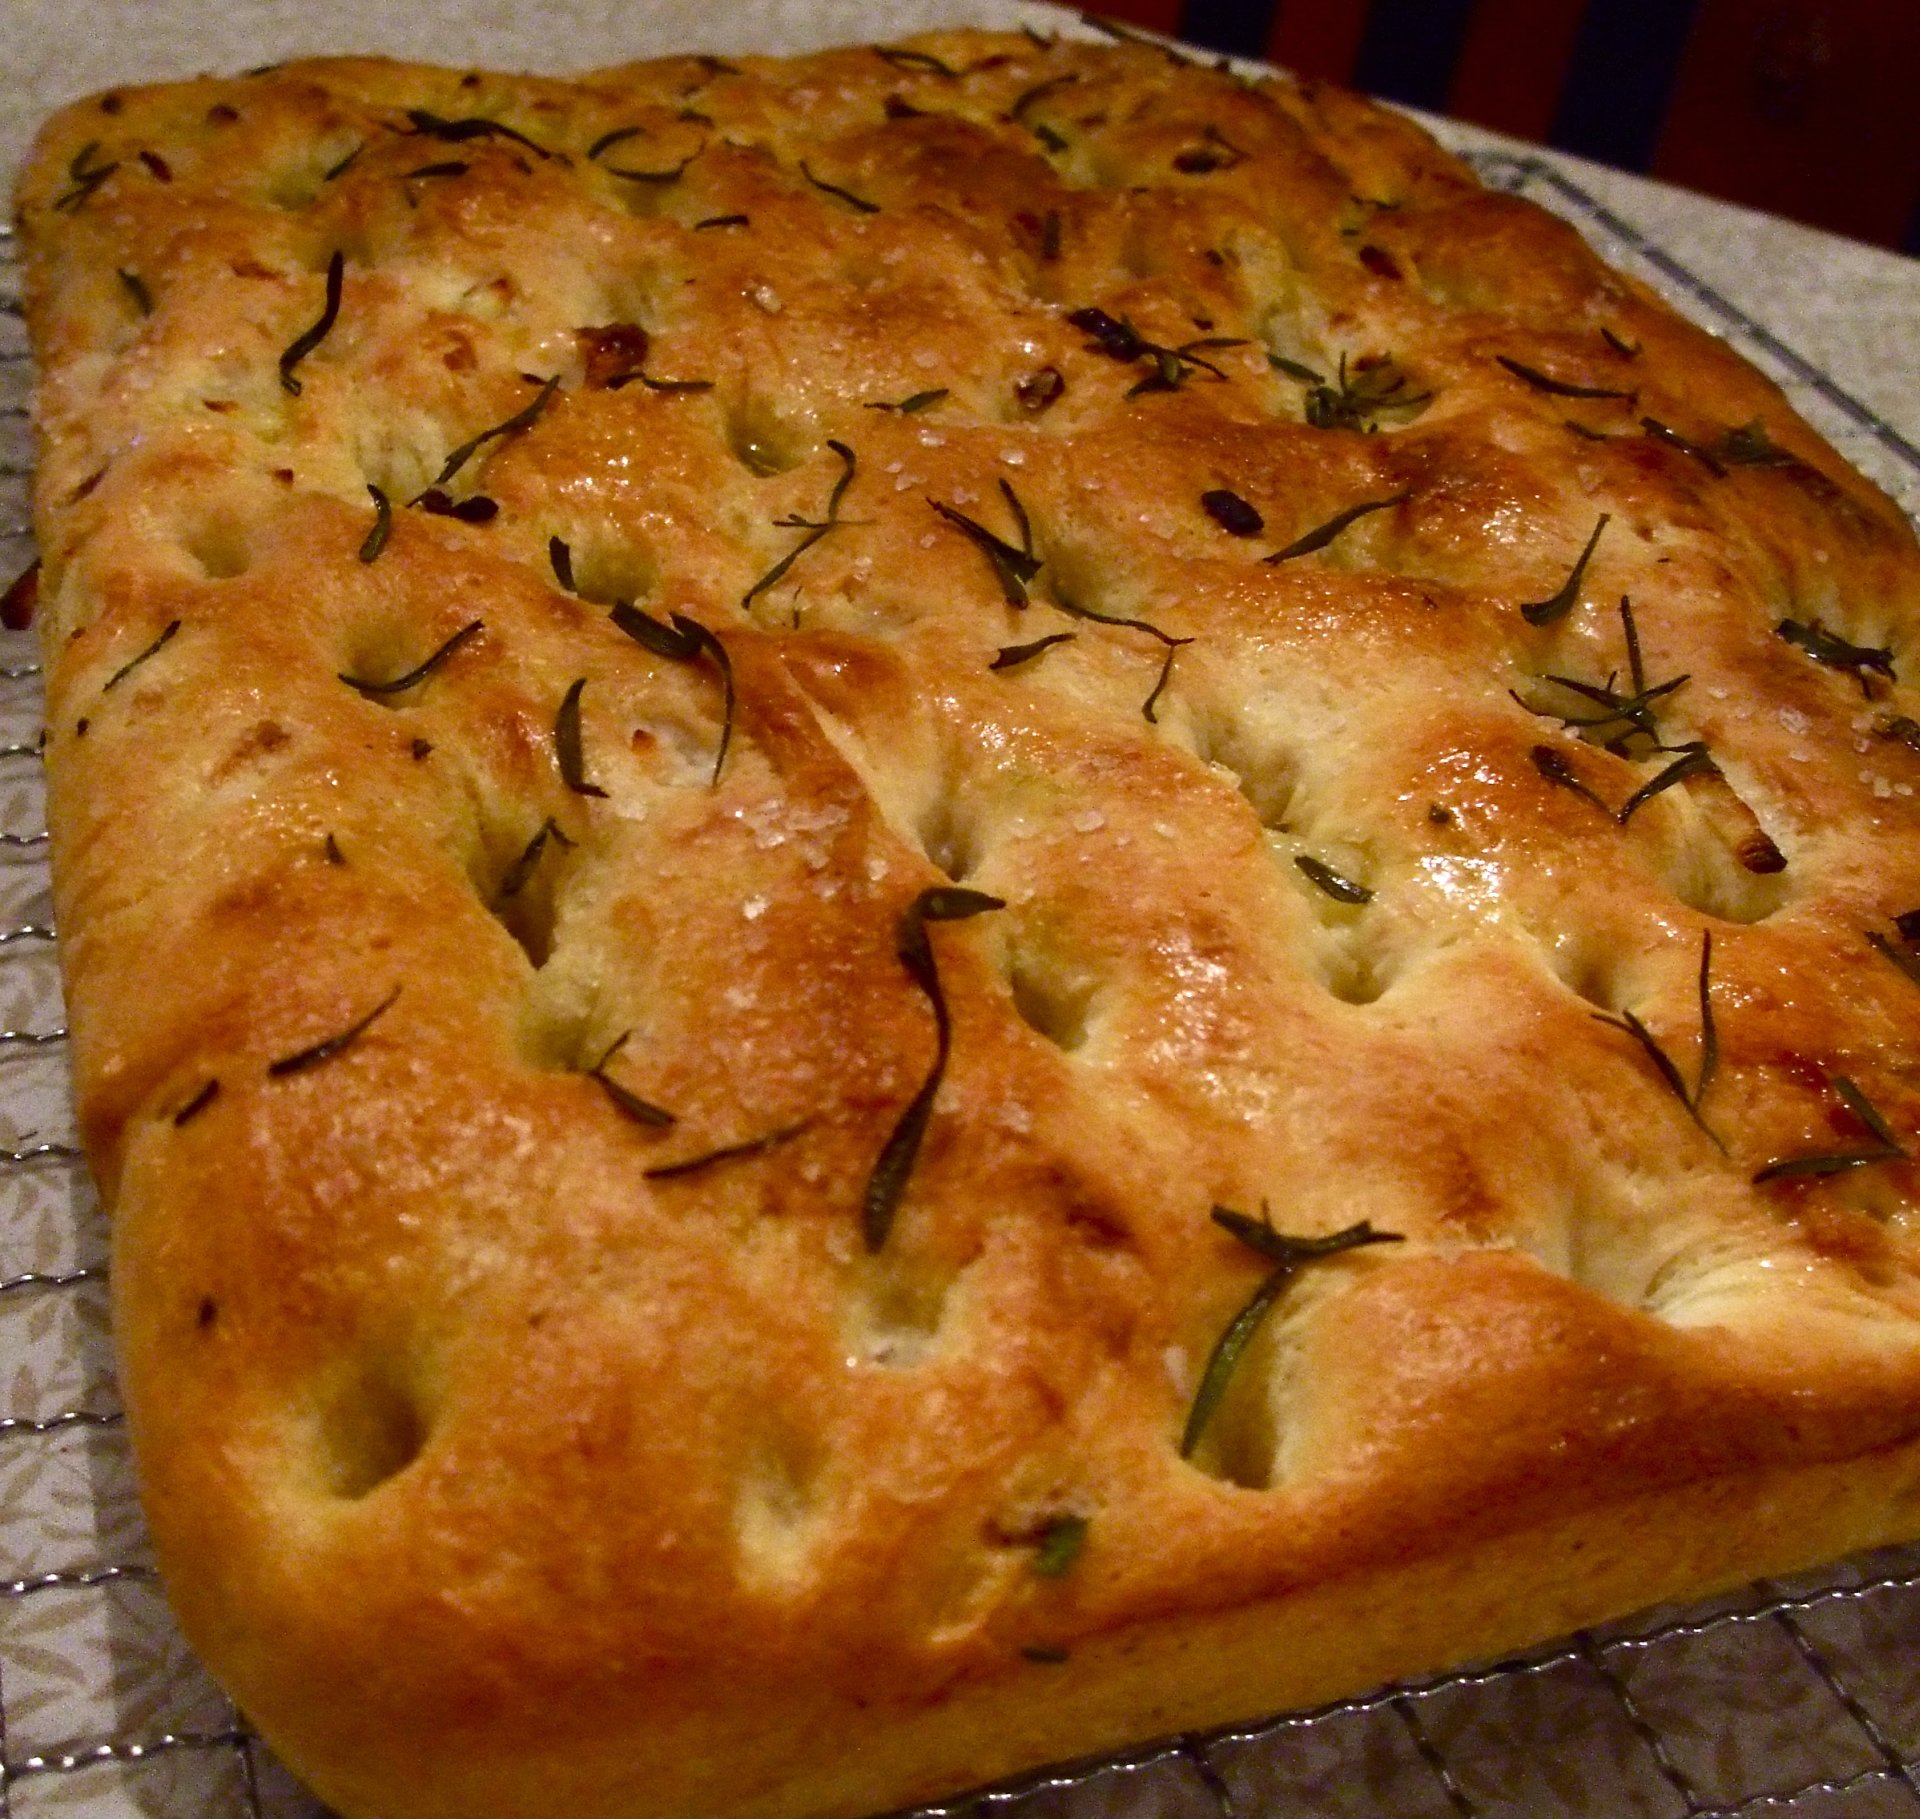
Onion Focaccia
I'm not usually a focaccia fan, but this is a focaccia to write home about. Or at least share semi-anonymously with people on the internet. I think it's usually because I find focaccia really dry and this one is not, because it has DELICIOUS ONIONS baked into it as well as the traditional olive oil and salt, which also grace the top of the bread. I think I'm on an onion kick these days, what with the caramelized onion burgers from a while back.
This recipe is from a Williams-Sonoma cookbook called Bread, which is actually really good. Probably because the recipes are by Beth Hensperger. It has basic yeast breads as well as quick breads without yeast and special breads like challah and focaccia. Every recipe I've tried so far has been great. And actually, if you are going to start making bread, this is a good recipe to start with. It's pretty straight-forward.
So here, for your enjoyment, is the recipe:
You need:
1 TBS yeast
1 TBS sugar
1.5 c warm water
1/2 c good olive oil plus some for greasing and topping
1.5 TBS table salt
4-4.5 c flour
1 medium (not gigantic) yellow onion, chopped
2 sprigs of fresh rosemary
Coarse sea salt for sprinkling
1. Proof the yeast by sprinkling it over the warm water and the sugar and let it sit for 10 minutes. It should get foamy.
2. Slowly mix in the flour, the salt, and half the olive oil a bit at a time, then mix in the onion. You should end up with a really soft shaggy dough that is slightly sticky -- you don't have to add all the flour if you don't need it but do be sure to knead the bread for at least 10 minutes.
3. Put the dough in an oiled bowl and cover it. Let it rise for 20 minutes.
4. Line a heavy-rimmed baking sheet with parchment paper and brush the paper with oil. Then turn out the dough onto the sheet and press it into shape with your fingers. It should be about an inch thick all the way around. Cover it with oiled plastic wrap and let it rise again for about an hour.
5. Make nice deep indentations in the bread with your fingers, almost to the bottom of the pan. Drizzle the top with the rest of the olive oil (1/4 c) and let rise again, covered, for another 30 minutes while you preheat the oven to 425ºF.
6. Sprinkle the top of the bread with sea salt and rosemary leaves and bake for 20 to 25 minutes, until the top is nicely golden. Let it cool a bit, then slice into it and devour with gusto. It's delicious when dipped in olive oil and balsamic, but it also makes a nice sandwich bread, for a change.
.
.
Tuesday, August 24, 2010
Grilling Things
This time, for real! Remember a long time ago I made some burgers? And remember how I complained about having to make them inside because there was snow everywhere and I couldn't get to my barbecue? Now it's summer.
It's been summer for quite some time now, actually, and we've been using the grill a lot. We've grilled the standard burgers, but we've also branched out and tried pizzas on the grill, both rather successfully if I do say so myself. So here is the first of two posts about grilling!
First, burgers. You can pretty much do burgers with anything ground - beans, beef, turkey, chicken - as long as you bind it and flavour it well. These are beef burgers, but they have a special twist - caramelized onions. The onions are mixed into the burgers themselves, not just plopped on top like an afterthought. And the onions are not just boring old normal caramelized - they are caramelized in bacon fat. Mmmmm...
For 6 burgers, you need:
1.5 lbs ground beef
1 large onion, thinly sliced
1 tsp white sugar
6 slices of bacon, cut in half
1.5 cups breadcrumbs
1 egg
1 tsp powdered mustard
1 TBS Worcestershire sauce
1 TBS HP sauce
1 TBS finely minced chives
1 tsp finely minced basil
1/2 tsp cinnamon (trust me, it's good)
1. In a skillet, preferably cast iron, cook the bacon slowly over low heat until it is crispy and the fat is rendered. Remove the bacon and drain it on paper towels. Pour out all but 1 TBS of the fat and saute the onions over low with the sugar until they are golden brown and translucent - this takes a long time - like an hour - but it is worth it. Let the onions cool down until they are room temperature.
2. In a large bowl, mix all the ingredients together including the onions but not the bacon - that's for putting on your burgers later. I find your hands work best for this - just remember to take off any rings before you get all up in the beefiness. If you find that the mixture is too loose, add some more breadcrumbs.
3. With a plate at the ready, form the mixture into 6 patties. Make sure they are of even thickness so the edges don't get dry while the insides stay raw.
4. Heat up your grill and slap those patties on there. After flipping them once, you can top the patties with a couple of slices of cheese and those bacon slices you cooked a while back. Or you can brush them with barbecue sauce, or both! Top as you like - we had fresh tomatoes from the garden, lettuce, and the other customary accoutrements of burger-eating, like ketchup, mayo and mustard. There may have even been some pickles involved.
Thursday, August 5, 2010
Summer Bounty
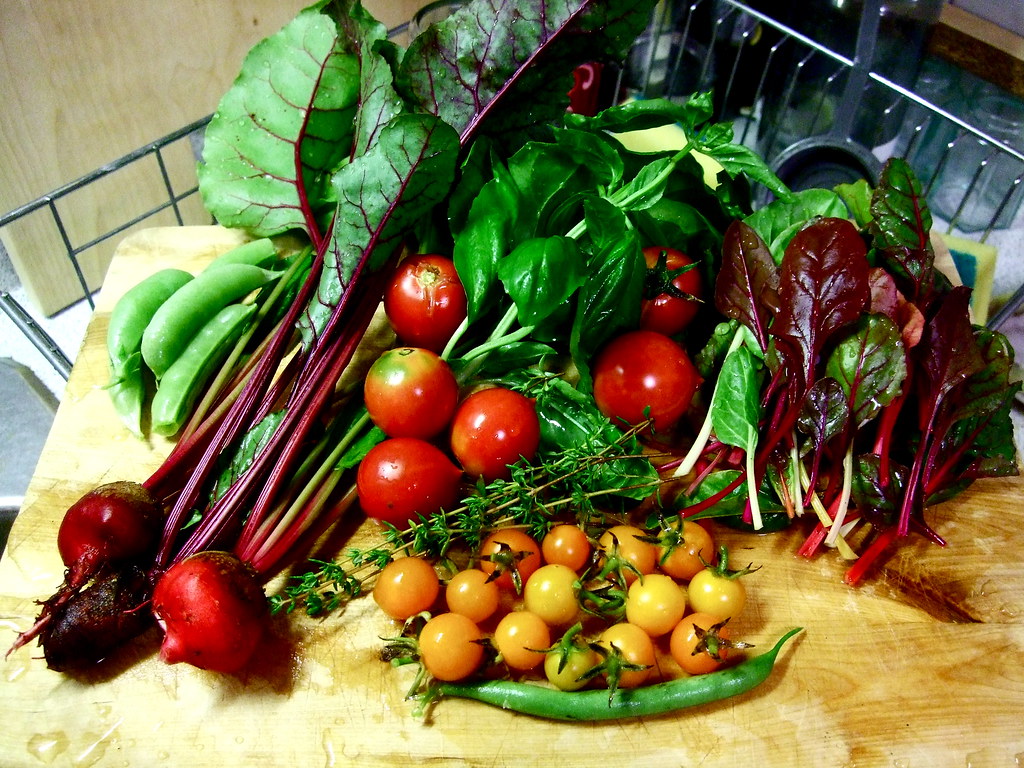
This isn't a recipe at all. It is merely an opportunity to brag/blog (brlag?) about what I came home to after my lovely holiday in BC.
These are all things my boyfriend and I grew in pots on our back patio. Everything but the tomatoes and basil are from seed, which we haphazardly sprinkled over our dollar-store soil. We've got sugar snap peas, beets, tomatoes (two kinds!), basil, thyme, a lone green bean, and lovely rainbow swiss chard!
Now that we're back I can't wait to eat all the garden goodies and maybe even share some more recipes with everyone.
.
Sunday, July 11, 2010
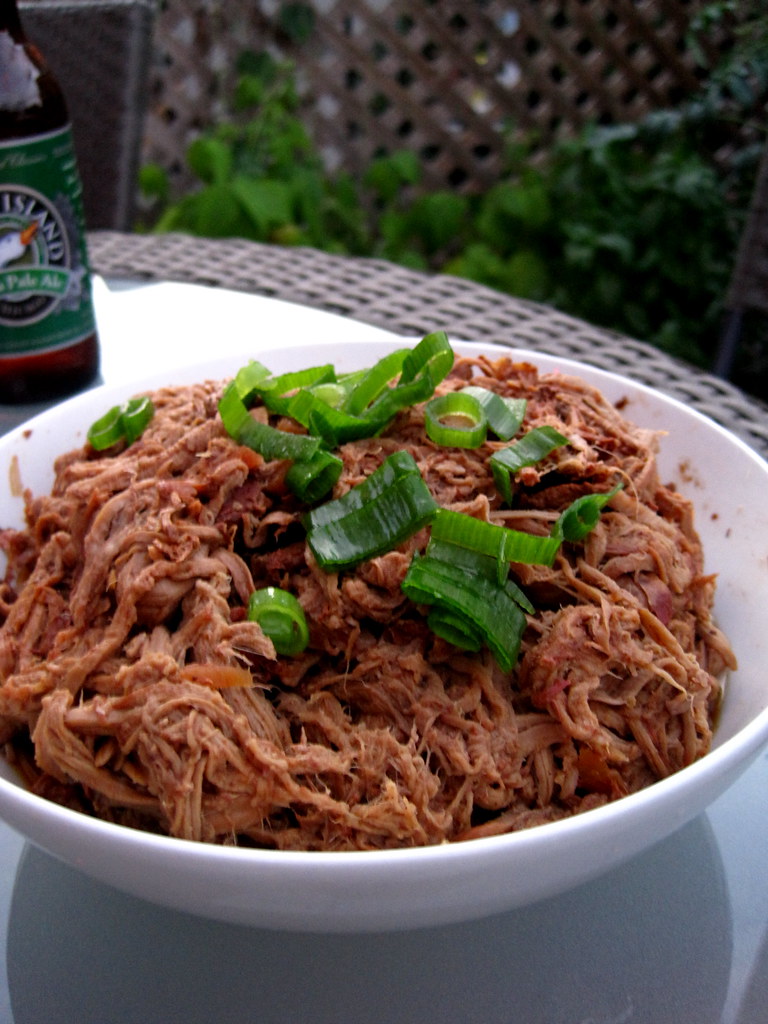
Pulled "Char Siu" with Scallion Pancakes
Well hello there... long time no see! Life kind of got away from me for a bit. Taught a summer course, sister moved to a different continent, tried (it's an ongoing battle) to write about my dissertation topic...
But enough about me: on to the food.
This is a slow cooker recipe. This is because it was actually three billion degrees here (five billion with the humidex) and I could not bear to turn on the stove, let alone the oven. We tried once, and it ended in tears. Tears and pizza, but tears none the less. If you don't have a slow cooker, just stick it in the oven on low for a few hours (have fun with the heat!) and it'll be fine.
These "Chinese Tacos", as they are now called in my house, have been so popular that we have made them twice in the past month -- something that doesn't happen that often, actually.
You need:
A slow cooker: mine was a wee little 1.5 litre one; 3 litres would do fine also
2 pounds of pork, the cheaper the better. Shoulder works really well.
1/4 c soy sauce
1/4 c hoisin sauce
2 tsps 5 spice powder
2 tsps minced ginger
3 cloves of garlic, minced
1 tsp sriracha chili sauce (optional)
1 tsp dark sesame oil
1. Put everything in the slow cooker (or covered baking dish) and stir it around so it gets all mixy. Mmmm mixy.
2. Turn the slow cooker on low for 8 hours. Go away.
3. Come back later. The pork will be all nice and shredable now. Take it out and shred it in a bowl, or shred it in the crock - your choice. If you shred it in a bowl, when it is all shreddy put it back in to soak up all the juices. YUM!
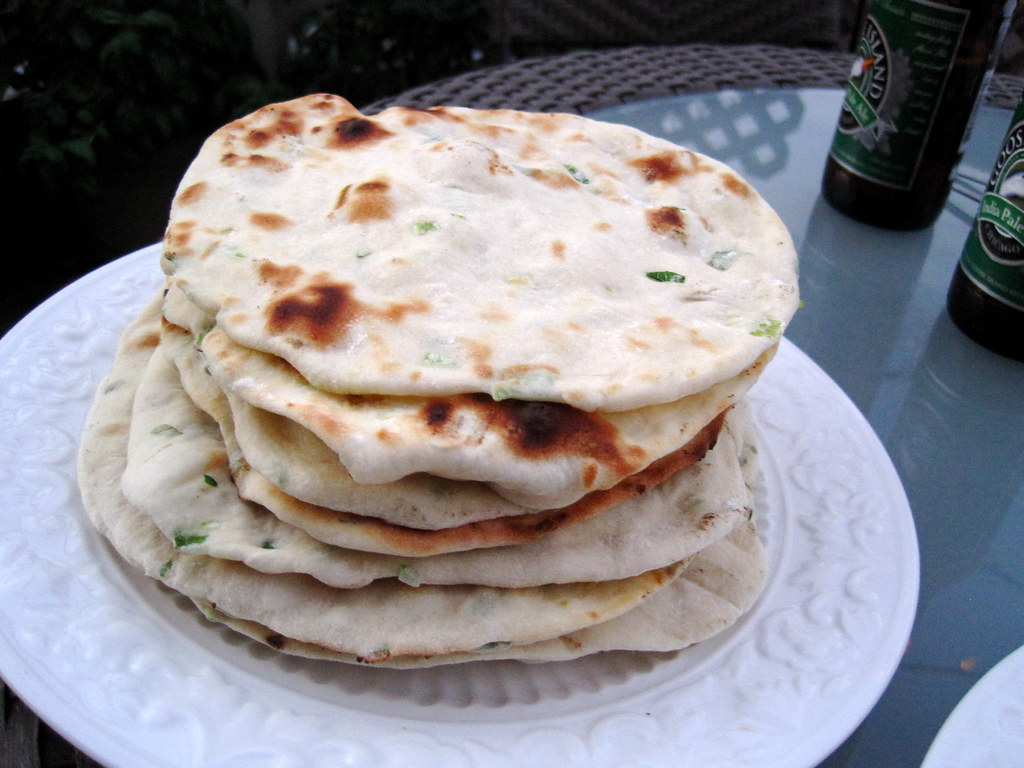
4. Serve with the scallion pancakes you find below, and maybe some Goose Island IPA you'd been saving from your trip to Chicago a while back.
Scallion Pancakes (makes 12):
3 c all purpose flour
2 tsp salt
6 green onions/scallions, white and light green parts only, finely sliced
2 tsp baking powder
2 TBS vegetable oil
1 TBS dark sesame oil
1 c water
1. Mix the dry ingredients together, except for 1 cup of the flour. Make a well in the centre and stir in the wet ingredients. Add in the scallions.
2. Knead the dough until it is smooth and elastic, about 5 minutes. Add the rest of the flour if you need it.
3. Let the dough rest for 30 minutes, covered with plastic wrap, then divide the dough into 12 pieces.
4. Form each piece into a ball, then flatten it and roll it out with a rolling pin on a lightly floured surface. Each dough piece should make an 8" circle when flat.
5. You can cook these in the frying pan with a bit of sesame oil over high heat for a minute or two on each side, but we did ours on the barbecue, because of that problem with the heat and the oven and the tears. A minute or two each side - til grilled and bubbly - worked really well.
6. Serve with the above pork recipe and the sliced green parts left over from the scallions!
.
Thursday, May 13, 2010
Spatchcocked Chicken: A Grotesque Step-by-Step
The secret to delicious, perfectly cooked whole chicken is also a really fun word to say: Spatchcock. It either sounds like a sneeze or a foreign swear word. Or both. You do have to get a little down and dirty with your chicken, but look at the reward:
Look at all that delicious browned crispy chicken skin. Look at those roasted whole garlic cloves and red onions. Spy the roasty-toasty carrots hiding in the sides of the pan. You, too, can enjoy a roast chicken on a weeknight, and in about an hour from start to finish.
The secret is cutting out the backbone of the chicken and flattening it. This makes the chicken cook more quickly and more evenly, so you get a juicier breast without having underdone legs. That sounds like the cover of a glamour magazine. ANYWAYS. After you have spatchcocked your bird, the seasonings and accompanying vegetables are really up to you -- really, anything goes (within reason - I don't want any comments saying you tried it with chocolate sauce and marshmallow fluff and it didn't work and I'm a liar).
But if you want to make what I made, here's what you need:
One whole chicken
2 TBS olive oil
One red onion, cut into wedges
2 carrots, cut into sticks
One head of garlic, peeled but in whole cloves
1 lemon (or more if you like) cut in half
1 TBS honey
1 tsp coarse salt
Freshly ground pepper.
Your instructions and gruesome raw chicken photos are after the jump! But also some lovely roasty after shots - don't despair! Click here to keep reading.
Friday, May 7, 2010
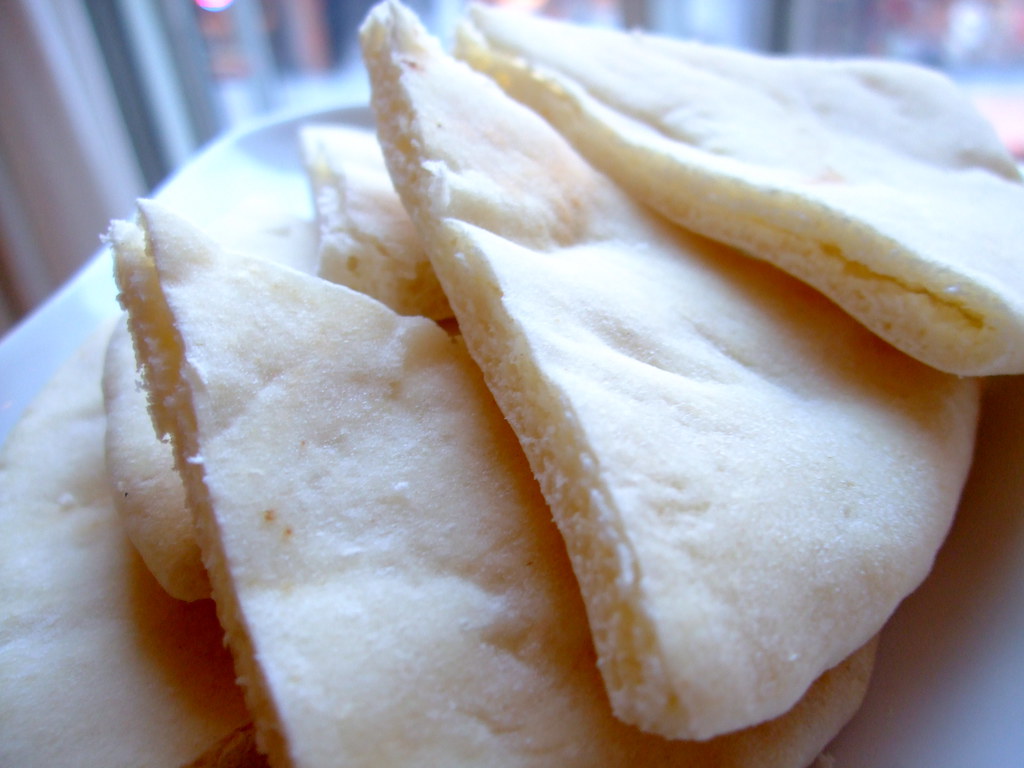
Amazing Pita Bread
I had a bit of a problem with this pita bread. The problem wasn't in the kneading or rising or baking -- it was getting it photographed. I even made another batch the very next day and still - the pieces kept disappearing before I could get a decent photo! But really, I should just take that as a sign that this is some mighty fine pita. Once again, The Fresh Loaf comes to the rescue.
I know I keep saying how all my bread recipes that I post on here are soooo easy, but they are. And this one is no exception. If you can make cookies, you can make bread. If you can play with playdough, you can make bread. It's just measuring, mixing, a wee bit of kneading, some patience, and a hot oven.
You need:
3 cups of flour
1 1/2 teaspoons of salt
1 Tablespoon of sugar or honey
2 teaspoons of yeast
1 1/4 to 1 1/2 cups water, roughly at room temperature
2 tablespoons of olive oil, vegetable oil, butter, or shortening. I used olive oil because it is delicious.
1. Mix the sugar in 1 1/4 c of the water and sprinkle the yeast on top. Let it sit for a few minutes until the yeast gets foamy.
2. Mix the flour and salt in a bowl together. When the yeast is ready, add the water-yeast-sugar mixture and the olive oil and mix. I used my KitchenAid so this was really easy. If the dough seems really dry, add the rest of the water.
3. When the dough is more or less cohesive and/or your wooden spoon revolts, start kneading. Knead for about 10 minutes then put the dough in a greased bowl and cover with plastic wrap or a clean dish towel and let it sit and rise for about 90 minutes.
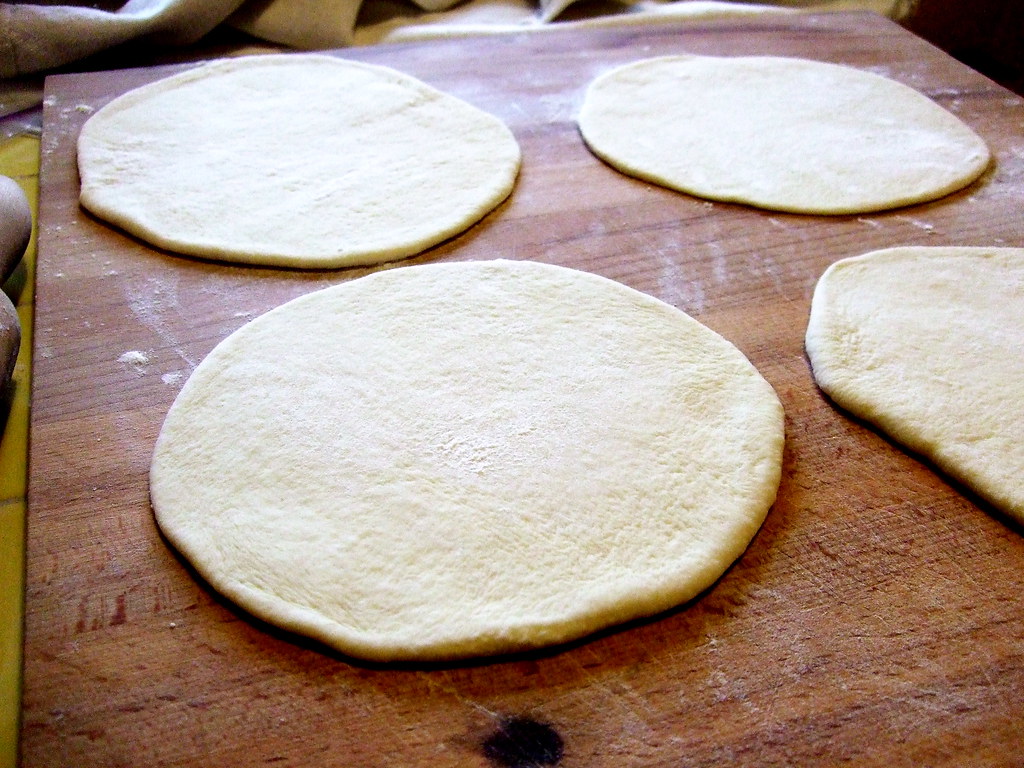
4. After it has risen divide the dough into 8 even pieces and shape into balls. Let these rest another 20 minutes, again covered with something. At this point, turn on your oven to 400º and make sure your baking stone is in there, or if you don't have a baking stone, a baking pan flipped upside-down. My baking stone BROKE during a tragic Tarte-Tatin accident and I have yet to replace it.
5. After 20 minutes, lightly flour your work surface and roll out the dough into flat circles about 1/4 inch thick or a little thinner.
6. Bake them two at a time for about 3 minutes. They will get nice and puffy, making lovely pockets for you to stuff with delicious things later on.
These are great for stuffed pita sandwiches or you could try serving them with a delicious white bean dip!
.
Wednesday, April 28, 2010
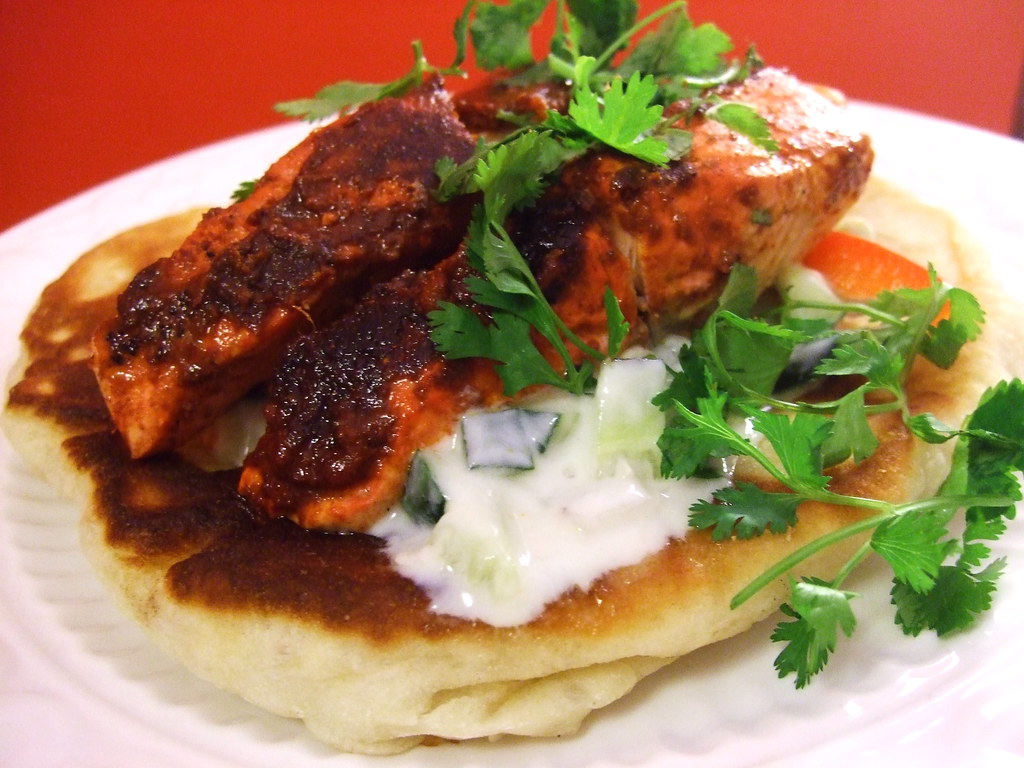
Salmon Tikka with Cucumber Yoghurt
If you are looking for a way to become friends with fish, this might be a good recipe for you. If you are already a fish enthusiast, then you're in luck too. The Indian spices, though not terribly hot, are so delicious - I'm sure there is a way to do this completely from scratch but I followed directions and bought a jar of Patak's Tandoori paste - if I hadn't made my own naan bread, this would have been a very quick, less than 30 minute meal. This recipe serves two.
You need:
- 1.5 c plain yoghurt
- 1/4 c minced red onion
- 1/2 c chopped cucumber
- 1/2 tsp cumin
- 2 salmon fillets
- 3 TBS Patak's Tandoori paste
- 1 TBS oil
- 2 pieces of naan bread
- 1/4 c chopped fresh cilantro
First, prepare your yoghurt. This is a really nice, cool side that complements the spices on the fish really well. If you add some hot peppers to it, you will also get some bit. We are wimps though and don't abide by such things. Anyways, seed a half a cucumber, or a third if you have one of those giant long ones, and dice it finely. I left the skin on because I like it that way. Finely mince a about a quarter cup of red onion. Stir these, along with about a 1/2 tsp of ground cumin, into 1.5 cups of plain yoghurt. I used fat-free organic, but thick Greek style would be great too. Set this aside in the fridge.
If you are making your own naan, you want to start that well in advance, as the bread will have to rise etc. But if not, and you have purchased naan from your local Indian restaurant or from your grocery store, then you can move right on to the salmon portion of this dinner.
You need a couple of fillets of salmon - make sure the fish you are buying is sustainably fished in your part of the world. If you can't find salmon, red-fleshed trout works well too. Cut the fish into thirds lengthwise and leave the skin on. Brush the top and sides of each piece with the Tandoori paste - I used about 3 tablespoons total - maybe a little less. Don't put the brush back into the jar because you will get fishy things in your jar of paste and that is unsanitary.
At this point, bake your naan bread if you made your own, or start heating it up if you bought some. Heat up about a tablespoon of oil in a cast-iron pan, or other pan if you don't have a cast-iron one. But cast-iron is really the best. It should be on about medium or medium high depending on how hot your stove gets. Place the salmon pieces in the pan and cook for about 3 minutes on each side, until the salmon turns opaque.
Give each person a warm naan bread, dollop some of the yoghurt on it, top with the salmon, and with some chopped cilantro if you are into cilantro. If not, that is sad but not your fault. You can fold up the sides and munch on it like a taco, or use a sophisticated knife and fork. Either way, enjoy!
.
Saturday, April 10, 2010
Lazy Saturday
If making that pasta was one of the more involved projects I've undertaken for this wee blog of mine, I think this post marks one of the simplest -- short of the soft-boiled eggs post, of course. Anyways pancakes.
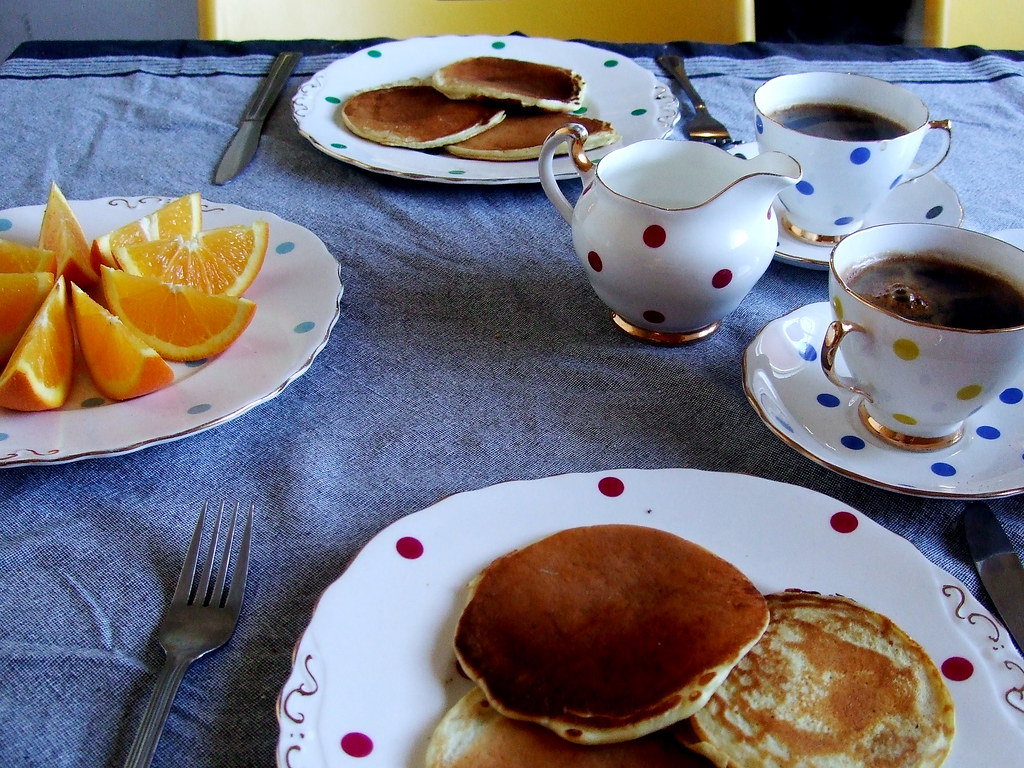
I also wanted an excuse to show off my adorable plate and tea cup collection. My mom's friend Oona has these cups and I always loved them, so every Christmas and/or birthday, my mom scours eBay and antique stores for a piece for the collection and gives whatever she finds to me. I have four lunch (or pancake!) plates, about 8 tea cups and saucers, and few tiny tea plates for fancy sandwiches or cakes.
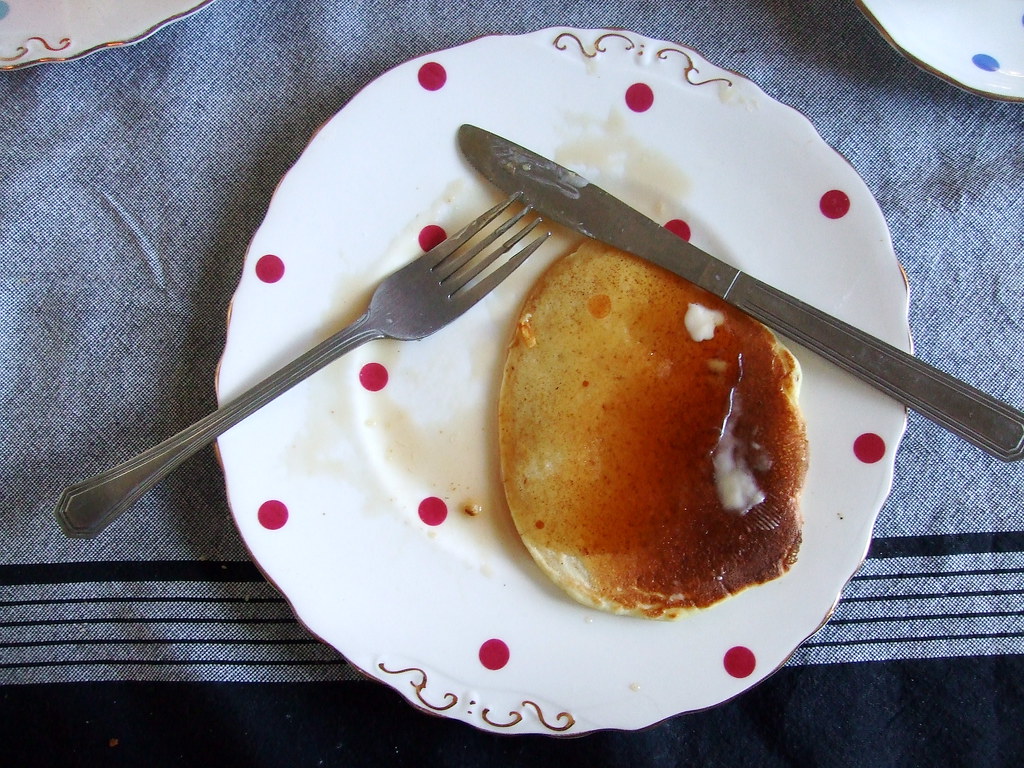
On a sunny Saturday they called out to be filled with sliced oranges, hot coffee, and steaming pancakes fresh from the pan.
Do you want to know my pancake recipe? I love this recipe because it is the perfect amount for two people. Four little pancakes each.
You need:
1/2 c flour
2 tsp wheat germ or flax (optional but healthy!)
1/4 tsp baking powder
1/4 tsp baking soda
1/4 tsp salt
1 egg
1/2 c milk or butter milk
1.5 tsp plain yogurt or oil or apple sauce
You just put all the ingredients into a shaker bottle (mine was $1 from the dollar store!) and shake them up. Then just pour out a bit into a heated and lightly buttered cast-iron pan (my fav!) and you're good to go! You can obviously add whatever you like to your pancakes - blueberries, raspberries, chopped apple - but we like ours plain.
Wednesday, March 24, 2010
Happy Birthday, Cast-Iron Darling!
That's right, my little blog is already one year old!
To celebrate, I wanted to do something special so I had my friend Jen over and we cooked up a feast! Plus, I tried my hand at something I had never attempted. It had been on my list for a while: make my own pasta. Without a pasta maker. Not because I'm a masochist; just because I don't own one. Although after reading this, it may seem like the former is also true.
I believe I followed Jamie Oliver's directions because he always seems to make things sound straightforward and tells me I don't have to worry. I halved the recipe because we were only two and the pasta was a side, not the main. We served it with a lovely braised pork butt and the carrot-celery ragout in which it cooked, and a delicious beet roesti, thanks to Mark Bittman - those recipes soon.
So!
300g flour
3 eggs
and away we go with this deceptively simple recipe! I wasn't so keen on getting my counter all eggy so I put the flour in my Kitchenaid, since Jamie says you can use a food processor and so I decided a Kitchenaid was close enough. Maybe this was my first mistake.
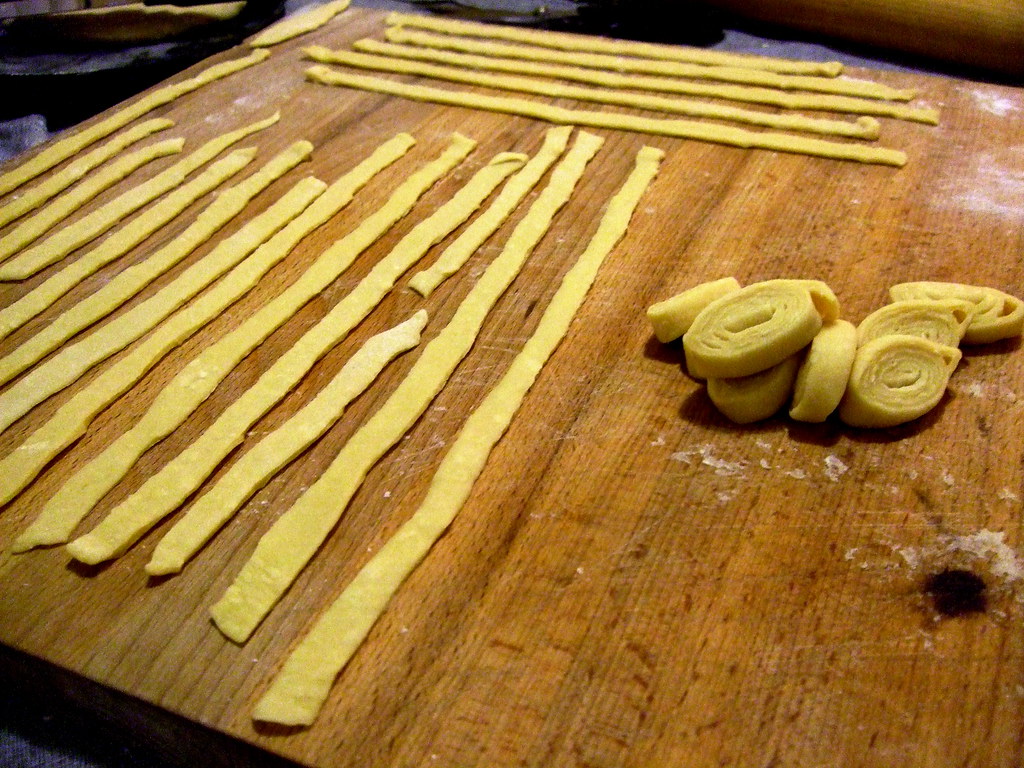
Actually, my first mistake was not using "Tipo 00" flour. I searched; I could not find any and I didn't feel like going all the way up to Little Italy. So I used all-purpose. Things.... did not go ideally. The dough really didn't want to stick together. It was not as straightforward as Jamie had promised! It seemed like the dough was too dry!
Finally I got it to stick together enough to attempt rolling. I hope you've been working out, because this is serious business. My arms were still sore three days later! Maybe I should do this more often... I digress. Jamie says you should roll it out until it's as thin as a CD. I was really tired so mine was more like a CD and a half. Maybe two CDs. It wasn't thin enough, anyways. But I was proud and happy and rolled up the thin dough and sliced it into thin strips and unrolled it onto the counter. Pasta! It looked like Real Pasta! I was happy.
When we cooked it up, it tasted SO GOOD. DELICIOUSLY GOOD. SO GOOD THAT TWO DAYS LATER I WANTED MORE. I still didn't have a pasta maker. I still don't, come to think of it.
This time, I went and bought some Semolina flour from the bulk store, thinking this would be nice -- isn't Semolina what Real Italians use to make pasta? This may be true, but I am not a Real Italian. I am not even a Fake Italian.
Half-way through making it, I began to think that I should not have approached the Semolina, and I really should not have tried to make pasta A SECOND TIME with only my non-buff arms to roll out the dough. Clearly home-made pasta is good, because nothing else would be able to drive me to these lengths to get it.
This time:
1 c. Semolina
1 c. all-purpose flour
pinch of salt
1 Tbs olive oil
3 eggs (I ended up using 4)
Making this pasta made me want to cry. It would not stay in a well-behaved ball. It crumbled if you even looked at it. It looked like a mound of cheese curds when at rest.
I left it alone for 30 minutes and let it think about its bad behaviour. When I returned, it had repented. I squooged it into a ball and it stayed. It even allowed itself to be rolled out, with reluctance. My sister called. She was coming for dinner. She wanted to bring a friend. I eyed the take-out numbers on the fridge, made the sign of the cross, and agreed.
I don't think my wrists will ever be the same again. However difficult rolling out pasta made from regular flour was, Semolina is beyond the pale. I swore. I made promises I couldn't keep. I vowed vengeance on the pasta.
It still took 40 minutes to roll out and cut all the pasta, and even then it was not to Jamie's requisite CD-thinness.
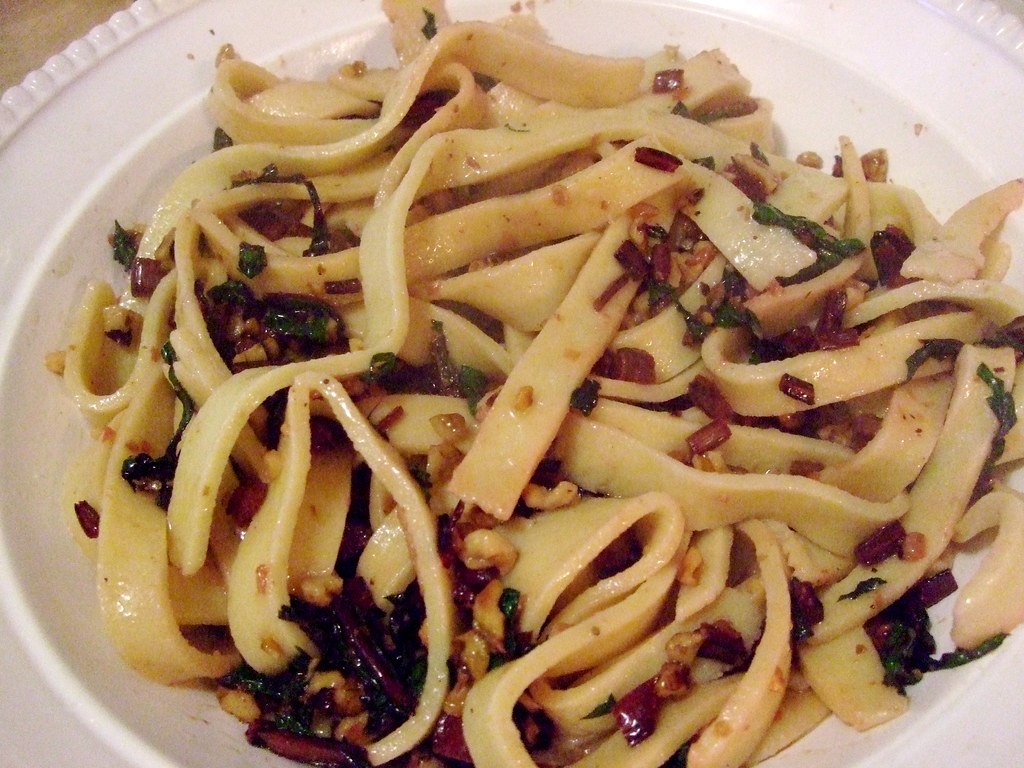
I felt so proud though. The pain made me blind to beauty, as a new mother, fresh from labour, is to her mediocre newborn. My pasta was so beautiful. Perfect. Golden. Nothing could surpass it.
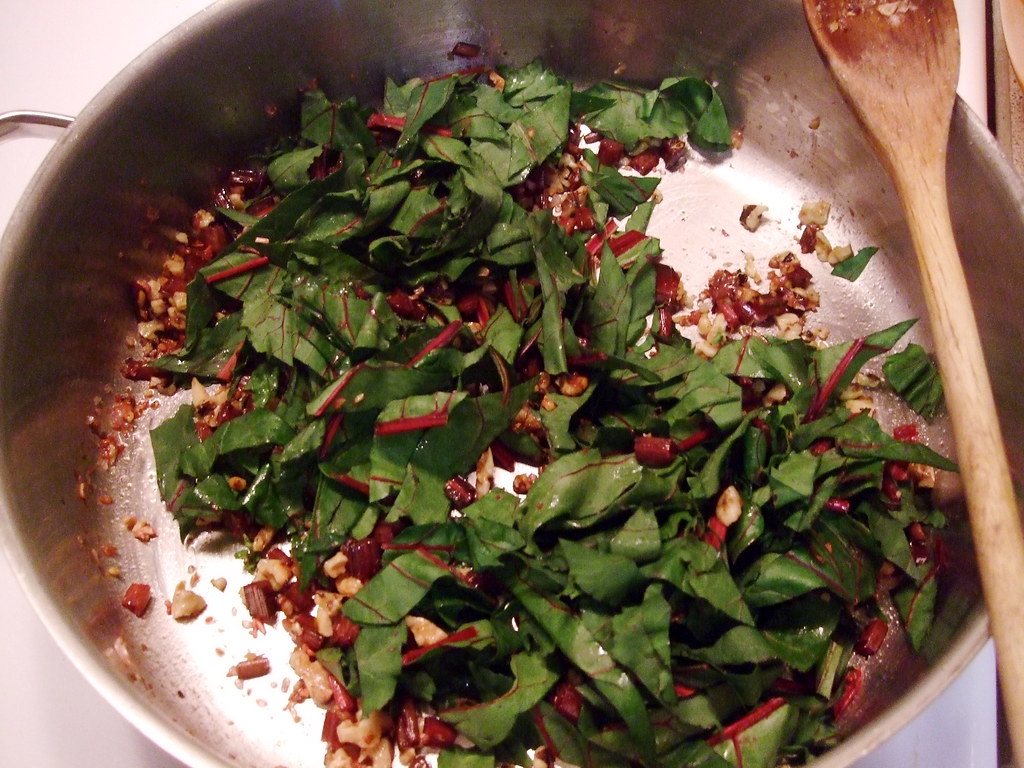
To accompany my beautiful pasta, I made a light sauce of toasted walnuts, minced garlic, and chopped beet greens.
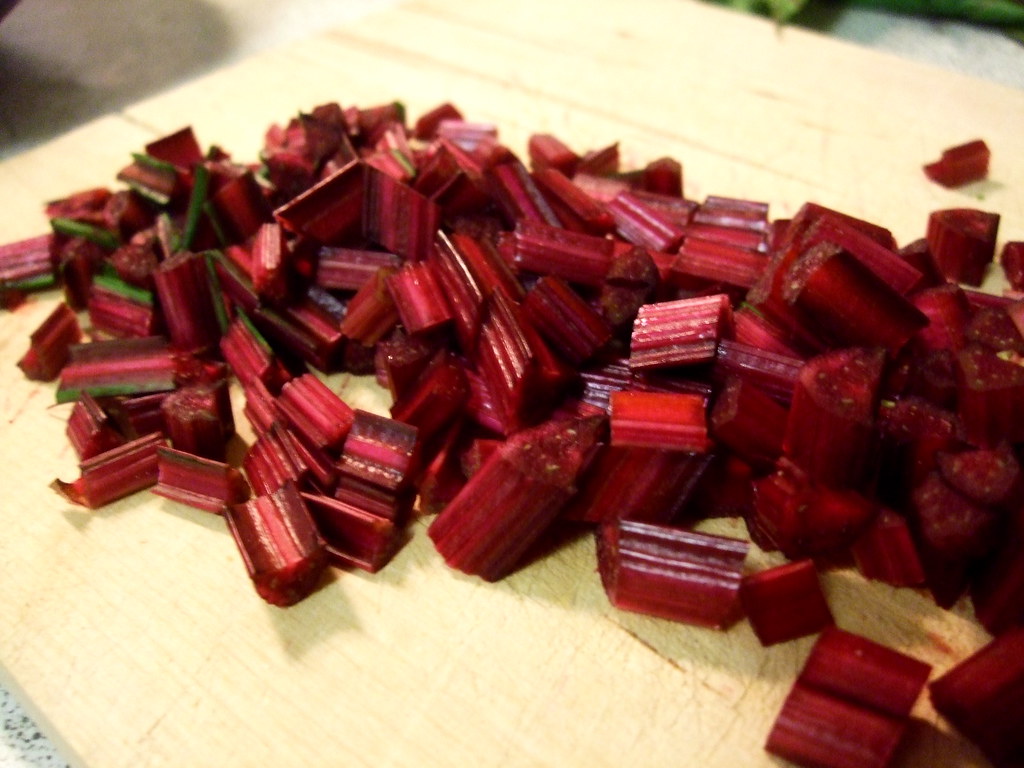
About 3/4 c chopped walnuts, toasted in a dry pan over medium heat until fragrant. Move those to another dish, and heat 2-3 tbs olive oil and saute the garlic with a pinch or so of coarse salt. Add the beet stems, about a cup or more, and saute as well. At the end, throw in the chopped leaves, about 2 cups, and saute until wilted. Toss with the pasta and more olive oil and some pepper to taste.
It was very well received. The pasta was al dente in a way I had never tasted before. I guess that's the difference of having it fresh. The all-purpose flour pasta I had made the first time tasted more like the spaetzle I sometimes make; the Semolina tasted like Real Italian Pasta.
You know what, this pain-in-my-butt Semolina pasta was worth the agony. It was worth the trouble and the sore wrists and the red palms and the cursing. I would make it again in a second.
.
To celebrate, I wanted to do something special so I had my friend Jen over and we cooked up a feast! Plus, I tried my hand at something I had never attempted. It had been on my list for a while: make my own pasta. Without a pasta maker. Not because I'm a masochist; just because I don't own one. Although after reading this, it may seem like the former is also true.
I believe I followed Jamie Oliver's directions because he always seems to make things sound straightforward and tells me I don't have to worry. I halved the recipe because we were only two and the pasta was a side, not the main. We served it with a lovely braised pork butt and the carrot-celery ragout in which it cooked, and a delicious beet roesti, thanks to Mark Bittman - those recipes soon.
So!
300g flour
3 eggs
and away we go with this deceptively simple recipe! I wasn't so keen on getting my counter all eggy so I put the flour in my Kitchenaid, since Jamie says you can use a food processor and so I decided a Kitchenaid was close enough. Maybe this was my first mistake.
Actually, my first mistake was not using "Tipo 00" flour. I searched; I could not find any and I didn't feel like going all the way up to Little Italy. So I used all-purpose. Things.... did not go ideally. The dough really didn't want to stick together. It was not as straightforward as Jamie had promised! It seemed like the dough was too dry!
Finally I got it to stick together enough to attempt rolling. I hope you've been working out, because this is serious business. My arms were still sore three days later! Maybe I should do this more often... I digress. Jamie says you should roll it out until it's as thin as a CD. I was really tired so mine was more like a CD and a half. Maybe two CDs. It wasn't thin enough, anyways. But I was proud and happy and rolled up the thin dough and sliced it into thin strips and unrolled it onto the counter. Pasta! It looked like Real Pasta! I was happy.
When we cooked it up, it tasted SO GOOD. DELICIOUSLY GOOD. SO GOOD THAT TWO DAYS LATER I WANTED MORE. I still didn't have a pasta maker. I still don't, come to think of it.
This time, I went and bought some Semolina flour from the bulk store, thinking this would be nice -- isn't Semolina what Real Italians use to make pasta? This may be true, but I am not a Real Italian. I am not even a Fake Italian.
Half-way through making it, I began to think that I should not have approached the Semolina, and I really should not have tried to make pasta A SECOND TIME with only my non-buff arms to roll out the dough. Clearly home-made pasta is good, because nothing else would be able to drive me to these lengths to get it.
This time:
1 c. Semolina
1 c. all-purpose flour
pinch of salt
1 Tbs olive oil
3 eggs (I ended up using 4)
Making this pasta made me want to cry. It would not stay in a well-behaved ball. It crumbled if you even looked at it. It looked like a mound of cheese curds when at rest.
Proof: Cheese curds, or pasta dough? Impossible to tell.
I left it alone for 30 minutes and let it think about its bad behaviour. When I returned, it had repented. I squooged it into a ball and it stayed. It even allowed itself to be rolled out, with reluctance. My sister called. She was coming for dinner. She wanted to bring a friend. I eyed the take-out numbers on the fridge, made the sign of the cross, and agreed.
It looks impossible at this point that the dough will allow itself to be rolled as thin as a CD.
I don't think my wrists will ever be the same again. However difficult rolling out pasta made from regular flour was, Semolina is beyond the pale. I swore. I made promises I couldn't keep. I vowed vengeance on the pasta.
My poor, red, puffy hands.
It still took 40 minutes to roll out and cut all the pasta, and even then it was not to Jamie's requisite CD-thinness.
Two CDs are better than one, right?
I felt so proud though. The pain made me blind to beauty, as a new mother, fresh from labour, is to her mediocre newborn. My pasta was so beautiful. Perfect. Golden. Nothing could surpass it.
To accompany my beautiful pasta, I made a light sauce of toasted walnuts, minced garlic, and chopped beet greens.
About 3/4 c chopped walnuts, toasted in a dry pan over medium heat until fragrant. Move those to another dish, and heat 2-3 tbs olive oil and saute the garlic with a pinch or so of coarse salt. Add the beet stems, about a cup or more, and saute as well. At the end, throw in the chopped leaves, about 2 cups, and saute until wilted. Toss with the pasta and more olive oil and some pepper to taste.
It was very well received. The pasta was al dente in a way I had never tasted before. I guess that's the difference of having it fresh. The all-purpose flour pasta I had made the first time tasted more like the spaetzle I sometimes make; the Semolina tasted like Real Italian Pasta.
You know what, this pain-in-my-butt Semolina pasta was worth the agony. It was worth the trouble and the sore wrists and the red palms and the cursing. I would make it again in a second.
.
Thursday, March 11, 2010
Look up...
Look waaaaaay up!* I've got a new banner! It has a little cast-iron skillet! And my name! And it's pink!
I thought it was time for a more personal look for my little corner of the internet, so my friend Megan Wolf, a graphic designer, kindly offered to design one for me!
So let's all say it together now, THANK YOU MEGAN! :D
*10 points to anyone who knows the reference.
.
I thought it was time for a more personal look for my little corner of the internet, so my friend Megan Wolf, a graphic designer, kindly offered to design one for me!
So let's all say it together now, THANK YOU MEGAN! :D
*10 points to anyone who knows the reference.
.
Tuesday, March 9, 2010
Peanut Butter-Chocolate Lava Pots
Since that last post wasn't really a recipe so much as pretty pictures and links to techniques, here is a bonus recipe for you. It actually goes really well with the steak just posted. Actually it goes well with anything, because it is chocolate and peanut butter and it's melty and warm.
This recipe is adapted from Citrus and Candy, a site with lovely pictures and delicious recipes. The recipe there makes 10 and we are only two, so I halved it and fiddled a bit with the amounts. Note that any "leftovers" keep uncooked in the fridge at least for a couple of days and are just as nice as the ones cooked right away.
You need:
A kitchen scale (seriously - they are $12 and make you look like you mean serious buisiness)
150g chopped dark/milk chocolate. I used a combo.
80g peanut butter. I had smooth natural on hand. Don't know how it would work with the sweet kind.
10g chopped butter
3 eggs separated, yolks beaten.
100g icing sugar
50g flour
In a double boiler (so a metal bowl set atop simmering water in a pan on low) melt the chocolate with the butter and peanut butter. You could probably do this in the microwave too, but I always burn chocolate that way because it's so tricksy.
Cool the mixture and then stir in your beaten eggs. It needs to be cooled a bit because otherwise you will scramble your eggs and that is not very appetizing. If you are imptatient, you could turn your egg whites into soft peaks while you're waiting for it to cool, because you are going to have to do that anyways in the next step.
Beat your egg whites into soft peaks, and then whisk in the sugar.
GRADUALLY fold the whites into the chocolate mixture along with the flour. Pour into 4 greased ramekins and rest in the fridge for one hour.
Preheat your oven to as close to 338ºF as you can - 170ºC if you can do that. The recipe is in metric - sorry. Pop those ramekins into the oven for about 15 minutes. I had to watch mine and guess. They should look cooked on the outside but you still want them lava-like on the inside. When they start to cool, the middle should sink a bit. That's how you know they're ready to eat.
.
Gold Medal Meal
Technically this was our Valentine's Day dinner - we stayed at home and I cooked and M ran out to the tiny and excellent burger place on the corner to buy the best frites in the city and then we watched Alexandre Bilodeau win Canada's first gold medal on home soil at the Olympics.
Steak with shallot butter, green beans, and frites from Patati Patata
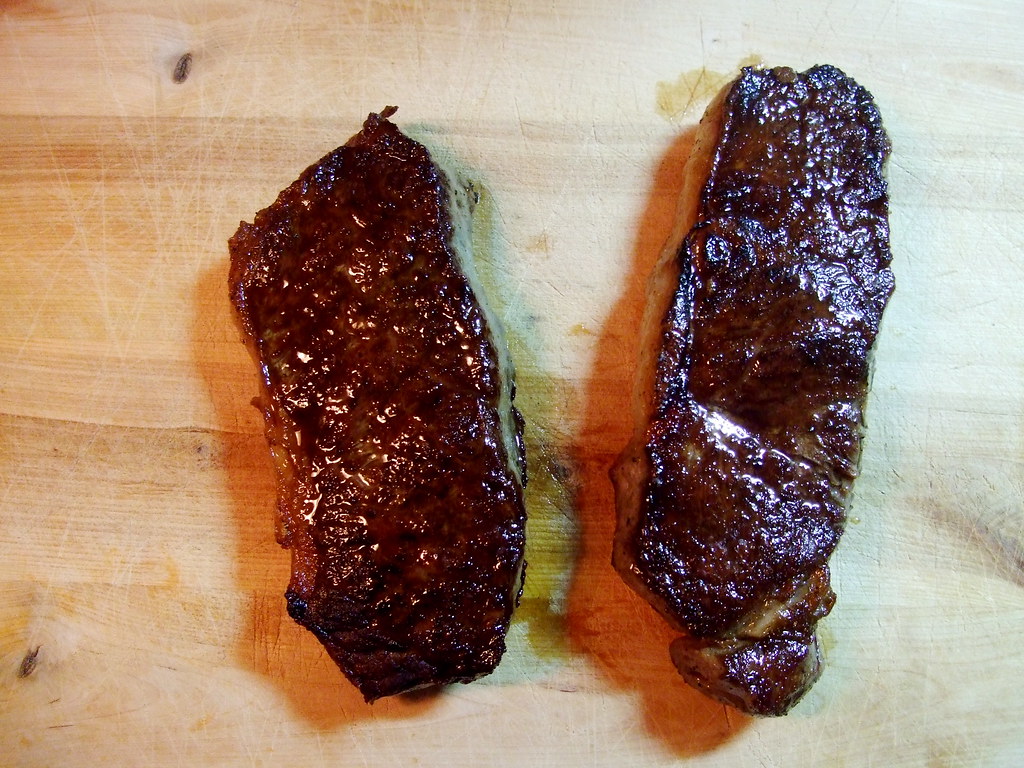
This was my first successful foray into cooking steak INSIDE. Mid-February is still winter here. (OR IT SHOULD BE!) At any rate, you can't get to a barbecue unless you are very determined and/or your barbecue is a lot closer to your back door than ours is. Also I think ours is broken. But as I discovered, inside steak is actually quite delicious - that's how they do them in restaurants, after all.
The trick is to try to replicate the serious heat a restaurant stove can kick out - a domestic stove just does not have the same kind of heat-producing capabilities. The other problem is that steak is expensive even at the grocery store. Thanks to the combination of two pieces of sage advice from two well-known stores of wisdom, YOU TOO CAN COOK DELICIOUS STEAK AT HOME. Just have one person on hand to wave a towel at the smoke detector - it gets a little smokey.
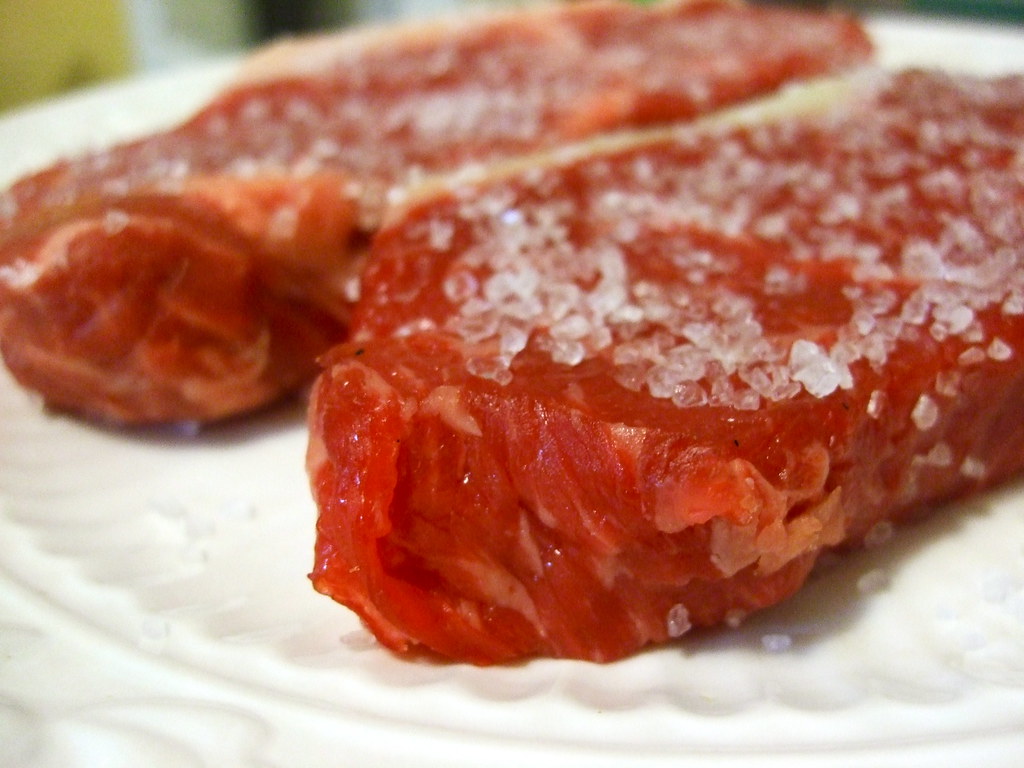
Tip number one, from The Steamy Kitchen: Salt your steak and let it sit in salt (a lot of salt - like a thick layer) for a while before you cook it. This draws moisture out of the steak so when you are cooking it, especially in a pan, it doesn't steam and get tough and nasty. This enables you to buy cheaper steaks and still have them be tender and lovely. Just rinse and dry the steak off thoroughly after it's been salted for a good amount of time.
Tip number two, from The Kitchn: Use a cast-iron pan and heat it up under the broiler until it is SCALDING scalding hot. Your broiler gets way hotter than your stove-top so use that to your advantage. Heat up the pan, then stick it on the stove on high and cook the steak in the scalding pan for thirty seconds a side. Then stick it back in the oven for two minutes.
There you go. Medium rare steak with a beautiful meaty crust on the outside and a juicy, tender centre.
I made shallot butter to serve on top, just like at a fancy restaurant! Mince a shallot finely and whip it into softened butter (not melted). Wrap the butter in saran wrap and shape into a log with your hands. Then chill until you're ready to use.
.
Monday, February 15, 2010
Is it summer yet?
Can I grill things outside? Can I have a burger? Please?
1. Not yet.
2. Not really.
3 & 4. Yes! Yes you may have a burger!
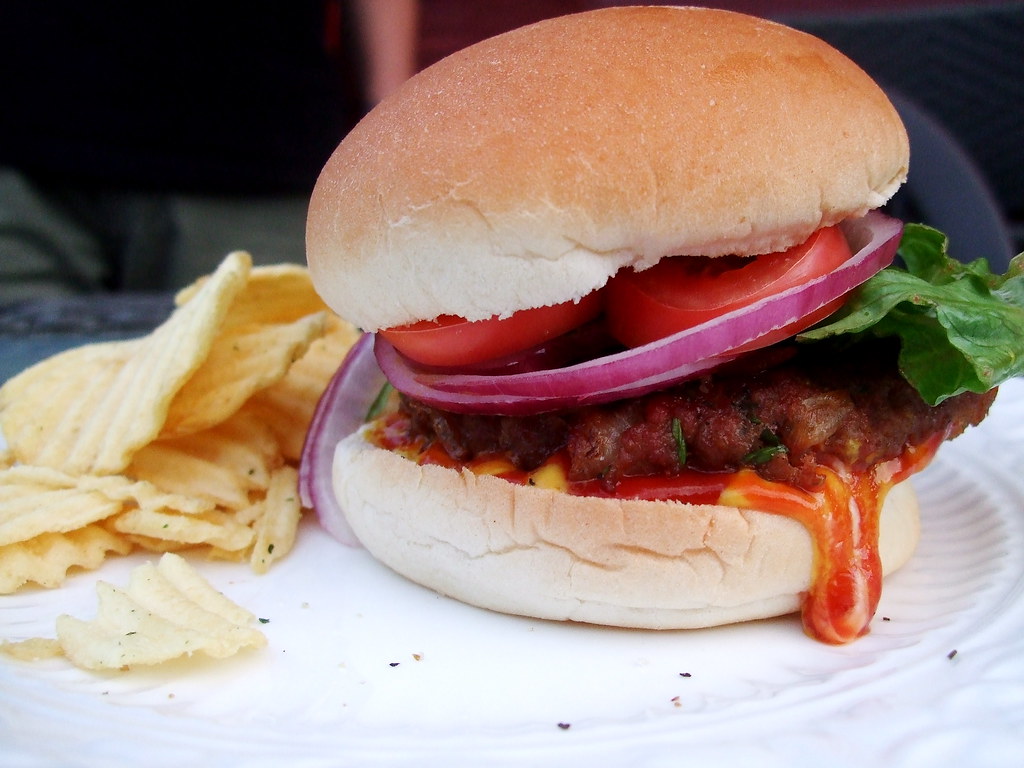
These are some scrumptious burgers from a truly scrumptious magazine. Did you know that the LCBO has a magazine? Did you know that you can get a subscription?* Both of these things are true. Along with some excellent drink recipes and ideas, the LCBO food magazine has some seriously tasty recipes. And gorgeous pictures to boot! This edition has a whole section on winter burgers, which was perfect because I really had a yearning for a good burger, but it is still far from grilling season.
These are anything but boring burgers. The Indian spices are a bit hit in this house, and this recipe was no exception. The chutney topping was also a nice touch. ENOUGH TALK! RECIPE!
You need (adapted from the LCBO Food&Drink Magazine):
1 large Granny Smith apple, peeled and grated.
1 small onion, minced
1 clove of garlic, minced
2 tbs curry powder
1 egg
1/2 c yogurt
1/2 tsp salt
1.5 c bread crumbs
1/3 c chopped coriander/cilantro leaves
1.5 lbs ground turkey (or chicken!)
butter and oil
some Major Grey chutney, or you can make your own
some yoghurt, to top
some sliced cucumber
some sliced red onion
naan, chapati, pita, or hamburger buns!
1. Sautee apple, onion, and garlic in 1 tbs of butter until the onions are soft and there isn't any liquid. Add the curry powder.
2. Mix egg, the 1/2 c of yoghurt, the breadcrumbs, cilantro, apple/onion mixture and the turkey with your hands! It won't kill you. It's just meat.
3. Form patties (not too thick! about 2 cm thick - I got 6 out of this batch). Heat your magical grill pan or cast iron pan with a bit of oil or butter over medium/medium low and grill/fry the patties until you get lovely grill marks (I love grill marks) and the centres are cooked through.
4. You are ready to assemble! Toast your bread product of choice and top your burger with cuke, red onion, yoghurt, and most importantly, chutney! YUM! Some spinach would also be delicious here, as the mag suggests.
*Dear LCBO: If you are reading this, and you like that I posted about your magazine and would like to say thank you, a large bottle of Forty Creek would make me really happy. Just sayin'!
.
Subscribe to:
Posts (Atom)