
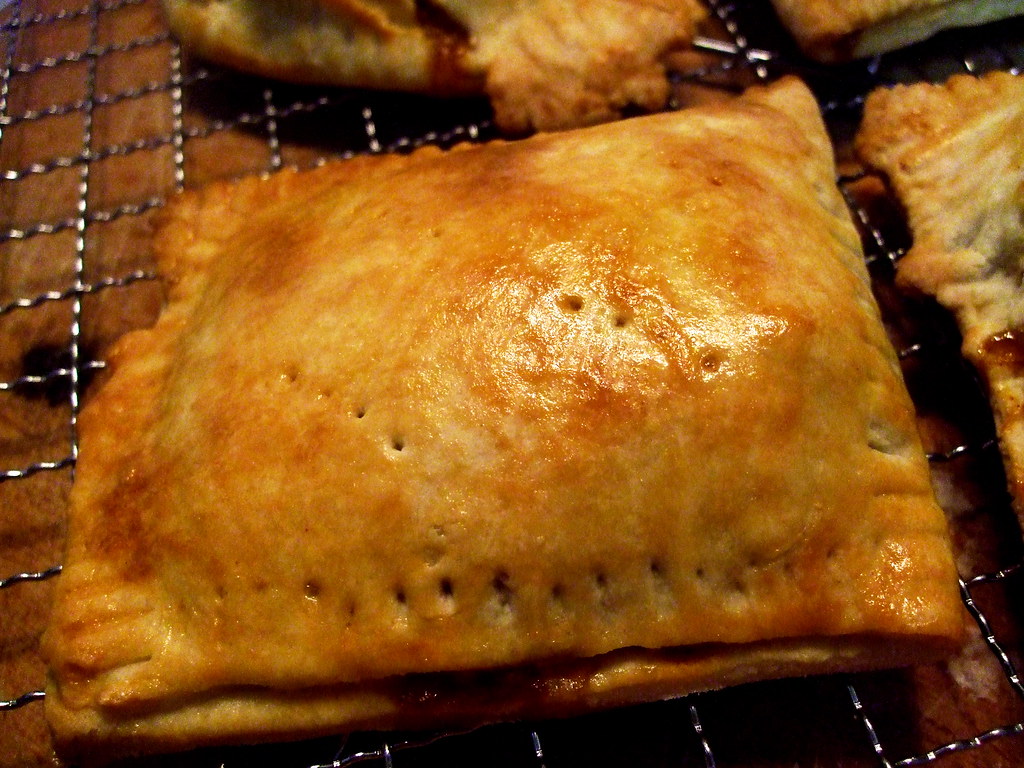
Hand pies are great because they are tiny pies. Everything is better if it is in miniature and/or in pie-form. The hand pie is superior to the regular pie in that the pie crust-to-filling ratio is greater than the traditional pot-pie, for example. This is also a great way to take chili on a picnic or to work/school for lunch, if your life is dull like mine and you don't go on picnics. It is a no mess, no cutlery way to both transport and eat delicious chili, or for that matter, any other stew-like filling.
The pastry, the recipe for which is from here, was delicious. It held together great even with the sloppy filling and was flaky as well as flavourful.
You need:
2 1/4 cups unbleached all-purpose flour
1 1/2 teaspoons salt
1 teaspoon sugar
1/2 cup cold unsalted butter, cut into 1/2-inch cubes
1 egg, slightly beaten
1/3 cup ice cold water
1.5 cups leftover chili
These instructions are from the above link; She said it so well and I followed them exactly, so here we are:
1. In a food processor fitted with the blade attachment, pulse together the flour, salt, and sugar. Add in the butter, and pulse a few times until the mixture is crumbly and resembles coarse meal. Combine the egg and water in a container (remove all ice pieces). While the processor is running, pour the water/egg mixture in and pulse until mixture just comes together.
2. Pour mixture out onto a floured board and knead a few times to bring all the ingredients together. Dough can be rolled out immediately, or it can be wrapped in plastic and refrigerated for up to 2 days.
OK now back to me.
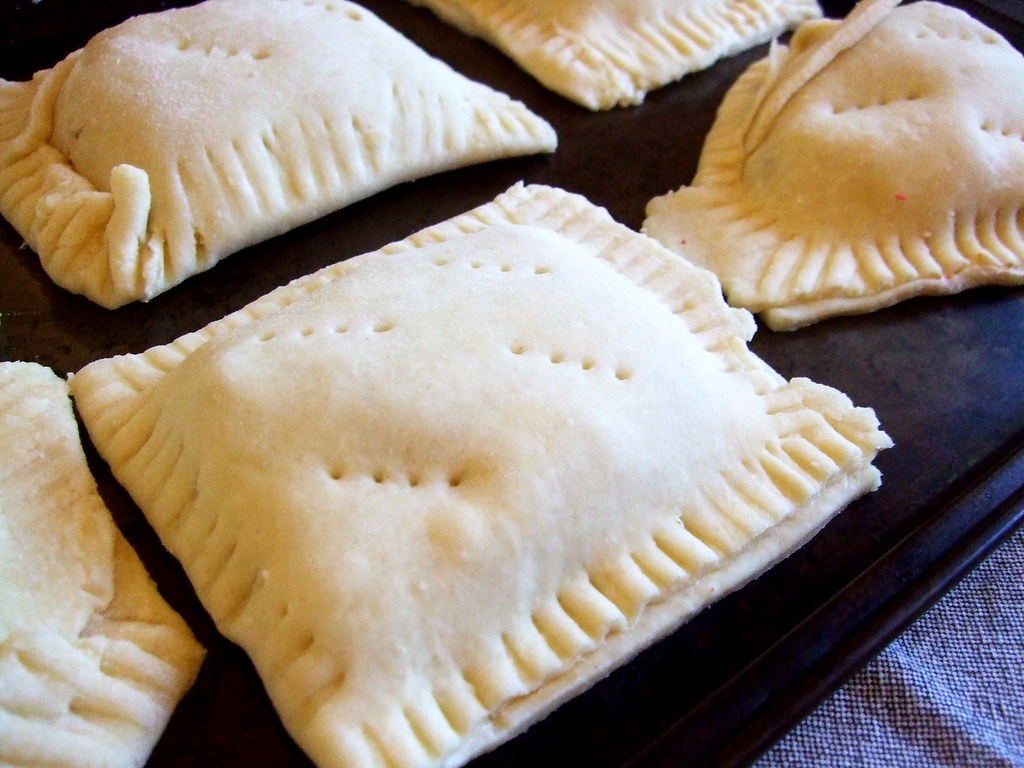
3. Roll out the dough on a lightly floured surface until it is about 18" by 22" and 1/8" thick.
4. Use a knife to cut the dough in half, then each half into thirds so you have six pieces of dough. If they aren't all perfectly square it is fine. Mine weren't all perfectly square and they baked up nicely!
5. Spoon 1/4 cup of chili or filling of your own imagination into one side of the dough, then wet the edges with dampened fingertips and fold over the empty half to cover the filled half. Using a fork, crimp the edges to seal the dough pocket. Poke holes in the top and repeat with the other five pies.
6. Place the pies on a baking sheet and bake for 15 minutes at 425ºF. If you like, brush the tops with a beaten egg prior to baking -- that is how I made mine all shiny like that.
To reheat, ideally a toaster oven would be used, but I didn't have one this afternoon at school and used a microwave; it was still delicious.
.


love it love it love it!! so making these.
ReplyDeleteDear CID, you are an evil genius. That is all.
ReplyDelete