Monday, January 10, 2011

Cheat-Loaf


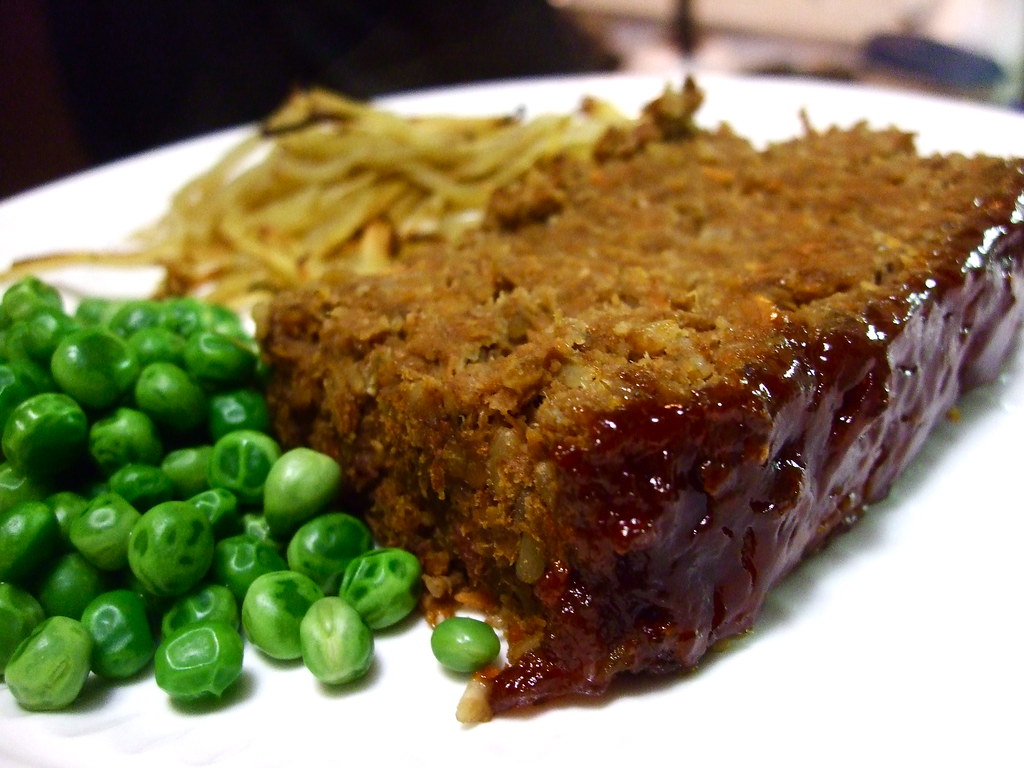
This loaf, despite being completely vegetarian, has all the familiar comforting taste of a genuine meatloaf, especially when you add the slightly sweet, rich, ketchupy glaze part way through the cooking. And, unlike a regular meatloaf, this one has NINE GRAMS of fiber per slice. NINE. So if your New Year's Resolutions involve eating healthier, this recipe is for you. (Even if you don't have New Year's Resolutions that involve food, sometimes it's a good idea to take a break from meat once in a while. It's cheaper, for one thing, and it's better for you and the environment.)

Part of the secret to how good, and how like a traditional meatloaf this one tastes is because of two secret ingredients. That's right, not one, but two secret ingredients. The first is steak sauce. The original recipe called for A-1 sauce, but we prefer HP so that's what I used, and lots of it. The second, very surprising, secret ingredient is finely chopped dates. I know. But they add a sweet, sticky texture that actually mimics meat surprisingly well. I wouldn't leave them out if I were you.

I'll warn you, though, that it's not as quick a meal to throw together as an actual meat-meat-loaf. If you add up the times on the page of the original recipe, even they have underestimated by at least 20 minutes by their own count. I would say allow 30 minutes for prep, but using the food-processor for everything will speed stuff up. I had to cook my rice as well as my lentils, so that also added time to the recipe, despite my renowned talent for multi-tasking.

I don't want to scare you off, though, because the results are amazing.

So! Now that I've rambled sufficiently, here is the recipe, which I've altered slightly from the original. It makes one large loaf, which we managed to cut into 9 slices. We ate the leftovers the next night and they were equally tasty.

You need:

A food processor (you will save yourself a lot of headache, trust me.)
1 cup dry brown lentils
2 medium carrots, grated or shredded
1 cup finely diced dates (I did mine in the food processor)
1 medium onion, diced
1 stalk celery, diced
2 tablespoons unsalted butter
2 cloves garlic, minced
1 tablespoon cumin
2 tablespoons soy sauce
3 tablespoons HP sauce
1/2 cup ground or very finely minced pecans (did 'em in the good ole food processor)
1 1/2 cups cooked brown rice
1/2 cup dry bread crumbs
3 large eggs

Sauce for Topping Loaf:
1/2 cup ketchup
1/4 cup brown sugar
2 tablespoons apple cider vinegar

First, note that you can do all your chopping in the food processor. You might as well, because you need it anyway to get the lentils the right texture, so if it's already got to be out, you may as well take advantage of it. Do the pecans first, then do the onion, celery, and carrot, and lastly the dates, because they are sticky and you  want to minimize the cleaning effort.

1. Cook your lentils in plenty of boiling water for about 20 minutes, or until they're very soft but not yet mush. Drain them really well and set aside to drain more.

2. Meanwhile, sautee the onion, carrot, celery, and dates in the butter over medium high heat for 6-8 minutes, until things are getting soft (like the onions) and there isn't a lot of liquid. You should stir a lot to make sure all the liquid gets a chance to evaporate. Add the garlic, cumin, soy sauce, and HP sauce and cook for another minute.

3. Pulse the lentils in the food processor until they're smooth. Put them in a big bowl. Pulse the cooked vegetables in the food processor until they're smooth. Add them to the lentils in the big bowl. Mix all this well and make sure it's cool enough to not cook eggs.

4. Add the rest of the ingredients for the loaf to the bowl and mix well. Make a sling with tin foil and put it in the bottom of a loaf pan. Grease the bottom and sides of the pan for easy removal. Spoon in your loaf mixture and cook for 20 minutes at 375ºF.

5. While it's cooking, add the sauce ingredients to a small saucepan and cook on low for 5 minutes, until thickened. After your loaf has cooked for its 20 minutes, take it out and slather it with the sauce. Then put the loaf back in the oven for another 20 minutes.

6. Let it cool for about 10 minutes, then slice and serve as you would normally serve meatloaf! In our house, that means with lots of ketchup.

. Digg Technorati Delicious StumbleUpon Reddit BlinkList Furl Mixx Facebook Google Bookmark Yahoo

Tuesday, December 7, 2010

Grandma's Ginger Crisps

This is my grandma when she was around 20:


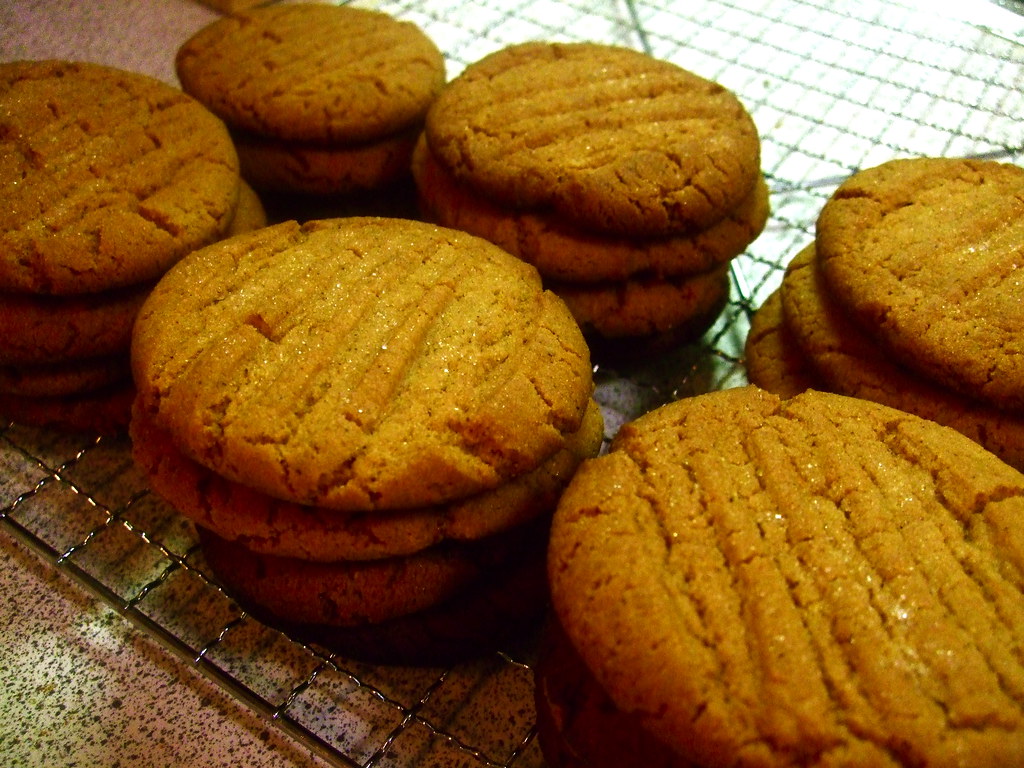
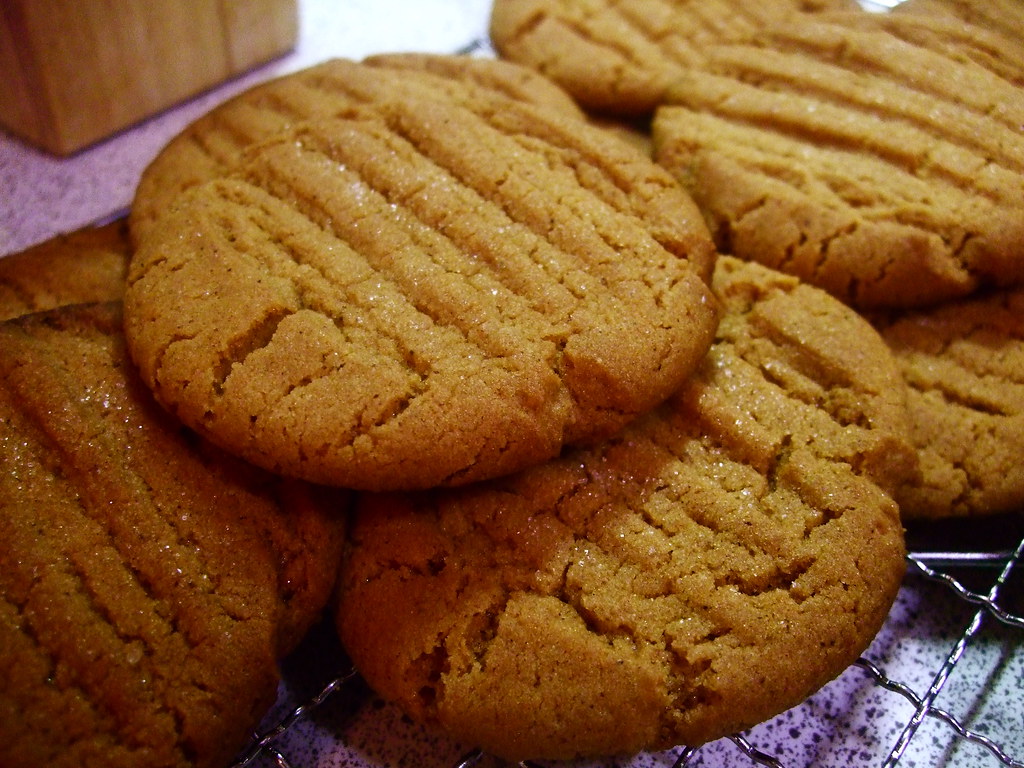
These are her cookies, which she makes every year for Christmas; every year my dad probably eats half of them. Every year I eat the other half. Not really. But I would if I had no decency. I have just enough decency.


These cookies don't have the "snap" that ginger snaps have; the cloves and cinnamon even out the ginger. The end result is a crispy, slightly chewy in the middle cookie that tastes exactly like Christmas. They are also really good on a rainy or snowy afternoon with a cup of tea, any time of the season. Now that I have acquired this highly guarded secret recipe, I can make them for snowy afternoons if I want to!


You need:

3/4 c shortening
1 c white sugar, plus a bit extra
1 egg
1/4 c molasses
2 c flour
1/2 tsp salt
2 tsp baking soda
1 tsp cinnamon
1 tsp ground cloves
1 tsp ground ginger

1. Cream the shortening and 1 cup of sugar; add the egg and molasses and mix until creamy.

2. Mix the dry ingredients together and add the dry to the wet and mix until you get something that looks like cookie dough.


3.  Lightly grease a couple of baking sheets, or line them with parchment paper. Make 1.5 tbs balls of dough and roll in some white sugar. Place the dough balls about 1.5" apart on the baking sheet. Press each ball down gently with a fork.

4. Bake for 10-12 minutes (watch them after 10 minutes!) in a 375ºF oven. Let cool, then devour them all and share them with no one. No no. I didn't mean that. I mean wrap them up and give them to friends and family in the spirit of the season.


. Digg Technorati Delicious StumbleUpon Reddit BlinkList Furl Mixx Facebook Google Bookmark Yahoo

Monday, November 29, 2010

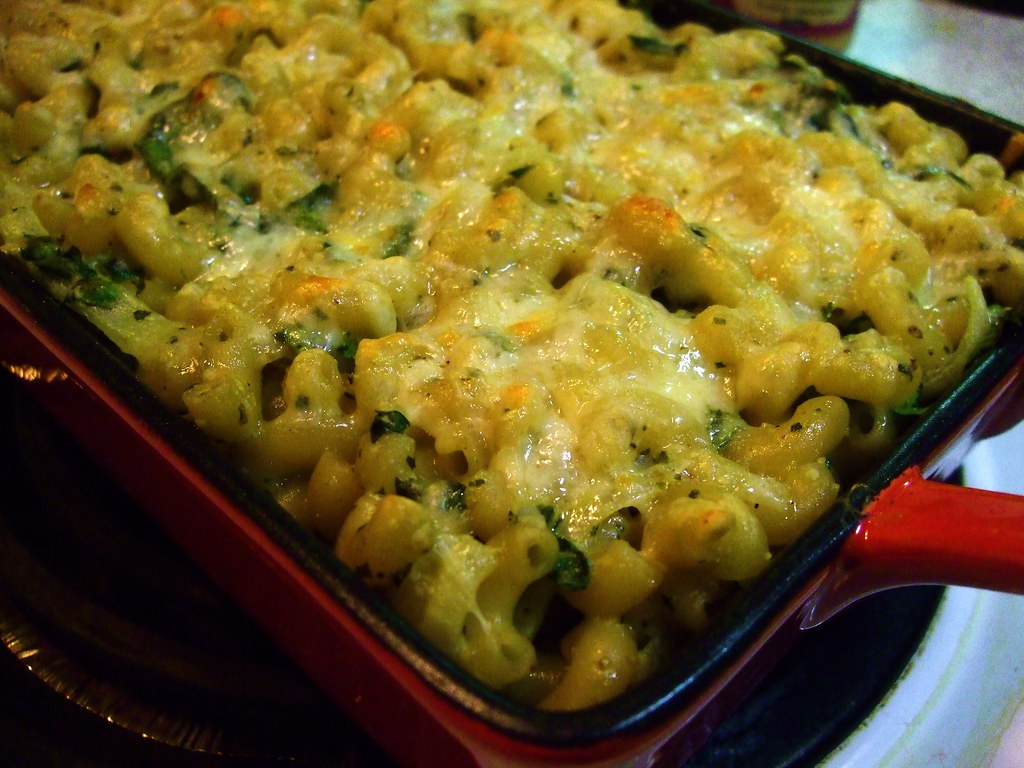
Spinach and Pesto Pasta Bake

Sorry I don't update that often. I'm kind of hoping to make some progress on this PhD so this semester has largely seen me staying at the library until it gets really dark outside, then coming home to desperate crock-pot experiments based wishful thinking and miscellaneous pantry items. I don't deem it appropriate nor healthy to post those because then one of you poor souls might actually try to recreate it and hold me responsible.

This one is good though. I can vouch for it -- recommend it, even. It's pretty quick to make (good if you are in the throes of PhD studies), and it has spinach in it, which not only is tasty but also makes you strong. Also cheese!


(Serves 2 hungry people or 4 not very hungry people. I guess it would serve three medium-hungry people)

3 cups dry small pasta, like macaroni
1/4 c heavy cream
2 tbs flour
2 tbs basil pesto
1 garlic clove, minced
1 cup grated sharp cheese
1 medium onion in thin slices
2 cups fresh spinach, roughly chopped
2 tbs butter
1/4-1/2 c milk

1. In a cast-iron pan on medium, melt 1 tbs of the butter and saute the onions and garlic until the onions are translucent. Meanwhile, cook your pasta.

2. Turn the heat to low and add the flour to the pan and cook for a minute, then add the cream and the pesto. Stir until combined and cook for 5 minutes, until thickened.

3. Add the spinach and 1/4 c milk and cook until the spinach is wilted and everything looks nice and saucy. Season with salt and pepper.


4. Put the other tbs of butter in a small casserole dish and pour the cooked, drained pasta into it to melt the butter and coat the pasta. This not only greases the casserole, but also keeps the pasta from clumping. Then add the pasta to the pan with the spinach mixture and stir to combine. At this point, if the sauce is too thick, add the rest of the milk and adjust the salt if you need to.


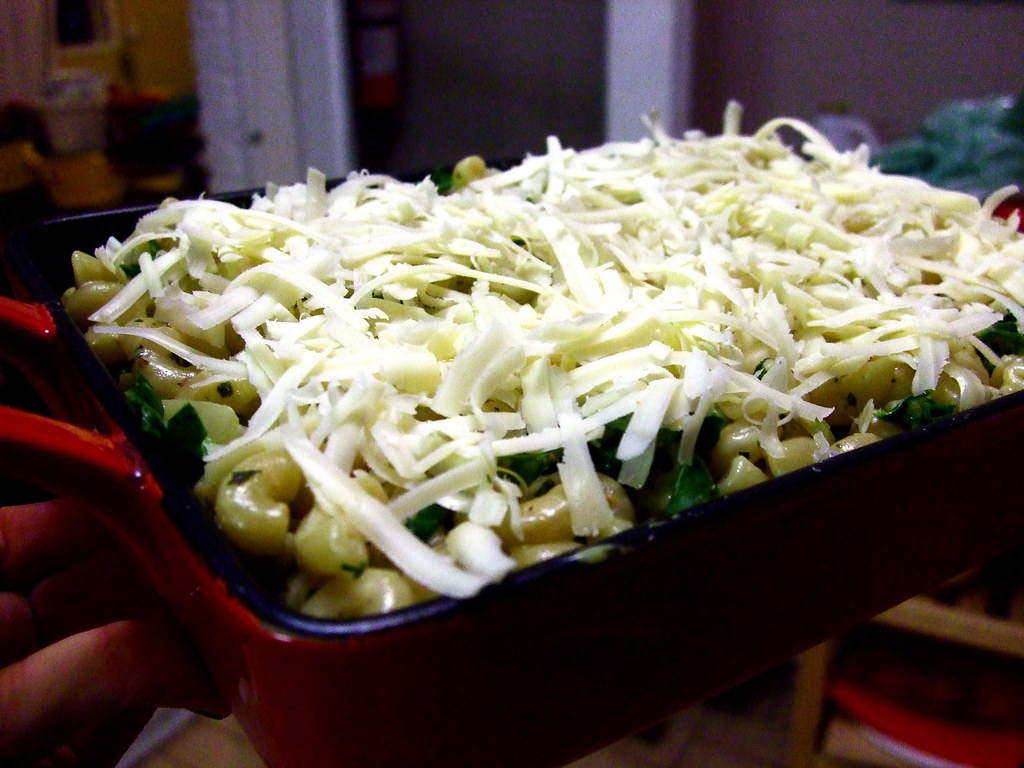
5. Pour the whole shebang back into the casserole dish and top with the grated cheese. Bake in a preheated oven (375 should do it) for 10 minutes, then broil for 2 or 3 more minutes, until the cheesey top is just starting to brown. Do let it cool a bit before digging in.

Digg Technorati Delicious StumbleUpon Reddit BlinkList Furl Mixx Facebook Google Bookmark Yahoo

Sunday, October 31, 2010

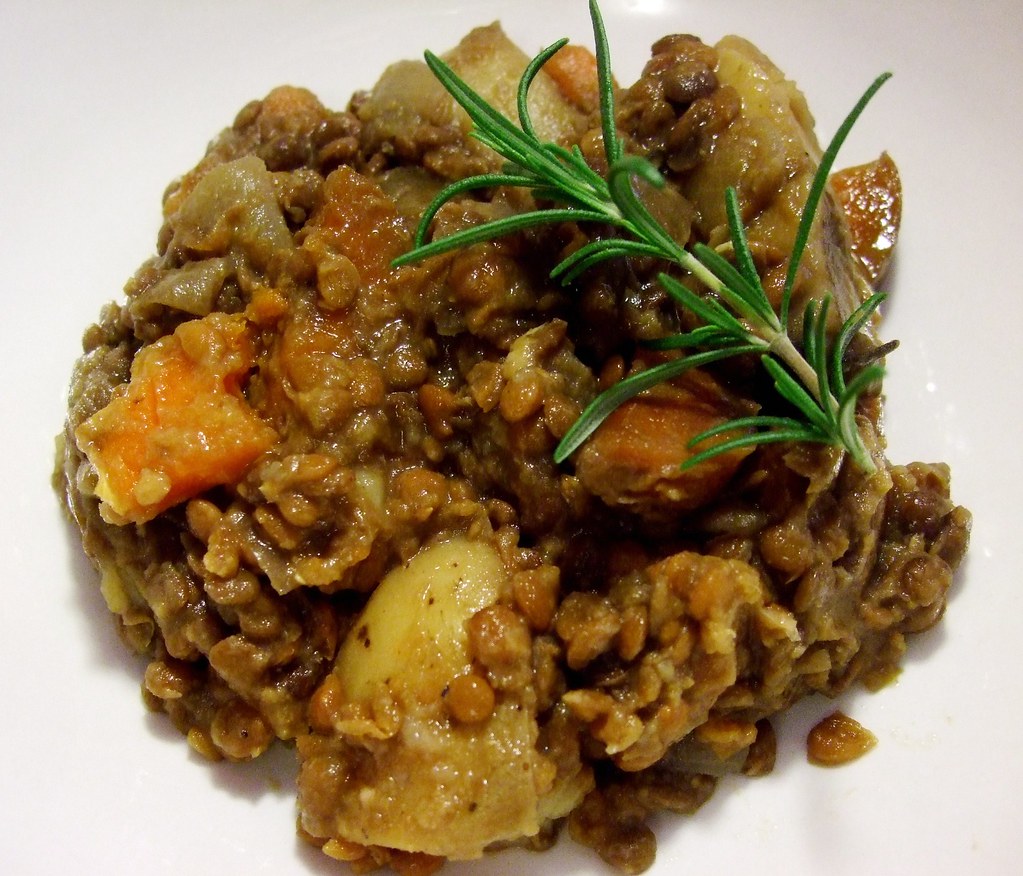
Savoury French Lentil Stew

I admit that this is not the prettiest dish. It wasn't a joy to photograph, let me tell you. But what it lacked in aesthetics it more than made up for in flavour!


It's also so seriously easy to make, largely because of my little friend, the slow cooker. You could also do this in a pot and it would still be really easy and probably just as tasty, too! But these days I just have so much going on that by the time I get home around 6 the thought of *starting* dinner makes me want to eat cookies. So my slow cooker is my friend right now. What strategies do you all use to cope with busy days and hot dinners?

This dish could be vegetarian really easily; I used beef stock because it added a depth of flavour and a richness, but vegetable stock would make this a perfect, hearty vegetarian meal.


You need (Serves 4):

3 quart slow cooker
1 tbs olive oil
1 cup French/Puy lentils, rinsed and picked over*
2 large carrots, cut in coins
3 medium potatoes, in large dice
1 medium onion, diced
2 cloves of garlic, minced
1 sprig of rosemary
1 bay leaf
4 cups beef stock or veggie stock
salt and pepper to taste


To make this in the slow cooker, put all the ingredients in the slow cooker and turn to low. Cook 8-10 hours. Done!

To make this on the stove, heat the oil in a large pot and saute the onions and the garlic until translucent. Add the rest of the ingredients and simmer until the lentils are cooked and the potatoes are soft. Done!


*Because of the long cooking time, Puy or French lentils are important because they hold their shape better than regular brown lentils, but if you don't mind mush then sub other lentils if you like.

. Digg Technorati Delicious StumbleUpon Reddit BlinkList Furl Mixx Facebook Google Bookmark Yahoo

Monday, October 4, 2010

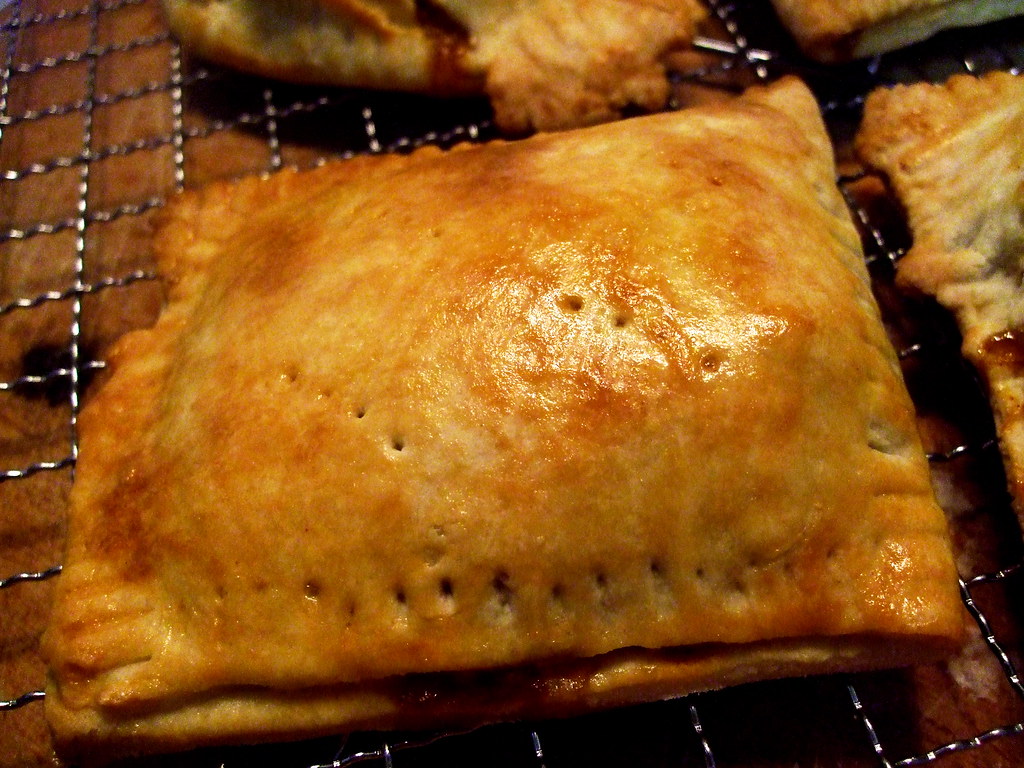
Chili Hand Pies

Or, what to do with leftover chili!


Hand pies are great because they are tiny pies. Everything is better if it is in miniature and/or in pie-form. The hand pie is superior to the regular pie in that the pie crust-to-filling ratio is greater than the traditional pot-pie, for example. This is also a great way to take chili on a picnic or to work/school for lunch, if your life is dull like mine and you don't go on picnics. It is a no mess, no cutlery way to both transport and eat delicious chili, or for that matter, any other stew-like filling.

The pastry, the recipe for which is from here, was delicious. It held together great even with the sloppy filling and was flaky as well as flavourful.

You need:


2 1/4 cups unbleached all-purpose flour
1 1/2 teaspoons salt
1 teaspoon sugar
1/2 cup cold unsalted butter, cut into 1/2-inch cubes
1 egg, slightly beaten
1/3 cup ice cold water
1.5 cups leftover chili


These instructions are from the above link; She said it so well and I followed them exactly, so here we are:

1. In a food processor fitted with the blade attachment, pulse together the flour, salt, and sugar. Add in the butter, and pulse a few times until the mixture is crumbly and resembles coarse meal. Combine the egg and water in a container (remove all ice pieces). While the processor is running, pour the water/egg mixture in and pulse until mixture just comes together.

2. Pour mixture out onto a floured board and knead a few times to bring all the ingredients together. Dough can be rolled out immediately, or it can be wrapped in plastic and refrigerated for up to 2 days.

OK now back to me.

3. Roll out the dough on a lightly floured surface until it is about 18" by 22" and 1/8" thick.

4. Use a knife to cut the dough in half, then each half into thirds so you have six pieces of dough. If they aren't all perfectly square it is fine. Mine weren't all perfectly square and they baked up nicely!

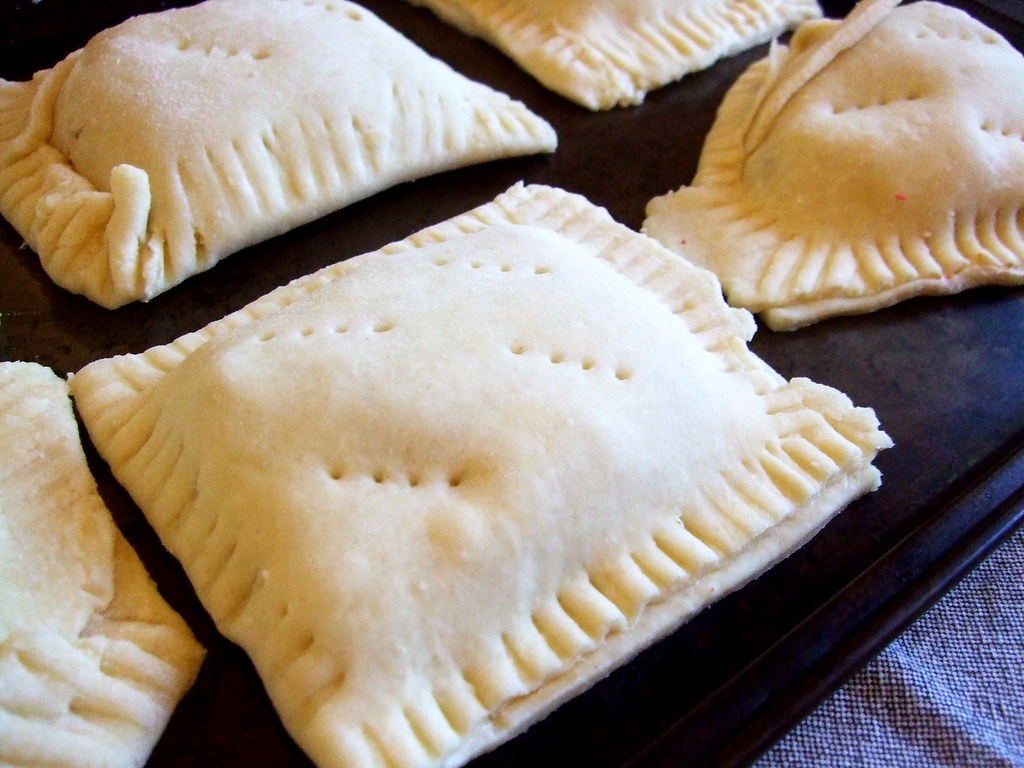
5. Spoon 1/4 cup of chili or filling of your own imagination into one side of the dough, then wet the edges with dampened fingertips and fold over the empty half to cover the filled half. Using a fork, crimp the edges to seal the dough pocket. Poke holes in the top and repeat with the other five pies.


6. Place the pies on a baking sheet and bake for 15 minutes at 425ºF. If you like, brush the tops with a beaten egg prior to baking -- that is how I made mine all shiny like that.

To reheat, ideally a toaster oven would be used, but I didn't have one this afternoon at school and used a microwave; it was still delicious.

. Digg Technorati Delicious StumbleUpon Reddit BlinkList Furl Mixx Facebook Google Bookmark Yahoo

Sunday, September 19, 2010

Onion Focaccia

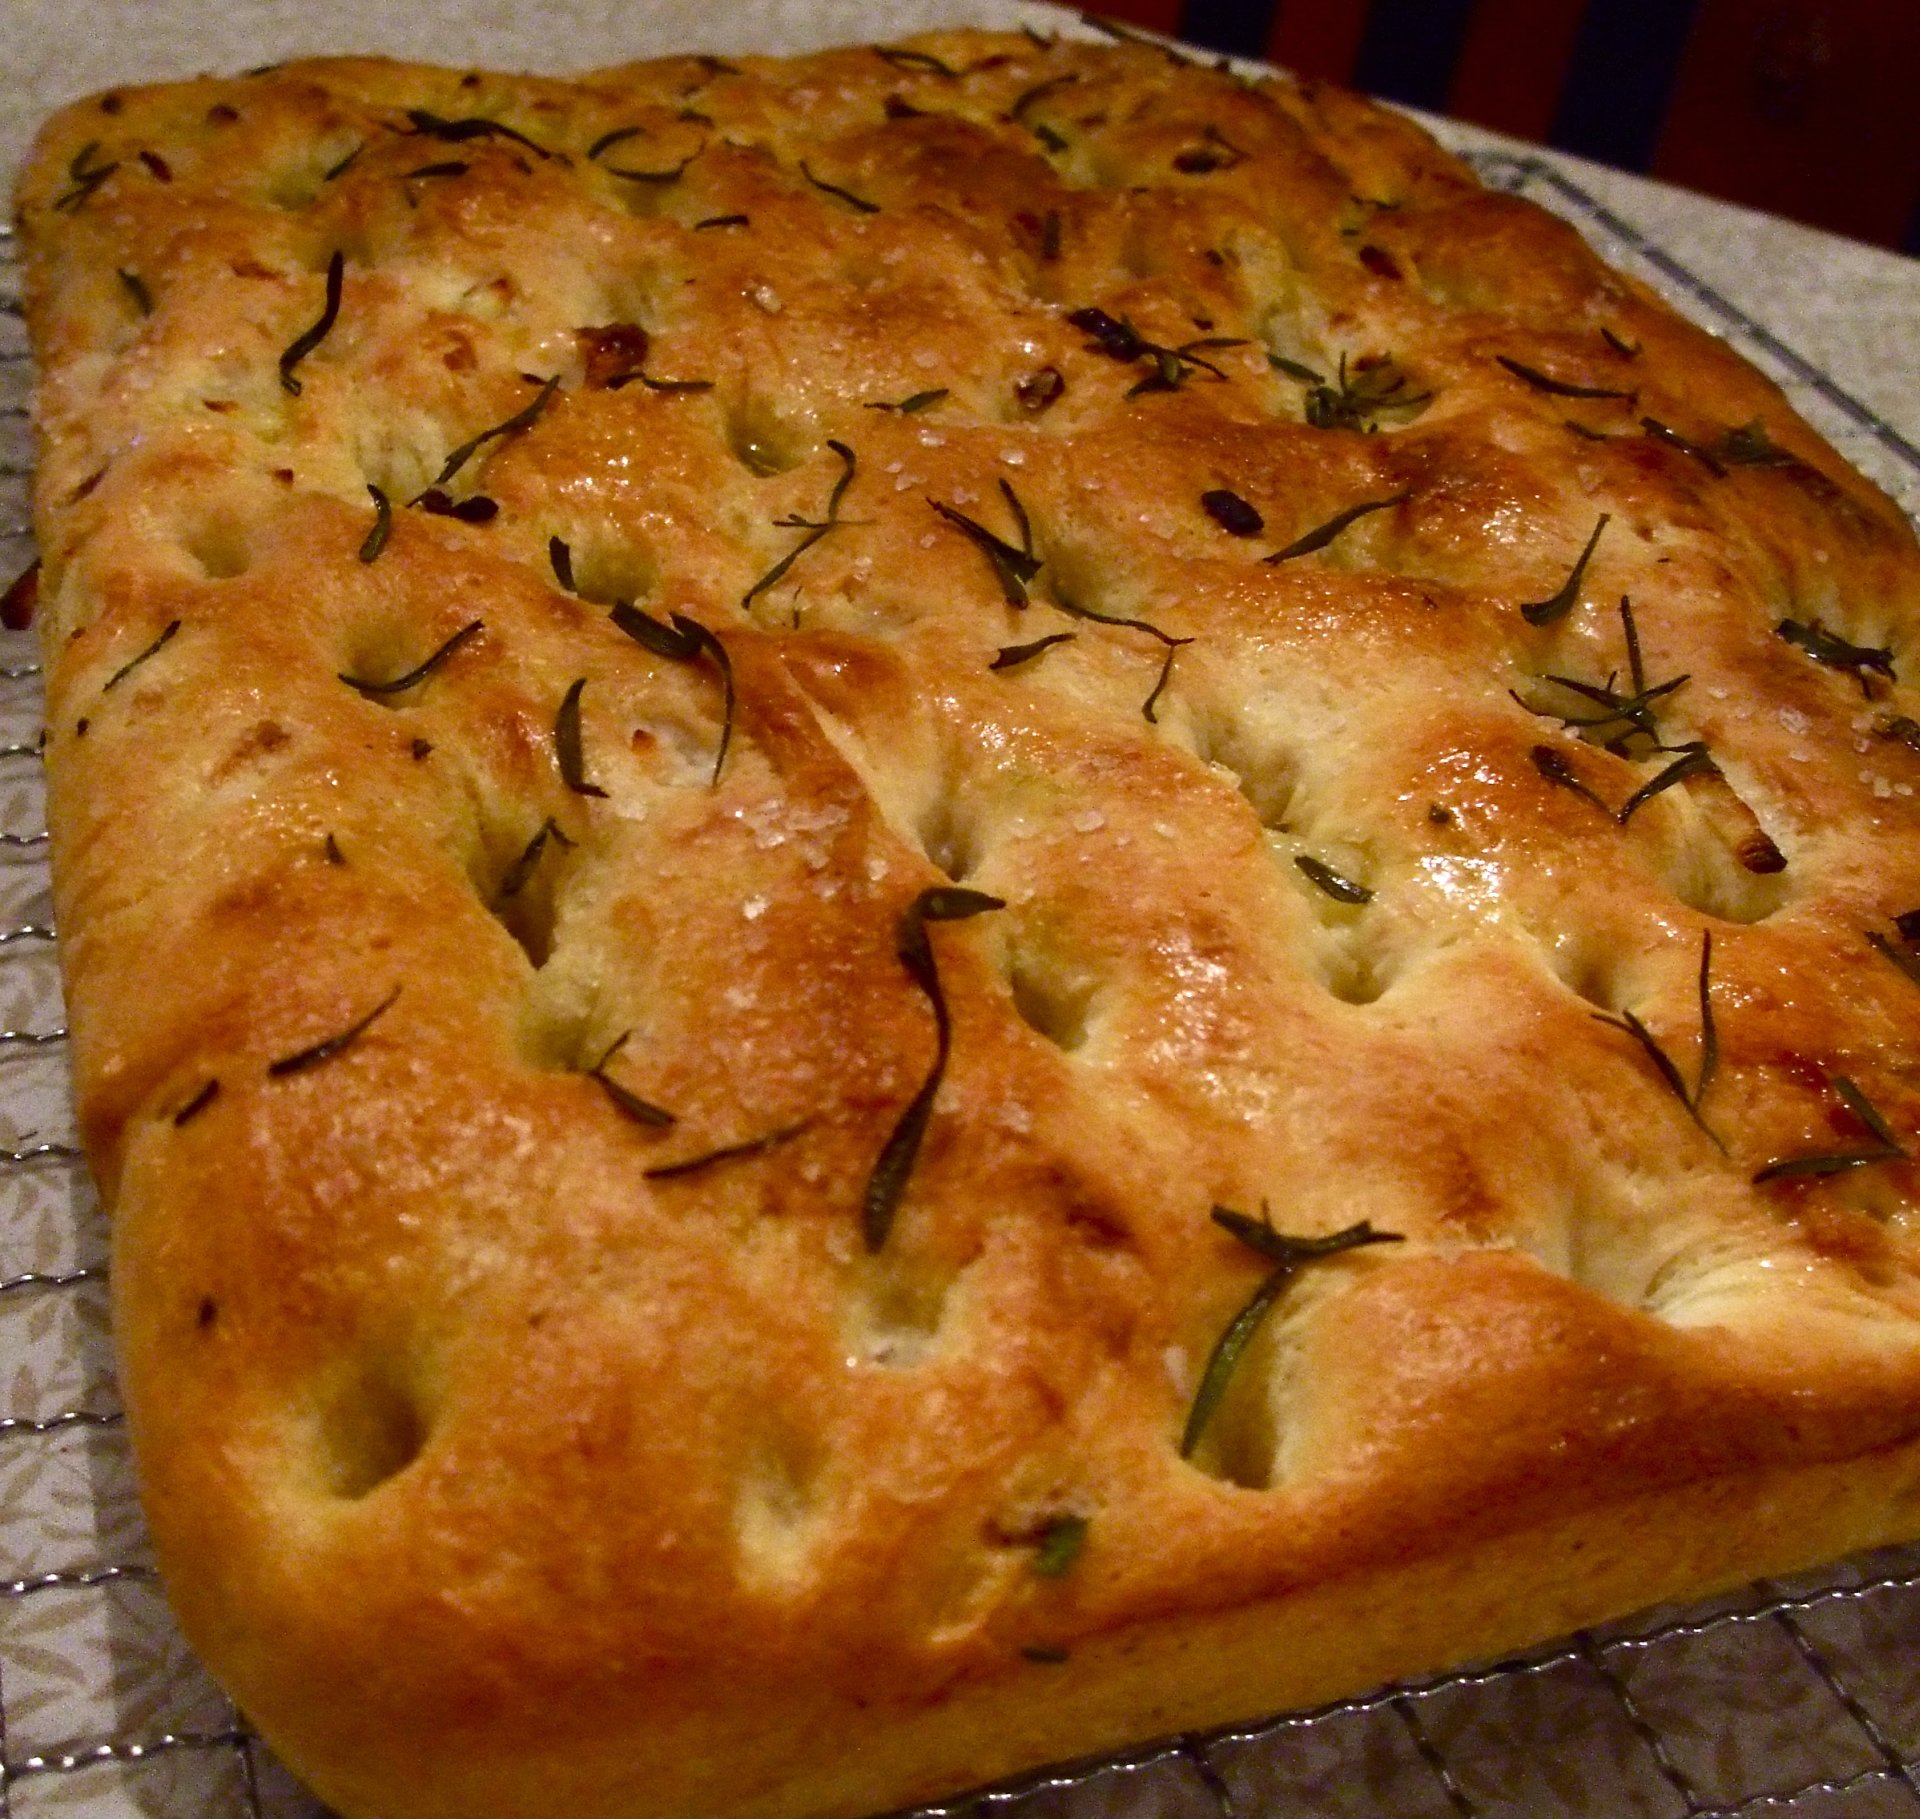
I'm not usually a focaccia fan, but this is a focaccia to write home about. Or at least share semi-anonymously with people on the internet. I think it's usually because I find focaccia really dry and this one is not, because it has DELICIOUS ONIONS baked into it as well as the traditional olive oil and salt, which also grace the top of the bread. I think I'm on an onion kick these days, what with the caramelized onion burgers from a while back.

This recipe is from a Williams-Sonoma cookbook called Bread, which is actually really good. Probably because the recipes are by Beth Hensperger. It has basic yeast breads as well as quick breads without yeast and special breads like challah and focaccia. Every recipe I've tried so far has been great. And actually, if you are going to start making bread, this is a good recipe to start with. It's pretty straight-forward.

So here, for your enjoyment, is the recipe:

You need:

1 TBS yeast
1 TBS sugar
1.5 c warm water
1/2 c good olive oil plus some for greasing and topping
1.5 TBS table salt
4-4.5 c flour
1 medium (not gigantic) yellow onion, chopped
2 sprigs of fresh rosemary
Coarse sea salt for sprinkling

1. Proof the yeast by sprinkling it over the warm water and the sugar and let it sit for 10 minutes. It should get foamy.

2. Slowly mix in the flour, the salt, and half the olive oil a bit at a time, then mix in the onion. You should end up with a really soft shaggy dough that is slightly sticky -- you don't have to add all the flour if you don't need it but do be sure to knead the bread for at least 10 minutes.

3. Put the dough in an oiled bowl and cover it. Let it rise for 20 minutes.

4. Line a heavy-rimmed baking sheet with parchment paper and brush the paper with oil. Then turn out the dough onto the sheet and press it into shape with your fingers. It should be about an inch thick all the way around. Cover it with oiled plastic wrap and let it rise again for about an hour.

5. Make nice deep indentations in the bread with your fingers, almost to the bottom of the pan. Drizzle the top with the rest of the olive oil (1/4 c) and let rise again, covered, for another 30 minutes while you preheat the oven to 425ºF.

6. Sprinkle the top of the bread with sea salt and rosemary leaves and bake for 20 to 25 minutes, until the top is nicely golden. Let it cool a bit, then slice into it and devour with gusto. It's delicious when dipped in olive oil and balsamic, but it also makes a nice sandwich bread, for a change.


.
. Digg Technorati Delicious StumbleUpon Reddit BlinkList Furl Mixx Facebook Google Bookmark Yahoo

Tuesday, August 24, 2010

Grilling Things

This time, for real! Remember a long time ago I made some burgers? And remember how I complained about having to make them inside because there was snow everywhere and I couldn't get to my barbecue? Now it's summer.


It's been summer for quite some time now, actually, and we've been using the grill a lot. We've grilled the standard burgers, but we've also branched out and tried pizzas on the grill, both rather successfully if I do say so myself. So here is the first of two posts about grilling!

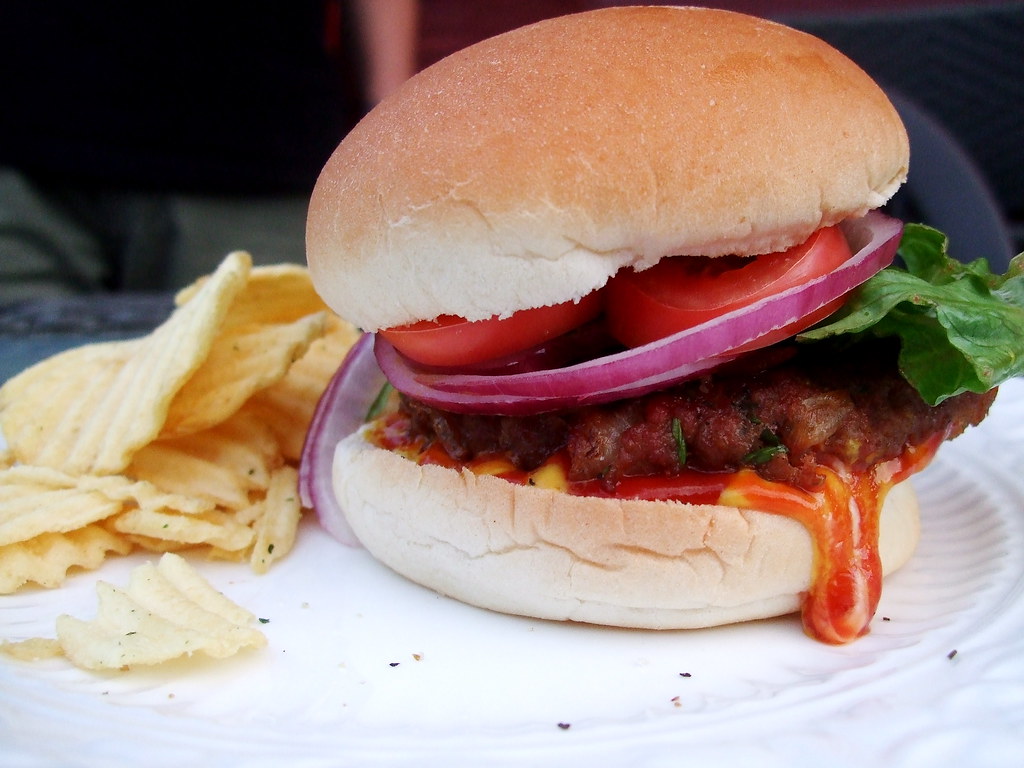
First, burgers. You can pretty much do burgers with anything ground - beans, beef, turkey, chicken - as long as you bind it and flavour it well. These are beef burgers, but they have a special twist - caramelized onions. The onions are mixed into the burgers themselves, not just plopped on top like an afterthought. And the onions are not just boring old normal caramelized - they are caramelized in bacon fat. Mmmmm...

For 6 burgers, you need:

1.5 lbs ground beef
1 large onion, thinly sliced
1 tsp white sugar
6 slices of bacon, cut in half
1.5 cups breadcrumbs
1 egg
1 tsp powdered mustard
1 TBS Worcestershire sauce
1 TBS HP sauce
1 TBS finely minced chives
1 tsp finely minced basil
1/2 tsp cinnamon (trust me, it's good)

1. In a skillet, preferably cast iron, cook the bacon slowly over low heat until it is crispy and the fat is rendered. Remove the bacon and drain it on paper towels. Pour out all but 1 TBS of the fat and saute the onions over low with the sugar until they are golden brown and translucent - this takes a long time - like an hour - but it is worth it. Let the onions cool down until they are room temperature.

2. In a large bowl, mix all the ingredients together including the onions but not the bacon - that's for putting on your burgers later. I find your hands work best for this - just remember to take off any rings before you get all up in the beefiness. If you find that the mixture is too loose, add some more breadcrumbs.


3. With a plate at the ready, form the mixture into 6 patties. Make sure they are of even thickness so the edges don't get dry while the insides stay raw.


4. Heat up your grill and slap those patties on there. After flipping them once, you can top the patties with a couple of slices of cheese and those bacon slices you cooked a while back. Or you can brush them with barbecue sauce, or both! Top as you like - we had fresh tomatoes from the garden, lettuce, and the other customary accoutrements of burger-eating, like ketchup, mayo and mustard. There may have even been some pickles involved.

Digg Technorati Delicious StumbleUpon Reddit BlinkList Furl Mixx Facebook Google Bookmark Yahoo