I'm sure this recipe is as old as tinned soup itself, but there's just something deliciously comforting about this meal.
Recipe:
1 can cream of mushroom soup
1 soup-can water
1 soup-can full of uncooked arborio or short-grain rice
as many chicken thighs as you like - i used 6 small boneless skinless thighs
1 tbs oil for frying
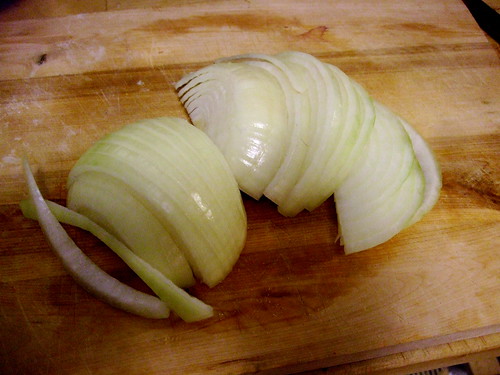
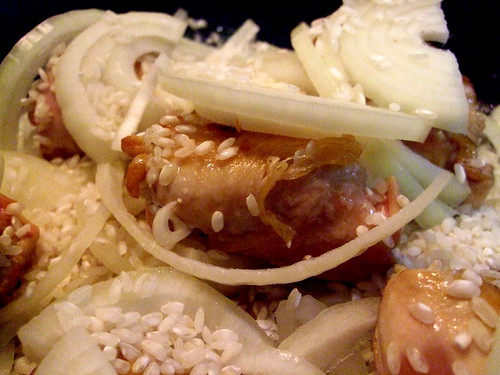
1 large raw onion, sliced finely (or more if you like - i used 1.5 because i like onion)
salt and pepper to taste
1. Preheat the oven to 375F.
2. Trim the chicken if you like. Heat oil in the pan to medium/medium high. I use a Le Creuset so it's all in one pan from start to finish, but you can do what you like! A skillet and a casserole dish work just as well, but it's best if the casserole has a lid, or at least a good covering of foil.
3. Sear the chicken on one side until brown and a bit crispy, and then the other side - about 5 minutes per side. Set aside on a plate. While you're doing the chicken, slice up your onion into thin slices.

4. To the same pan, add your can of soup and your water. Reduce heat a bit and deglaze, scraping up the brown bits from the chicken.
5. If you're using the same dish for everything, like I did, pour the soup out into a measuring cup/mixing bowl so that your baking dish is empty. If you're using a different dish for the baking, get it out now.
6. Lay down 1/4 of the onions in your casserole and sprinkle 1/4 of the rice over top. Plop in the chicken pieces, cover with more onion and rice until you've used them up.
7. Pour the soup mixture over the contents, making sure that the rice is covered, especially at the edges. it is not possible for me to take a picture of this step without it looking gross, so I'll leave that one to the imagination.
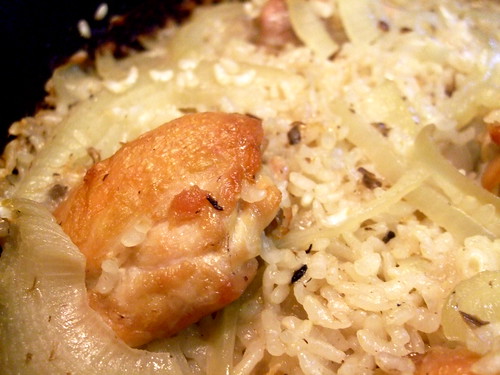
8. Cover the casserole and stick that baby in the oven. Check it after 45 minutes and test the rice for done-ness. It may need 10 more minutes, it may not. You should have some liquid left over by the time the rice is done.
Serve hot with salad. This makes great leftovers, too, and freezes well.
1 can cream of mushroom soup
1 soup-can water
1 soup-can full of uncooked arborio or short-grain rice
as many chicken thighs as you like - i used 6 small boneless skinless thighs
1 tbs oil for frying
1 large raw onion, sliced finely (or more if you like - i used 1.5 because i like onion)
salt and pepper to taste
1. Preheat the oven to 375F.
2. Trim the chicken if you like. Heat oil in the pan to medium/medium high. I use a Le Creuset so it's all in one pan from start to finish, but you can do what you like! A skillet and a casserole dish work just as well, but it's best if the casserole has a lid, or at least a good covering of foil.
3. Sear the chicken on one side until brown and a bit crispy, and then the other side - about 5 minutes per side. Set aside on a plate. While you're doing the chicken, slice up your onion into thin slices.
4. To the same pan, add your can of soup and your water. Reduce heat a bit and deglaze, scraping up the brown bits from the chicken.
5. If you're using the same dish for everything, like I did, pour the soup out into a measuring cup/mixing bowl so that your baking dish is empty. If you're using a different dish for the baking, get it out now.
6. Lay down 1/4 of the onions in your casserole and sprinkle 1/4 of the rice over top. Plop in the chicken pieces, cover with more onion and rice until you've used them up.
7. Pour the soup mixture over the contents, making sure that the rice is covered, especially at the edges. it is not possible for me to take a picture of this step without it looking gross, so I'll leave that one to the imagination.
8. Cover the casserole and stick that baby in the oven. Check it after 45 minutes and test the rice for done-ness. It may need 10 more minutes, it may not. You should have some liquid left over by the time the rice is done.
Serve hot with salad. This makes great leftovers, too, and freezes well.