Showing posts with label cookies. Show all posts

Sunday, March 3, 2013

Grandmaw's Oatmeal Cookies

First of all, sorry for the long hiatus. It's been an intentional break to try to get my dissertation done, and it's working so far. I'm just breaking my "fast" to post these awesome cookies because they deserve to be on here.


Instagram photo because (1) I'm kind of lazy and (2) my camera needs to go to the repair shop since I dropped it in Ireland over the summer.

But seriously, don't let that stop you from making these quick and delicious cookies. YOU DON'T EVEN NEED EGGS. The recipe is my great-grandmother's, and I remember eating these when I was little and we went for tea at her house. My mom used to make these too. She still does, actually. Hi mom!

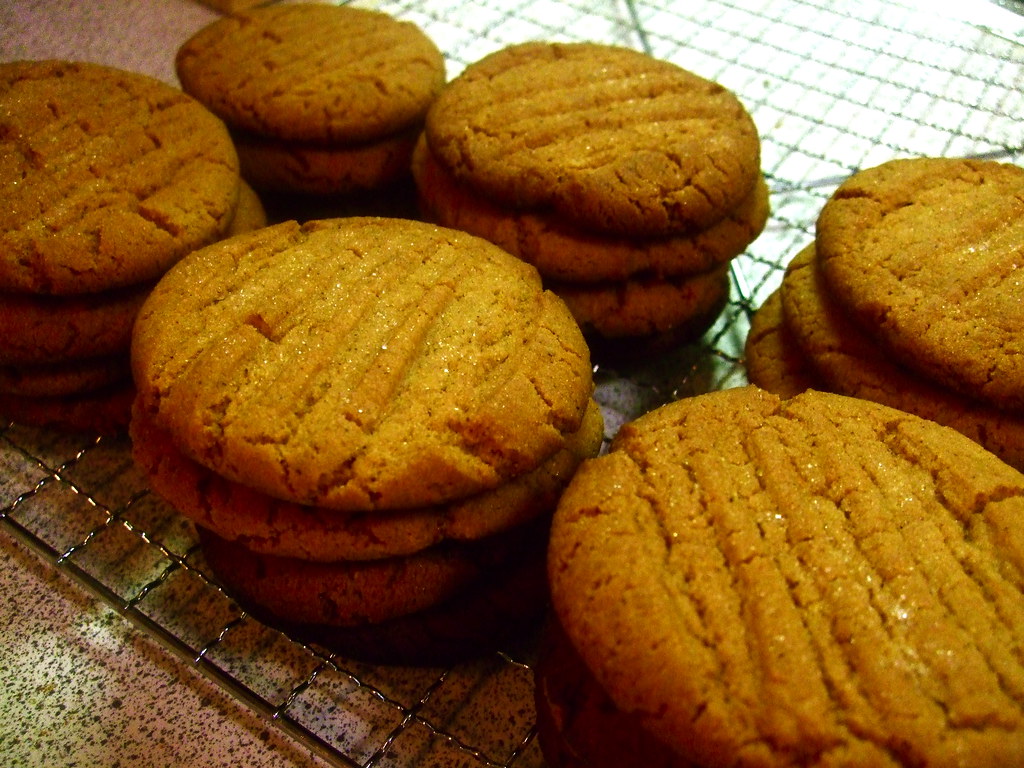
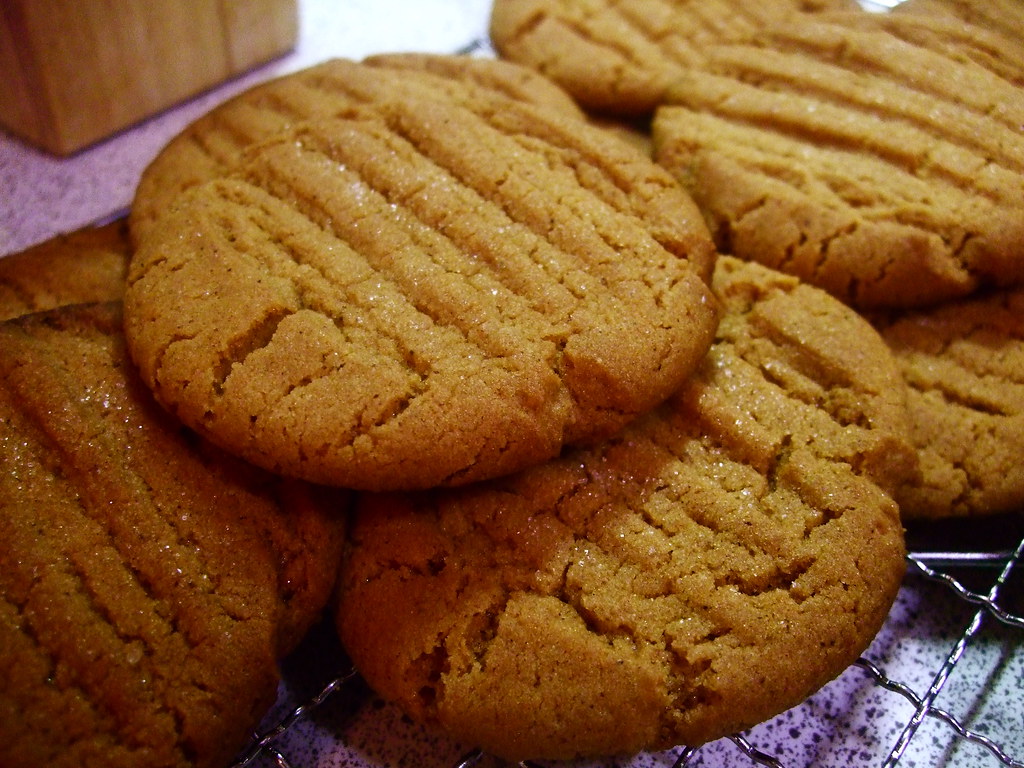
These are a very crumbly, spiced biscuit, great with tea in the afternoon. They come together very quickly in one bowl and you don't even need to grease the pan.


Ingredients:

1/2 c softened butter
1/2 c firmly packed brown sugar
1/2 tsp baking soda dissolved in 2 tbs hot water
1/2 tsp vanilla
1 c white flour
1 c oats
1/4 c dried coconut (unsweetened)
1/8 tsp (heaping) nutmeg


1. Preheat oven to 300ºF.

2. Cream butter and sugar until well mixed, then add in the baking soda mixture and the vanilla.

3. Stir in the flour, oats, and coconut. Mix. You'll have a crumbly-looking dough but don't worry.

4. Using your hands, form walnut sized balls of the dough. I find it works best if you flatten them a little bit so you have kind of a fat disk of dough, about 1 cm thick. If you are having trouble, you can add a tiny bit more water to help the dough form, but be careful not to add too much—1/4 tsp at a time!

5. Arrange the first batch on your ungreased baking sheet and then GENTLY press down on each cookie with a fork dipped in milk (to prevent sticking). This pressing gives the cookies their crumbled-looking edges. Don't press too hard or the cookie might fall apart.

6. Bake for 15 minutes, then let cool slightly on the pan before moving to a cooling rack and doing your second batch.


This amount of ingredients gives 2 dozen; the original recipe is double this and obviously gives 4 dozen, but we are only 2 people and 48 cookies is a lot for us.

Let me know how you like them!

. Digg Technorati Delicious StumbleUpon Reddit BlinkList Furl Mixx Facebook Google Bookmark Yahoo

Tuesday, December 7, 2010

Grandma's Ginger Crisps

This is my grandma when she was around 20:


These are her cookies, which she makes every year for Christmas; every year my dad probably eats half of them. Every year I eat the other half. Not really. But I would if I had no decency. I have just enough decency.


These cookies don't have the "snap" that ginger snaps have; the cloves and cinnamon even out the ginger. The end result is a crispy, slightly chewy in the middle cookie that tastes exactly like Christmas. They are also really good on a rainy or snowy afternoon with a cup of tea, any time of the season. Now that I have acquired this highly guarded secret recipe, I can make them for snowy afternoons if I want to!


You need:

3/4 c shortening
1 c white sugar, plus a bit extra
1 egg
1/4 c molasses
2 c flour
1/2 tsp salt
2 tsp baking soda
1 tsp cinnamon
1 tsp ground cloves
1 tsp ground ginger

1. Cream the shortening and 1 cup of sugar; add the egg and molasses and mix until creamy.

2. Mix the dry ingredients together and add the dry to the wet and mix until you get something that looks like cookie dough.


3.  Lightly grease a couple of baking sheets, or line them with parchment paper. Make 1.5 tbs balls of dough and roll in some white sugar. Place the dough balls about 1.5" apart on the baking sheet. Press each ball down gently with a fork.

4. Bake for 10-12 minutes (watch them after 10 minutes!) in a 375ºF oven. Let cool, then devour them all and share them with no one. No no. I didn't mean that. I mean wrap them up and give them to friends and family in the spirit of the season.


. Digg Technorati Delicious StumbleUpon Reddit BlinkList Furl Mixx Facebook Google Bookmark Yahoo

Tuesday, March 24, 2009

(To be read aloud in a Julia Child voice)

Here's another one from the archives: Peanut-butter M&M cookies, with grouchy commentary.

------------

I think we've all had a tough day today - I know I have.

So take some time for yourself this evening, and soothe that aching tummy and head by pouring yourself a glass of wine and settling down to some baking. Don't you love baking?

Tonight, since the IBS is acting up after a stressful day, I think we'll make something easy - both on the intellect *and* the gut. I think other sufferers out there will agree with me when I say that a good cure for the daily aches is a high-fat, high-chocolate treat that's fun to eat! (/sarcasm)

So, dear readers, I present you with dithie's not-so-famous-but-nonetheless-yummy no-fail peanut-butter m & m cookies, adapted from that down-to-earth baking blog, kraft.com.

Ingredients:
1 cup PB
1 cup butter*
1 cup white sugar
1 cup packed brown sugar
2.5 cups flour
1 tsp baking powder
1 tsp baking soda
2 eggs
1 tsp vanilla
.5 tsp salt.
3-6 packets of peanut M & Ms

1. Pour yourself a large glass of wine and take three Midols. This step is crucial.
2. Preheat your oven to 350 F or 180 C.
3. Admire your KitchenAid mixer. It's important for it to feel appreciated before you begin.
4. Go to the deppanneur and get butter. I can't believe you forgot to get butter.
5. Soften the butter and cream it together with the PB and sugars.
6. Taste the batter. It's important to taste the batter at every stage.
7. Add in vanilla and eggs. Mix in well.
8. Pretend salmonella is a figment of your mother's imagination and taste the batter again. At this stage, it should be shiney and beyond delicious.
9. Walk to the pantry and knock over your recycling bin.
10. Avoiding the spilled cans and papers, reach for the flour and add it, with the other dry goods, into the delicious PB batter.
11. Taste the batter. Make sure it is delicious. If it is delicious, it is now time to add the M & Ms. If not, taste again until sure.
12. Form perfect little balls of dough with your hands and place them on oiled cookie sheets. Place them at awkward distances from each other, so that you are not sure if, when they bake, they will smoosh together into a Giant Cookie. This adds to the excitement, and is good for your tummy.
13. At this point, you may need to refill your wine glass. Don't worry, I'll wait.
14. Press the cookies down with forks.
15. Bake the cookies with the oven light on. Don't set the timer; just watch them until they look kind of golden, then take them out and look at them. Alternately, you may choose to watch a few minutes of an episode of Buffy. In that case, watch until they figure out that something bad is going to happen, and then take the cookies out. It should be about 10 minutes, depending on the season.
16. Instead of reusing the old pans, get out new cookie pans and put in another batch. This way, there are more dishes to do later.
17. After the pans are cool to the touch, try to find somewhere to cool the cookies. Good luck, because your counter space is probably limitied. I know mine is! Settle for various random surfaces.
17.5. You may have noticed that your cookies have, in fact, glommed into Giant Cookie. Do not let this distress you. Instead, simply mash apart the cookies with your spatula, and pretend that they look just as beautiful as you had imagined.
18. Attempt to eat a cookie and burn your tongue. Patience, patience!
19. At this point, the wine and the midol should have kicked in, and your tummy should feel slightly better. Once this has happened, return to your episode of Buffy, if watching.

* note the butter content: so far, 1:1 with sugar.


Digg Technorati Delicious StumbleUpon Reddit BlinkList Furl Mixx Facebook Google Bookmark Yahoo