Showing posts with label bread. Show all posts

Sunday, September 19, 2010

Onion Focaccia

I'm not usually a focaccia fan, but this is a focaccia to write home about. Or at least share semi-anonymously with people on the internet. I think it's usually because I find focaccia really dry and this one is not, because it has DELICIOUS ONIONS baked into it as well as the traditional olive oil and salt, which also grace the top of the bread. I think I'm on an onion kick these days, what with the caramelized onion burgers from a while back.

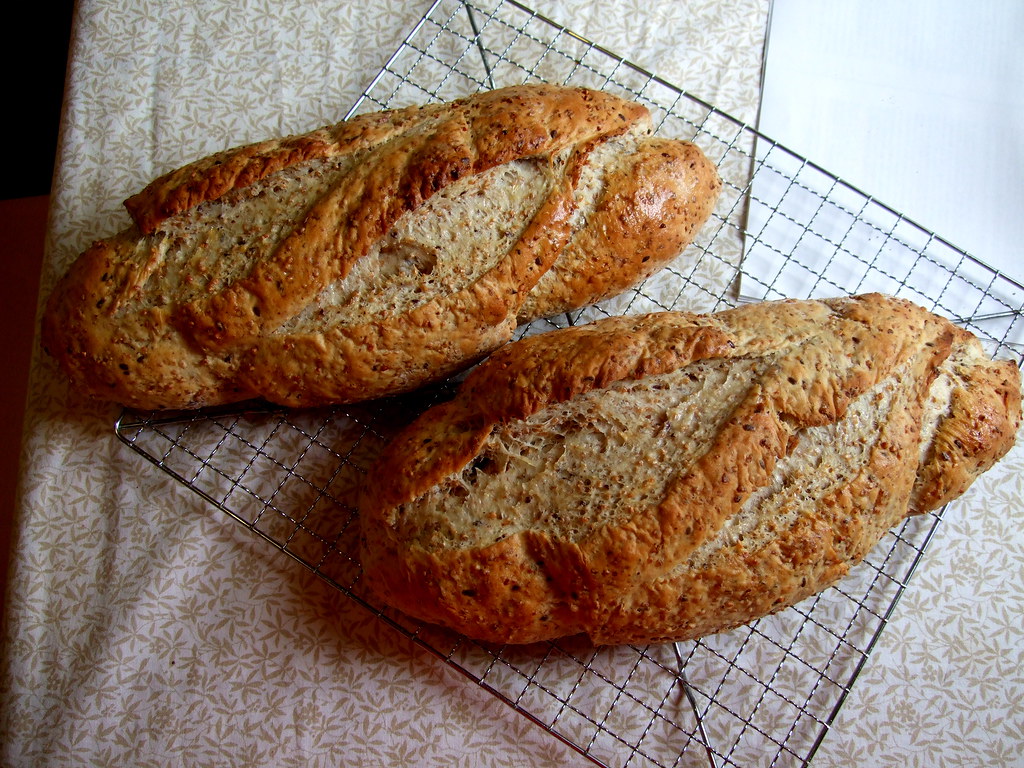
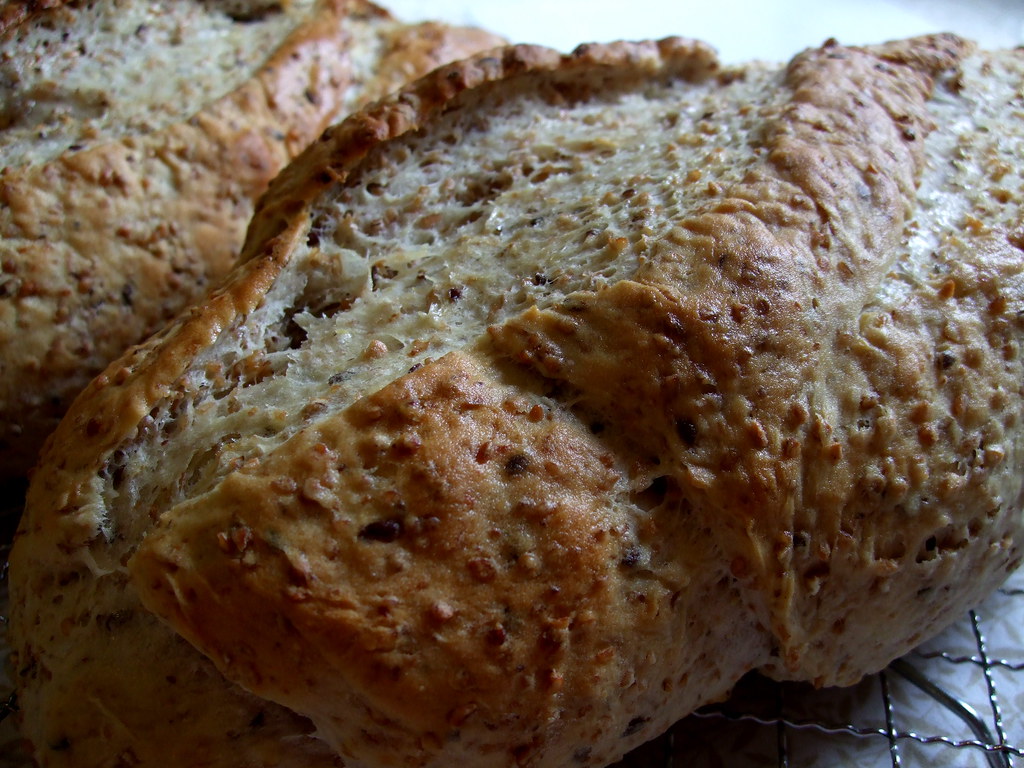
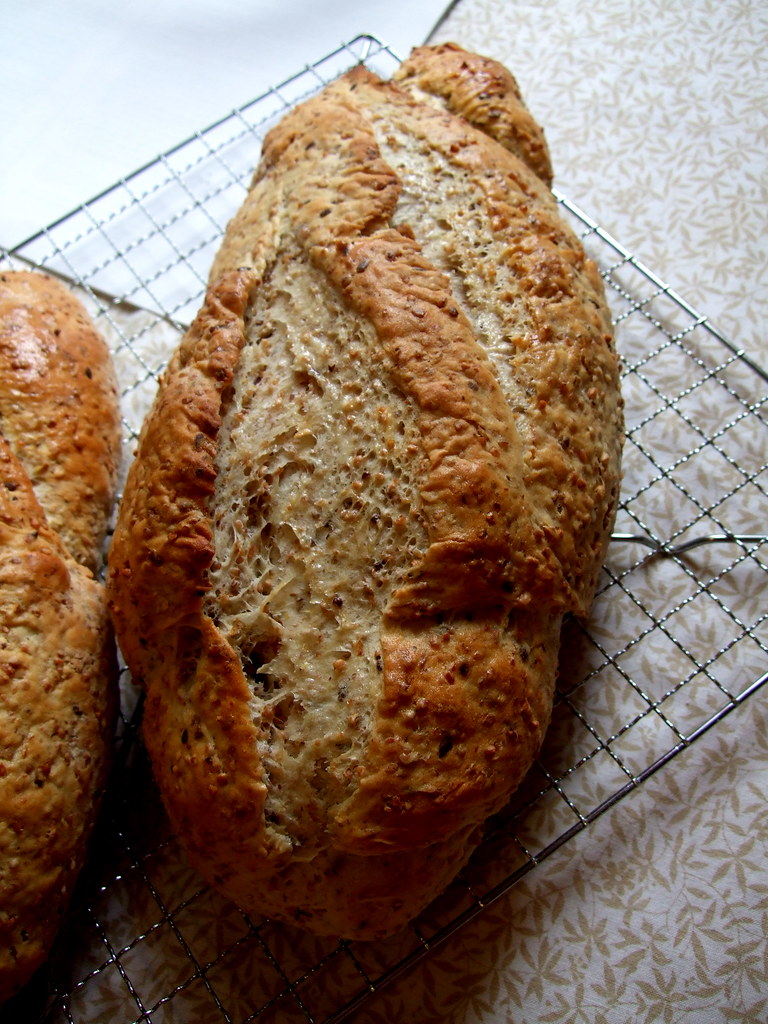
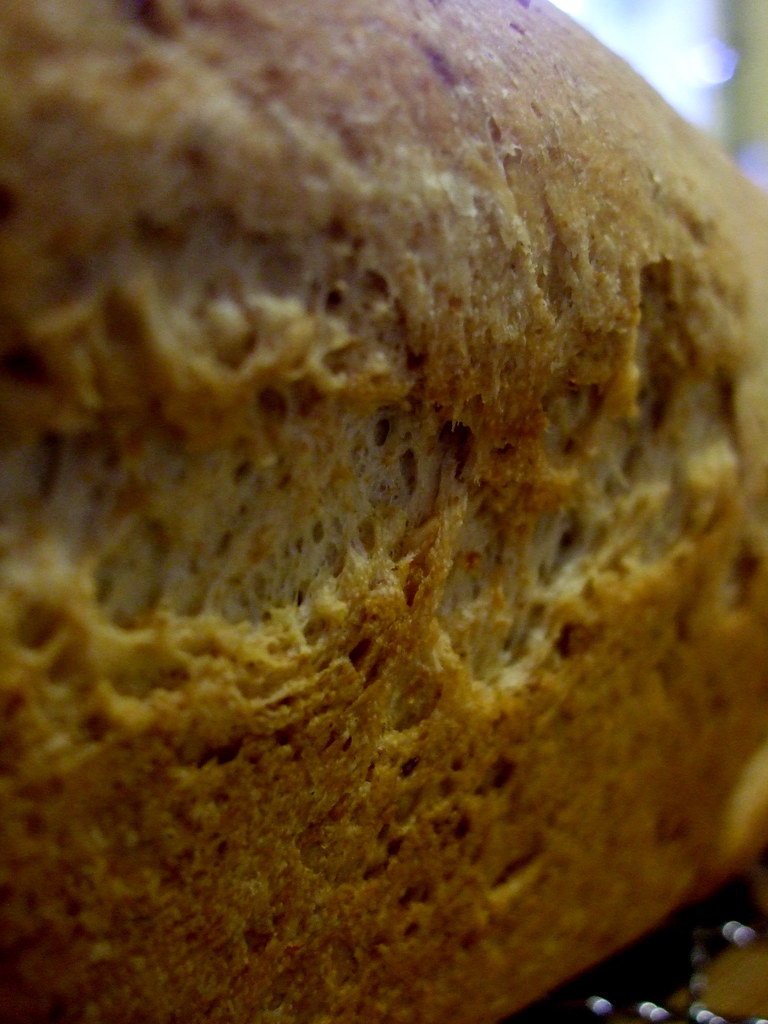
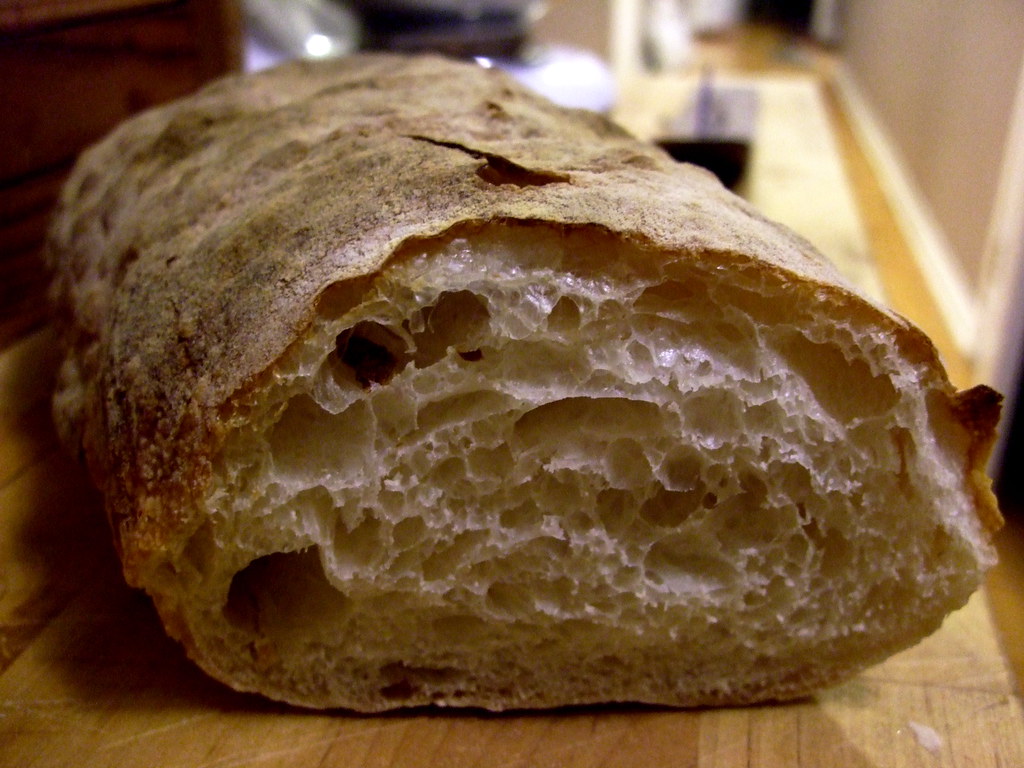
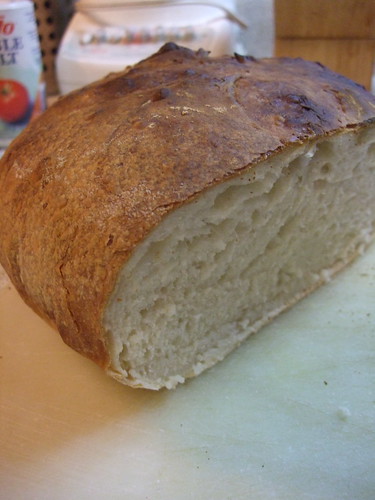
This recipe is from a Williams-Sonoma cookbook called Bread, which is actually really good. Probably because the recipes are by Beth Hensperger. It has basic yeast breads as well as quick breads without yeast and special breads like challah and focaccia. Every recipe I've tried so far has been great. And actually, if you are going to start making bread, this is a good recipe to start with. It's pretty straight-forward.

So here, for your enjoyment, is the recipe:

You need:

1 TBS yeast
1 TBS sugar
1.5 c warm water
1/2 c good olive oil plus some for greasing and topping
1.5 TBS table salt
4-4.5 c flour
1 medium (not gigantic) yellow onion, chopped
2 sprigs of fresh rosemary
Coarse sea salt for sprinkling

1. Proof the yeast by sprinkling it over the warm water and the sugar and let it sit for 10 minutes. It should get foamy.

2. Slowly mix in the flour, the salt, and half the olive oil a bit at a time, then mix in the onion. You should end up with a really soft shaggy dough that is slightly sticky -- you don't have to add all the flour if you don't need it but do be sure to knead the bread for at least 10 minutes.

3. Put the dough in an oiled bowl and cover it. Let it rise for 20 minutes.

4. Line a heavy-rimmed baking sheet with parchment paper and brush the paper with oil. Then turn out the dough onto the sheet and press it into shape with your fingers. It should be about an inch thick all the way around. Cover it with oiled plastic wrap and let it rise again for about an hour.

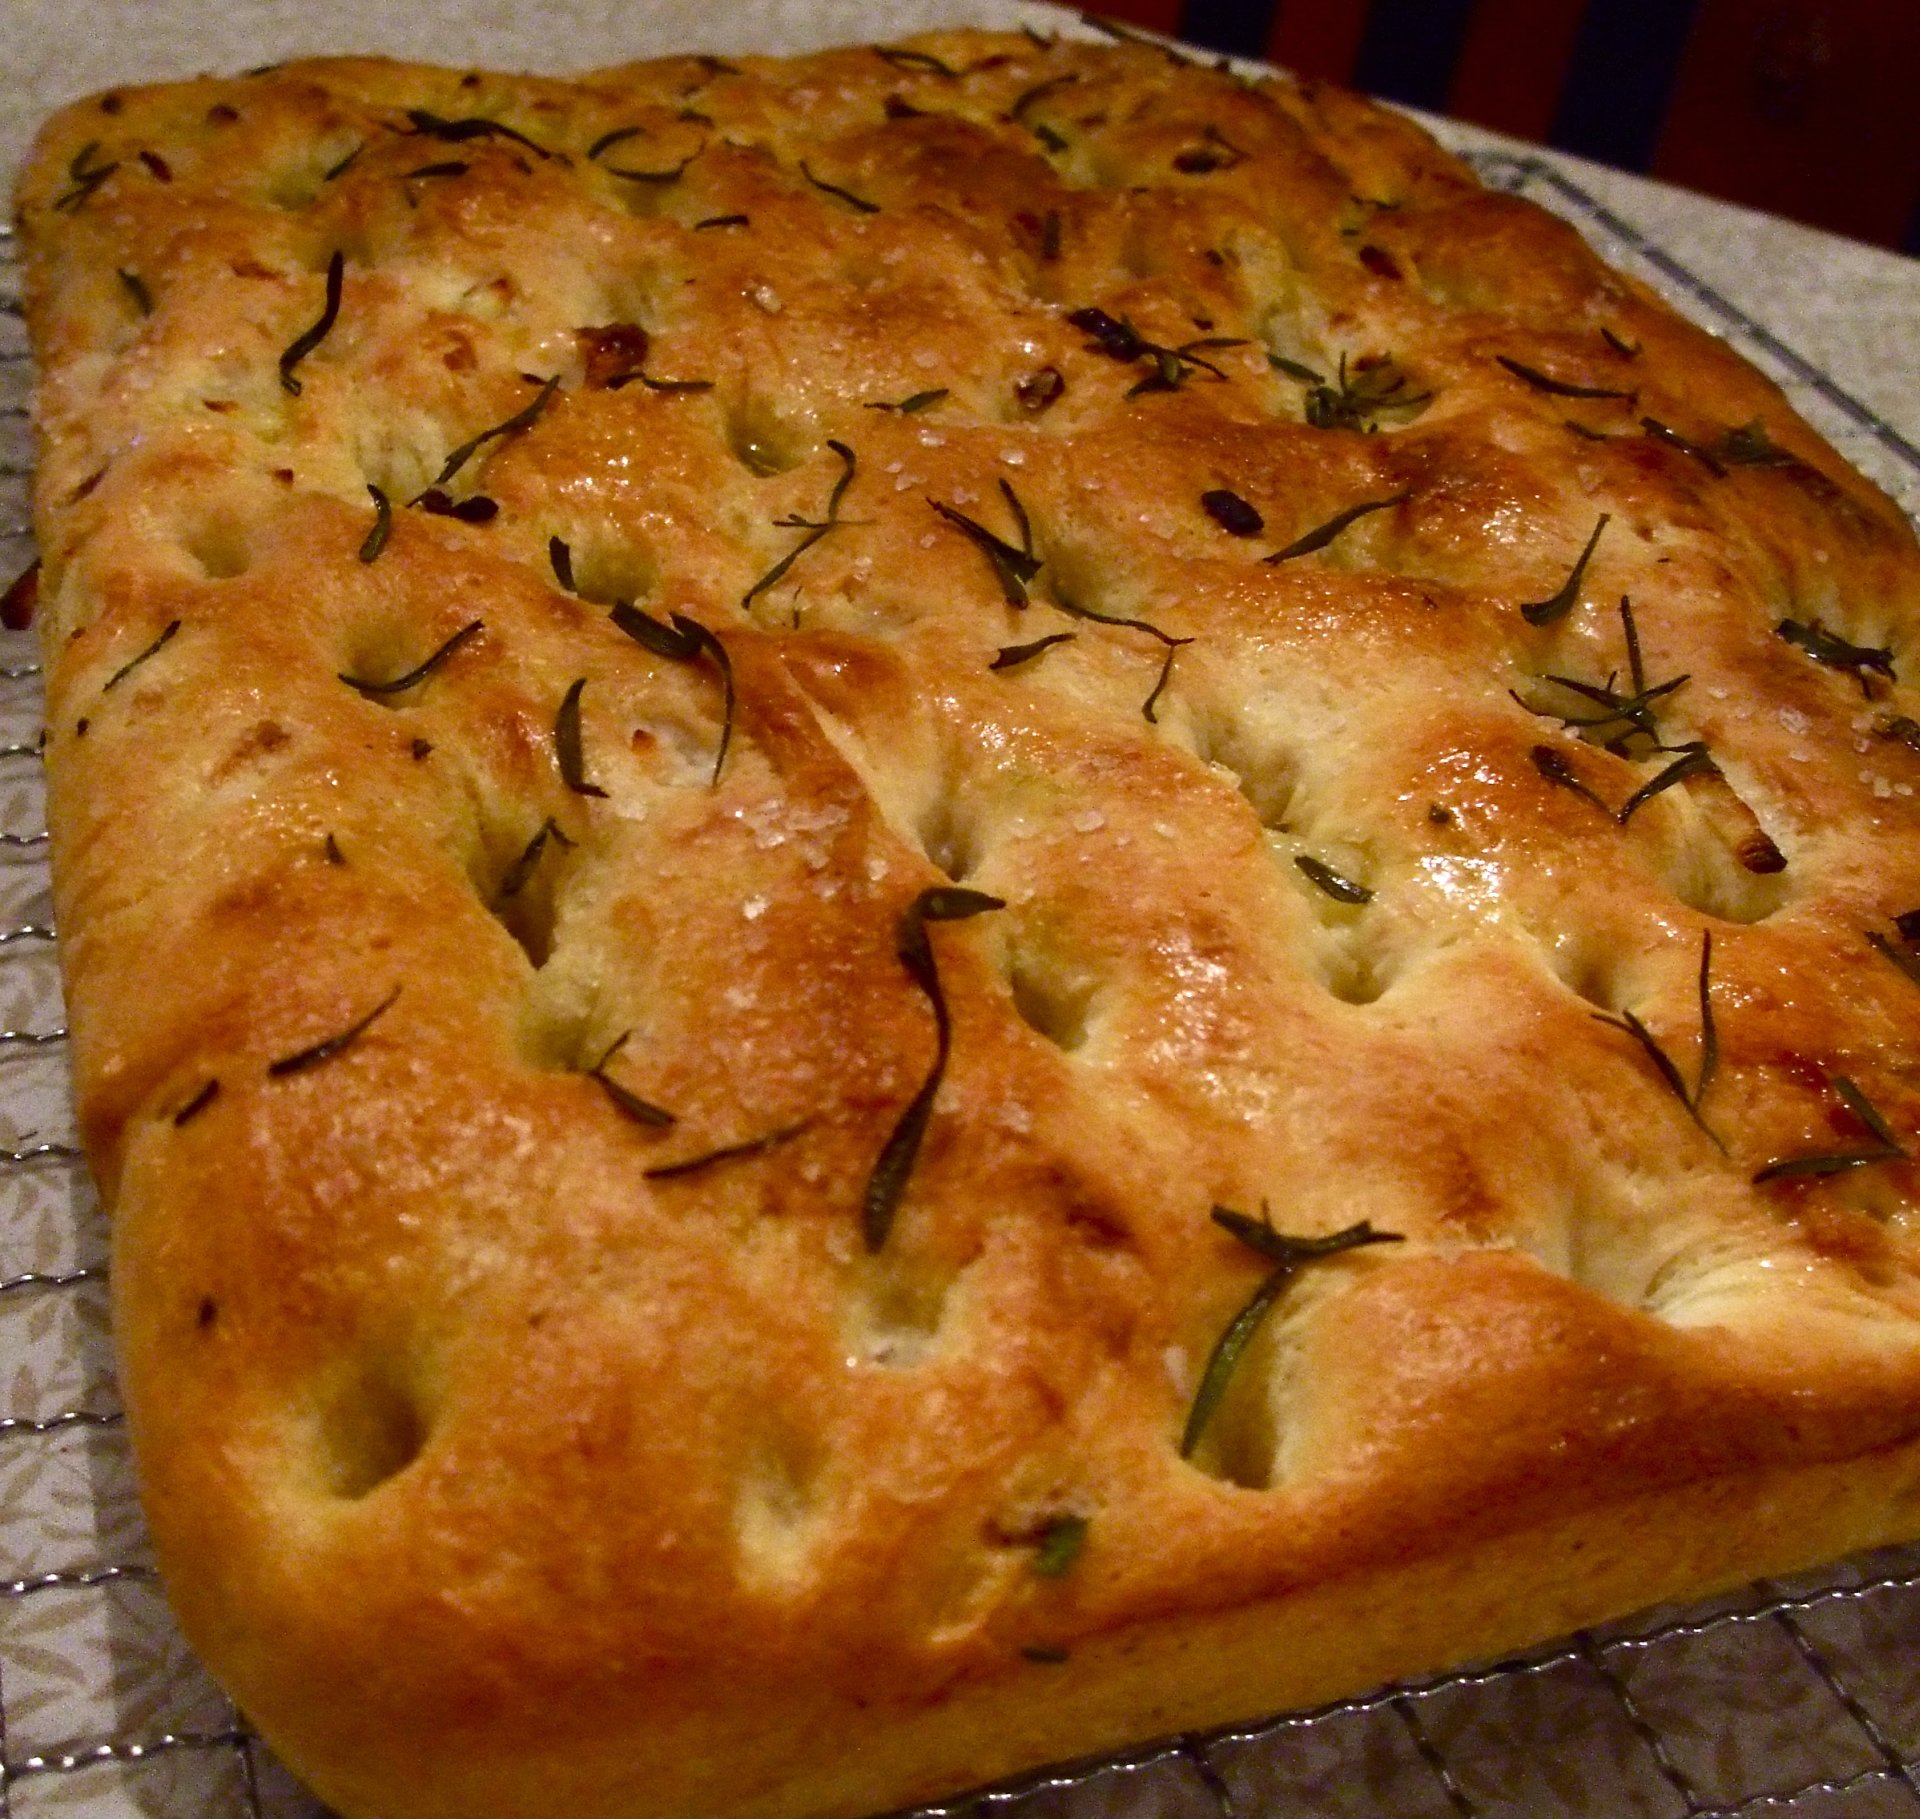
5. Make nice deep indentations in the bread with your fingers, almost to the bottom of the pan. Drizzle the top with the rest of the olive oil (1/4 c) and let rise again, covered, for another 30 minutes while you preheat the oven to 425ºF.

6. Sprinkle the top of the bread with sea salt and rosemary leaves and bake for 20 to 25 minutes, until the top is nicely golden. Let it cool a bit, then slice into it and devour with gusto. It's delicious when dipped in olive oil and balsamic, but it also makes a nice sandwich bread, for a change.


.
. Digg Technorati Delicious StumbleUpon Reddit BlinkList Furl Mixx Facebook Google Bookmark Yahoo

Tuesday, January 5, 2010

NEW AND IMPROVED!

Stop what you are doing right now and listen up: I HAVE PERFECTED MY SEEDY BREAD RECIPE. I know you all thought it was perfect before, but you didn't know that it could be made perfecter. Now you know!


The secret is buttermilk! This is officially my new favourite bread. It is just as soft as bought bread and sooo much tastier. And cheaper! And better for you! Buttermilk, contrary to what I thought until yesterday, is not fatty milk. It's milk with good bacteria in it! It tastes kind of like plain yoghurt. Who'd-a-thunk-it. Anyways, it makes a pretty delish loaf of bread. Apparently you can also use it in salad dressings.

So now that you have stopped what you were doing before, it's time to get out your flour, because you are making this bread right now. You will thank me.

You need:

5-6c all purpose flour
2 c Red River or Sunny Boy or equivalent cereal*
3 c buttermilk
4.5 tsp yeast
1/4 c sugar or honey or some combo of the two
1 Tbs salt
2/3 c water

Ok so the night before, mix up the buttermilk and the cereal and stick it in the fridge with plastic wrap over it.

Next morning, or afternoon, or whenever you happen to remember about it, take it out and warm it up in the microwave so it's baby-bottle temperature. While you're at it, get your 2/3 c water at about that temperature, too. Mix the sugar/honey with the water and add the yeast to it.

Put the cereal mush in a large bowl, unless you used a really large bowl to start, and start adding your flour a cup at a time. When you've added 2 cups, add the sugar/yeast mix and continue to add your flour until you can't mix it any more and it's time to knead.

Knead in the rest of the flour until you have a really soft elastic dough. It shouldn't be sticky, but it shouldn't be dry either. Err on the side of less flour - I used 5 cups.

Let the dough rise, covered, for 2 hours in a warm-ish place. Then shape it into two loaves and stick those in two greased loaf pans to rise again for another hour. Meanwhile, preheat your oven to 400ºF.

Bake them for 30 minutes, or until the bottoms sound hollow when you tap them and the tops are brown. Resist slicing open right away - make sure you wait until they have cooled!

-----
* If you can't find these cereals, use a combo of whole flax seeds, wheat bran, and cracked wheat - that should do the trick. These cereals are both made up of a mix of flax, rye, and wheat so use your imaginations! Digg Technorati Delicious StumbleUpon Reddit BlinkList Furl Mixx Facebook Google Bookmark Yahoo

Monday, November 2, 2009

Italian Wedding Soup

You may have noticed that things are getting a little cozier around here - soups, pies, breads - they're going to get cozier, too! Winter is a-comin'! That's where this hearty meatball soup comes in. Usually, Italian wedding soup is made with small pasta, but I decided to use barley instead. It's a bit heartier than pasta and it's what I had on hand! It turned out really nicely - barley added a great texture to the soup.


You need:

1 tbs olive oil
1 medium onion, finely diced
1 stalk of celery, finely diced
1 carrot, finely diced
2/3 c pot barley
8 c chicken stock
3 c fresh baby spinach, roughly chopped
20 home-made or store bought chicken or turkey meatballs

1. First, saute your onion, celery, and carrot in the olive oil. When the onions are translucent, add the stock and the barley and bring to a boil. Leave it at a vigorous simmer for 30 minutes or so - until the barley is cooked.

2. Add the meatballs and the spinach and boil until the meatballs are cooked (if you used fresh/raw) and the spinach is wilted.

Serve with yummy 60-minute dinner rolls: YES they only take 60 minutes!! AND they are fluffy and delicious! It's like magic. :)


I opted for a half recipe so what you see here makes 12 rolls, not 24 as in the original recipe. I'm sure this will work without a kitchenaid, but it's what I have!

You need:

1/4 c. milk
2 tbs sugar
1 tsp salt
1.5 tbs butter
3 1/3 tsp yeast
3/4 c lukewarm water
3 c flour

1. Melt the butter, milk, sugar, and salt in the microwave. Stir to make sure they are all dissolved.

2. In the bowl of your mixer, dissolve the yeast in the warm water. Then add the milk mixture to it and stir.

3. Add the flour a bit at a time, mixing all the while, until all the flour is added. Knead until you get a sticky but cohesive dough ball.

4. Let the dough rise for 15 minutes in an oiled covered bowl.

5. Shape the rolls into 12 portions and place in an oiled baking pan - 9 X 13 worked for me but muffin tins do the trick too. Let rise another 15 minutes.

6. Bake in a preheated oven at 425ºF for 12 minutes. The rolls should be deliciously golden at this point.


Digg Technorati Delicious StumbleUpon Reddit BlinkList Furl Mixx Facebook Google Bookmark Yahoo

Monday, October 26, 2009

Yet another loaf!

My usual, go-to bread is the french loaf, but I like to play around with different breads. My goal is to find a brown bread recipe that is just as soft and cushy as the bought loaves but without all those scary cushy-making chemicals.

I made this 100% whole wheat loaf a while ago, but it wasn't quite right - 100% whole wheat is a little intense for me. But neither was I interested in the 100% white loaf on which it was based. So I came to a delicious compromise:


2 c warm water
2/3 c sugar (yes it is a lot)
1.5 tbs yeast
1.5 tsp salt
1/4 c oil
3 c white flour
1 c oats
1 3/4 c wheat flour
1/4 c vital wheat gluten.

1. In a small bowl, mix water, sugar, and yeast together. Let the yeast foam - about 5 minutes.

2. In a large bowl, or the bowl of your mixer, mix all the flours and the salt and the oats.

3. Add the yeast mixture and the oil to the flour mixture and mix until combined. Then knead it until you get a cohesive dough that is smooth but not tough.

4. Let the dough rise, in a covered, greased bowl, for about an hour - until the dough has doubled.

5. Shape it into 2 loaves and let rest for about 30 minutes, or until the dough rises 1" above the greased loaf pans you put it into.

6. Bake at 350º for 30 minutes. Remember to let it cool before cutting! The gluten is still developing. :)


This loaf is as soft as store-bought but you can pronounce all the ingredients. It's really great for sandwiches and does really well in the toaster. It's slightly sweet tasting, so if you're not into that, you could omit some of the sugar, but if you don't add enough you won't get the squishy texture I was going for.

Digg Technorati Delicious StumbleUpon Reddit BlinkList Furl Mixx Facebook Google Bookmark Yahoo

Friday, July 3, 2009

Mom's Amazing Seed Loaf

My mom (hi Mom!) sent me this recipe for the most delicious (and healthy!) bread. It's basically a white loaf except for the hefty dose of Red River Cereal, which adds a nice big dose of fiber to every slice. I only made one modification, which was to add some lemon juice. It was an experiment that paid off, as I'd heard that lemon juice is an excellent dough conditioner, and yields a fluffier, tastier loaf.


You can shape it either in loaf tins or freestyle, as I did. The inside crumb is light and soft, despite being so good for you. This might be an excellent bread to use to introduce a reluctant seedy-bread eater to the fold.


You need:

6 c all-purpose flour
2 c Red River cereal (I imagine Sunny Boy would also work)
3 c boiling water
1 tbs sugar or honey
1 tbs salt
4.5 tsp yeast
3 tbs lemon juice
2 tbs butter, for brushing on after.

1. In a large mixing bowl, combine the cereal and the boiling water. Let sit 20 minutes, until the cereal has cooled and absorbed much of the water.

2. Add 2 cups of flour and mix, then add the sugar, salt, yeast, and lemon juice. Make sure the mixture is not hot (warm is ok) otherwise it'll kill your yeasty-beasties.

3. Add the remaining flour 1/2 cup at a time and knead for 10 minutes.

4. Place the dough in a greased bowl and cover. Let rise about 45 minutes.

5. Shape into two loaves and let rise again for 40 minutes. If you shape them freestyle, slash them with a sharp knife just before baking.

6. Bake for 35 minutes at 400ºF. When done, remove and brush with the butter. Your house will smell like heaven.


Edit: Here is a shot of the crumb:


Digg Technorati Delicious StumbleUpon Reddit BlinkList Furl Mixx Facebook Google Bookmark Yahoo

Friday, June 19, 2009

The Perfect Soft-Boiled Egg


The glorious anticipation of two soft-boiled eggs before you, as yet uncracked, is a beautiful thing.

I knew that somewhere on the internet, someone had the answer to perfectly done soft-boiled eggs. I've tried many different instructions, from starting the fridge-cold eggs in the water before boiling it, to various complicated timings based on egg weight all in the hopes of getting a perfectly firm white cradling a golden, runny yolk. I found the answer at The Kitchy Kitchen via Photograzing - Claire Thomas posted a beautiful entry on "Googy Eggs", what her father called soft-boiled eggs. I could not do any better with photos than those that are in that entry - take a look, just to appreciate the beauty of the egg.

Her answer is to boil water, then to reduce the heat to a simmer before carefully dropping the eggs in. 4 minutes exactly for a room-temp egg, and 6 for a fridge-cold one. Perfect every time. So simple, and so satisfying.

Serve with some lovely ciabatta for dipping!

Digg Technorati Delicious StumbleUpon Reddit BlinkList Furl Mixx Facebook Google Bookmark Yahoo

Sunday, June 7, 2009

Oatmeal-Potato Bread

I have not been cooking as much as I would like. Well, I've been cooking my same amount, but it's not really anything to show off - shake n bake, plain pasta, pizza, etc. I'm trying to get a big project done, and while I would *love* to procrastinate by daydreaming about what meals I could cook, sometimes school comes first.

Enter the sandwich. A very important school-going staple; not to be trifled with. It requires decent bread that can stand up to the rigours of a back pack and tomatoes without falling apart.

I play around with sandwich loaves - I haven't yet found a whole wheat one that I'm entirely happy with. I've used this one, which is delicious but has so much sugar in it, and various others floating around online, or in my thousands of cooking and baking books. This recipe comes from Beth Hensperger's The Bread Bible and makes two good-sized loaves. I chose it because I had some left-over mashed potato waiting to be used up, and not enough time or energy to want to do a 24 hour whole wheat loaf as Peter Reinhart suggests. Maybe when these two are done.


Beth describes the bread as moist and slightly sweet, and very easy to make. She's right - mine rose beautifully even though my house is usually on the chilly side. When it was baking, the house smelled delicious and slightly nutty. I really wish you could photograph smell! When it was ready to cut, I discovered that the crumb is light and airy and makes perfect toast! It has a delicious flavour and a soft texture. This is a keeper of a recipe, at long last!

Look at the crumb in this shot! Representative of what is inside...


You need:

1 c mashed potato
2 tbs butter (unless your mashed potato already has butter in it, like mine did)
1 tbs yeast
1/2 c warm water
1 tbs sugar + 1 pinch
1.5 c warm milk (I was out so I used 3 tbs plain yogurt mixed in with enough water to make 1.5 c)
1 tbs salt (I did not add salt as my potatoes were already salted enough)
1.5 c rolled oats
5 c all purpose flour (I used 2 c whole wheat and 3 c white unbleached)


1. Dissolve the pinch of sugar in the 1/2 c warm water and sprinkle the yeast on top to dissolve. Let proof 10 minutes, until foamy.

2. In a mixing bowl or a stand mixer, put the potato, yeast mixture, the rest of the sugar, the milk, salt, oats, and 2 c of the flour. Beat until it's combined. Add the rest of the flour by the half-cup until you have a very moist dough that only just clears the sides of your dough. If you add too much flour to make a stiffer dough, the oats will suck up all the moisture and you'll end up with dry, terrible bread. When you're done kneading the dough should be smooth and springy.

3. Put the dough in an oiled bowl and cover. It'll rise for about 1.5 hours and get nice and puffy.

4. Tip the dough out onto your work surface, which you've floured so the dough doesn't stick. Divide it in two - you're making two loaves. Shape the dough into loaves by following this amazing tutorial on The Fresh Loaf. Put each loaf in a greased 9-by-5 loaf pan and let rise again, covered, for another 40 minutes.

5. Preheat your oven to 425. Bake the loaves for 10 minutes at this heat, then at 350 for another 35-40. The loaves should sound hollow when you tap them on the bottom. Let them cool completely before cutting into them - I know it's hard, but the bread won't taste as good if you cut into it too early! Promise!

Digg Technorati Delicious StumbleUpon Reddit BlinkList Furl Mixx Facebook Google Bookmark Yahoo

Tuesday, May 26, 2009

Cheater's Ciabatta

Normally, ciabatta, the delicious, porous, Italian bread, takes hours and hours of waiting. The gluten strands that make those nice, big, ready-for-butter holes take time to develop. You can cheat a bit, though.

The reason all those no-knead breads work is that if you give bread dough enough time, the gluten strands will develop on their own. They just need 18-24 hours to do so. Usually we knead bread to speed up the development of the gluten so that a loaf of French bread might only take 8-10 hours. It's kind of logical that if you leave a dough for a long time and don't have to knead it, you'd be able to knead the dough a lot and not have to wait, right?


This ciabatta recipe only takes 4-5 hours because you knead this dough within an inch of its life. Once again, The Fresh Loaf has come to the rescue and made last-minute fresh bread possible.

-------

You need:
500g bread flour (I used all-purpose and added a few tbs of vital wheat gluten - kind of an experiment)
475g water
15 g salt
2 tsp yeast

Directions (from the above link):

1. In Kitchen Aid style mixer: Mix all ingredients roughly till combined with paddle, let it rest for 10 minutes.

2. With the paddle , beat the living hell out of the batter; it will start out like pancake batter but in anywhere from 10 to 30 minutes it will set up and work like a very sticky dough. if it starts climbing too soon, then switch to the hook. You'll know it's done when it separates from the side of the bowl and starts to climb up your hook/paddle and just coming off the bottom of the bowl. I mean this literally about the climbing, i once didn't pay attention and it climbed up my paddle into the greasy inner workings of the mixer. It was not pretty! Anyway, it will definetely pass the windowpane test. (Note: See a great picture tutorial on what it's supposed to look like here.)

3. Place into a well oiled container and let it triple! it must triple! For me this took about 2.5 hours

4. Empty on to a floured counter, cut into 3 or 4 pieces. Spray with oil and dust with lots o' flour. Let them proof for about 45 minutes, which gives you enough time to crank that oven up to 500F.


5. After 45 minutes or so the loaves should be puffy and wobbly. Now it's iron fist, velvet glove time. Pick up and stretch into your final ciabatta shape (~10" oblong rectangle) and flip them upside down (this redistributes the bubbles, so you get even bubbles throughout), and onto parchment or a heavily floured peel. Try to do it in one motion and be gentle, it might look like you've ruined them completely, but the oven spring is immense on these things.

6. Bake at 500F , rotating 180 degrees half way through.


-------

The crumb in this bread is great - big and porous - and the crust is delicious - golden and chewy. I usually make a few loaves of french bread the long way every two weeks or so and freeze extra, but I think this way will enable me to have fresh bread every day if I wanted to!

I'm pretty sure I didn't stretch mine out enough - it looked so flat when I put it in the oven, but the recipe is right - big oven spring! I think "real" ciabatta is supposed to be a bit flatter.

Also, if you don't have a kitchen aid or something like that, you can, of course, beat the living daylights out of your dough by hand - it'll just take a bit longer and your arm may fall off.

Digg Technorati Delicious StumbleUpon Reddit BlinkList Furl Mixx Facebook Google Bookmark Yahoo

Tuesday, April 14, 2009

OM NOM Parker House Rolls

I am in love with Parker.....


.... House rolls! :D


I got this recipe from the Food Network years ago, who got it directly from the Omni Parker House Hotel, in Boston.

You need:
  • 6 cups of all-purpose flour
  • 1/2 c sugar
  • 2 tsp salt
  • 4.5 tsp yeast
  • 1 c butter, softened
  • 1 large egg
1. In a large bowl, combine 2 1/4 c flour, the sugar, salt, yeast, and half the butter. Mix while pouring in 2 cups of hot tap water.

2. Add the egg and beat. Mix in 3/4 more flour and continue beating. I'm using my KitchenAid for this. Stir in about 2 1/2 c more flour, or enough to make a soft dough.

3. Knead until smooth and elastic, working in more flour if you need it.

4. Put the dough into a greased bowl and cover. Let it rise for about 2 hours if your house is cold.

5. Punch down the dough and knead it into a smooth ball. Let it rest, covered, for 15 minutes.

6. Preheat your oven to 400ºF. Meanwhile, in each of two 9X13 roasting pans melt 1/4c of butter (so all the rest of the butter). This will grease the bottom of the pans.

7. Weigh your dough and divide that number by 40 because you are making 40 buns. Pluck off and weigh portions of the dough to make 40 even portions. Shape these into balls by folding them in on themselves and gently rolling to seal.

8. Put 20 rolls per pan, seam side down. Let the dough rise again, covered, for about an hour if your house is cold.

9. Bake rolls for about 15-20 minutes, until they're golden brown and smell heavenly. DEVOUR.


Digg Technorati Delicious StumbleUpon Reddit BlinkList Furl Mixx Facebook Google Bookmark Yahoo

Sunday, March 29, 2009

No-Knead Bread

Well, I bit the bullet and tried out Mark Bittman's famous no-knead bread. And I have to say, I think it's more trouble than it's worth, but that may just be my own circumstances.

I had no container in which I could bake the bread. Baking the bread in a dutch oven or a cast-iron pot keeps the steam in with the bread, making the crust nice and chewy, like real French bread. So in the end, after shaping and resting the bread, I baked it directly on my baking stone, using a tray of ice cubes on the bottom shelf to create steam. The crust was nice and chewy but the crumb left something to be desired, even after having risen for 24 hours. The flavour was good, but wasn't very salty, and didn't have the lovely nutty texture a long rise usually gives.


If you want to make delicious French bread and have absolutely no time whatsoever to be at home and supervise, then for sure, go this way. You'll get rave reviews and people will still love you.

But, if you have a day when you're going to be home anyways, working or doing chores, or watch TV etc, then I suggest you follow this method. This bread is almost as easy, does not require a dutch oven (although I'm sure it would be nice baked in there, too!), and can be shaped into lovely baguettes which are useful for impressing boyfriends, guests, et al.


If you can't see the recipe, first of all you should join The Fresh Loaf because it's awesome, but I'll reproduce it here, too.

Poolish
1 cup flour
1 cup water
1/4 teaspoon instant yeast

Final Dough
1 pound flour (about 4 cups)
10-12 ounces water (by weight, not volume!)
1 teaspoon instant yeast
2 teaspoons salt
all of the poolish

Combine the ingredients for the poolish in a small bowl the night before baking. Cover the bowl with plastic wrap and leave the poolish out at room temperature overnight.

The next day, prepare the final dough. Combine all the ingredients except for the poolish in a bowl and let it sit for 25 minutes. This develops the gluten in the bread and makes nice holes in the crumb. Then add the poolish in and mix them together until you have a VERY wet dough. Your hands will look like you put them in ... well, a lot of flour and water.

Knead the dough as best you can. Then put the dough in an oiled bowl, cover it, then leave it for 45-60 minutes. Come back and fold it ever 45 minutes to an hour, so about 6 times.

Shape the dough how ever you like and put the shaped loaves on parchment paper to rise. The Fresh Loaf has great shaping tutorials, not to mention more tips and tricks for French Bread. I usually make two oval loaves out of this amount of ingredients. Cover your loaves and let them rise for another 90 minutes. Meanwhile, preheat your oven to as hot as it can safely go. I usually set mine to 450-475, with my baking stone in right from the start.

Right before you're going to pop those loaves in, get the sharpest knife you have, or a razor blade, and make some slashes about 1/2" deep along the length of the bread. This will help the bread rise up and not split at the bottom. Bake for about 20 minutes. As you put the loaves in, put in a baking dish full of ice cubes. After 5 minutes, turn the temperature down to 450. The loaves should be brown and toasty on the top and sound hollow on the bottom when tapped.

Even though you're going to want to bite those loaves right out of the oven, resist. Leave them cool until they're mostly cold, and only then slice them. The gluten strands that make French bread so delicious continue to develop until the bread is cool. You'll end up with gummy crumb if you cut it too early.


See also: Naan Bread

Digg Technorati Delicious StumbleUpon Reddit BlinkList Furl Mixx Facebook Google Bookmark Yahoo

Tuesday, March 24, 2009

Naan Bread and Chicken Madras


I love naan bread. I love Indian food. So does M.

I made a huge batch of delicious chicken madras the other day and froze some. Tonight we're busting it out for dinner #2, and because I can't seem to eat a dinner without working for it, I decided naan was in order. I made naan about two years ago with a yeast-based recipe, but the one I tried today is yeast-free and relies on baking powder for its puff.

Here's what you need (From BBC Food):

Ingredients
For the dough
250g/9oz plain flour
2 tsp sugar
½ tsp salt
½ tsp baking powder
110-130ml/3½-4½fl oz milk
2 tbsp vegetable oil, plus extra for greasing

1 tbsp butter, melted, to serve

Method
1. For the dough, sift the flour, sugar, salt and baking powder into a bowl. In another bowl, mix together the milk and oil.
2. Make a well in the centre of the flour mixture and pour in the liquid mixture. Slowly mix together the dough by working from the centre and incorporating the flour from the edges of the 'well', to make a smooth, soft dough. Knead well for 8-10 minutes, adding a little flour if the dough is too sticky.
3. Place the dough into an oiled bowl, cover with a damp tea-towel and leave in a warm place for at least an hour, until doubled in size. Then knock the dough back and form into five balls.
4. Preheat the grill to medium and place a heavy baking sheet on the upper shelf of the grill to heat.
5. Roll the dough balls out quite thinly, ideally in a teardrop shape, but really this is just aesthetic. Sprinkle over your chosen topping and press into the surface of the dough. Place the naans onto the hot baking sheet and grill for just 1-2 minutes, or until lightly browned. Brush with butter and serve hot.


My dough is currently sitting for its hour rest right now. A few minutes before dinner, I'll pop them on my baking stone for a few minutes and tell you how they turn out.


Edit: They turned out pretty good. I would cook them at hotter than the 400F I did this time, and for less time. Also, I would poke holes in them with a fork to release some of the air, as they got pretty puffy.


Here's my chicken madras recipe:

2 chicken breasts or equivalent amount of other boneless, skinless chicken, in cubes (Optional! You can use tofu, beef, just have chickpeas, etc!)
4tbs Patak's madras curry paste (yes, yes, it's cheating but it's tasty) or to taste.
2 medium onions, diced
1 green or red pepper, chopped
1.5 c chicken or veggie stock
1 large potato, skin on, diced
1 c chickpeas (optional)
2 c chopped fresh spinach (optional)
1 can diced tomatoes with juices
1 tbs oil

1. In a large cast-iron skillet or deep-sided pan, heat the oil on medium or medium high (medium for cast-iron, medium high for others). Add the chicken and brown on all sides.

2. Add the Patak's paste, the potato, and the onions and fry until onions are soft and everything is coated in paste.

3. Add the tomatoes and the broth, the pepper and the chickpeas, if using. Cover, reduce heat, and simmer until the liquid is reduced by half. Remember to check it every once in a while and scrape the bottom of the pan.

4. Add the spinach, stir, and serve with basmati rice (I cook mine with peas and butter), and the naan you made from the above recipe. I like yoghurt with mine, because I'm a spice wimp. :)

Digg Technorati Delicious StumbleUpon Reddit BlinkList Furl Mixx Facebook Google Bookmark Yahoo

Braided Onion Loaf

Here's a post from October, but this bread is yummy any time of year. You can also shape it into a couple of loaves instead of braiding it.

----------

Since it's Canadian thanksgiving this weekend, I made a festive loaf to take to dinner at boy's parents' this weekend.


The recipe is from The Fresh Loaf, which is an amazing resource. Anyways, here's the recipe, copy and pasted:

________________________________________________________________________________

Poolish:
1 cup all-purpose unbleached flour
1 cup water
1/4 teaspoon instant yeast

Dough:
Poolish
3-3 1/2 cups all-purpose unbleached flour
1/2 cup milk
2 teaspoons instant yeast
2 tablespoons butter or shortening
2 tablespoons sugar
1 1 3/8 ounce package of onion soup mix
2 tablespoons grated Parmesan cheese
1 egg

Wash:
1 egg
1 tablespoon milk

The night before, in a bowl, mix together the poolish until it form a batter. Cover with plastic wrap and set aside overnight.

The next morning, combine 2 cups of the flour, the yeast, the sugar, the onion soup mix. Mix in the poolish, the milk, one of the eggs, the butter, and the Parmesan cheese with a wooden spoon. Add more flour a quarter cup at a time until a proper dough forms, one that is dry enough that you can hand knead it yet moist enough that it is still tacky to the touch.

Pour the dough out of the bowl onto a clean work surface and knead the dough for approximately 10 minutes. Return the dough to a clean, greased bowl, cover with plastic, and allow to rise until doubled in size, approximately 90 minutes.

Remove the dough from the bowl and shape it however you like. I tried a braid this time. I'm not good enough that I want to give directions on how to do it yet (for that please see your cookbook).

Cover the loaf with a damp towel or greased plastic wrap and allow it to double in size again, approximately 45 minutes. While you are waiting, preheat the oven (and baking stone, if you have one) to 450.

Just before baking, glaze the loaf with the egg wash. Put it into the hot oven. After 5 minutes, reduce the temperature to 375 and bake for another 15 minutes. Rotate the loaf and bake until the loaf is done. Total baking time may vary based on shape. My loaf took about 45 minutes.
_______________________________________________________________________________________________

Mine didn't take that long. I had to put foil on top for the last few minutes to stop it from overbrowning. It's crazy long. It'll be an adventure taking it on the 2 hour bus ride tomorrow!


I'm afraid I can't really help much with how to braid four strands of dough either, but I found a wonderful (but a bit fast to follow) video tutorial. Generally, people don't seem to mind how "perfect" the braid is - it'll look beautiful even if you make a few slip-ups. And it tastes divine!

Happy thanksgiving, Canadians!
Digg Technorati Delicious StumbleUpon Reddit BlinkList Furl Mixx Facebook Google Bookmark Yahoo