Showing posts with label chicken. Show all posts

Thursday, May 13, 2010

Spatchcocked Chicken: A Grotesque Step-by-Step

The secret to delicious, perfectly cooked whole chicken is also a really fun word to say: Spatchcock. It either sounds like a sneeze or a foreign swear word. Or both. You do have to get a little down and dirty with your chicken, but look at the reward:


Look at all that delicious browned crispy chicken skin. Look at those roasted whole garlic cloves and red onions. Spy the roasty-toasty carrots hiding in the sides of the pan. You, too, can enjoy a roast chicken on a weeknight, and in about an hour from start to finish.

The secret is cutting out the backbone of the chicken and flattening it. This makes the chicken cook more quickly and more evenly, so you get a juicier breast without having underdone legs. That sounds like the cover of a glamour magazine. ANYWAYS. After you have spatchcocked your bird, the seasonings and accompanying vegetables are really up to you -- really, anything goes (within reason - I don't want any comments saying you tried it with chocolate sauce and marshmallow fluff and it didn't work and I'm a liar).

But if you want to make what I made, here's what you need:

One whole chicken
2 TBS olive oil
One red onion, cut into wedges
2 carrots, cut into sticks
One head of garlic, peeled but in whole cloves
1 lemon (or more if you like) cut in half
1 TBS honey
1 tsp coarse salt
Freshly ground pepper.

Your instructions and gruesome raw chicken photos are after the jump! But also some lovely roasty after shots - don't despair! Click here to keep reading.

Digg Technorati Delicious StumbleUpon Reddit BlinkList Furl Mixx Facebook Google Bookmark Yahoo

Monday, November 2, 2009

Italian Wedding Soup

You may have noticed that things are getting a little cozier around here - soups, pies, breads - they're going to get cozier, too! Winter is a-comin'! That's where this hearty meatball soup comes in. Usually, Italian wedding soup is made with small pasta, but I decided to use barley instead. It's a bit heartier than pasta and it's what I had on hand! It turned out really nicely - barley added a great texture to the soup.


You need:

1 tbs olive oil
1 medium onion, finely diced
1 stalk of celery, finely diced
1 carrot, finely diced
2/3 c pot barley
8 c chicken stock
3 c fresh baby spinach, roughly chopped
20 home-made or store bought chicken or turkey meatballs

1. First, saute your onion, celery, and carrot in the olive oil. When the onions are translucent, add the stock and the barley and bring to a boil. Leave it at a vigorous simmer for 30 minutes or so - until the barley is cooked.

2. Add the meatballs and the spinach and boil until the meatballs are cooked (if you used fresh/raw) and the spinach is wilted.

Serve with yummy 60-minute dinner rolls: YES they only take 60 minutes!! AND they are fluffy and delicious! It's like magic. :)


I opted for a half recipe so what you see here makes 12 rolls, not 24 as in the original recipe. I'm sure this will work without a kitchenaid, but it's what I have!

You need:

1/4 c. milk
2 tbs sugar
1 tsp salt
1.5 tbs butter
3 1/3 tsp yeast
3/4 c lukewarm water
3 c flour

1. Melt the butter, milk, sugar, and salt in the microwave. Stir to make sure they are all dissolved.

2. In the bowl of your mixer, dissolve the yeast in the warm water. Then add the milk mixture to it and stir.

3. Add the flour a bit at a time, mixing all the while, until all the flour is added. Knead until you get a sticky but cohesive dough ball.

4. Let the dough rise for 15 minutes in an oiled covered bowl.

5. Shape the rolls into 12 portions and place in an oiled baking pan - 9 X 13 worked for me but muffin tins do the trick too. Let rise another 15 minutes.

6. Bake in a preheated oven at 425ºF for 12 minutes. The rolls should be deliciously golden at this point.


Digg Technorati Delicious StumbleUpon Reddit BlinkList Furl Mixx Facebook Google Bookmark Yahoo

Monday, October 19, 2009

Chicken Pot Pie

It's the season for savoury pies again! Get excited! Here to inaugurate the season is chicken pot pie.


This can be made really easily with left-over chicken or turkey - it might even be better that way - so it's a tried-and-true way to get rid of thanksgiving leftovers. Also, you can either make your own or buy your own pie crust, or you can buy puff pastry from the freezer of your grocery! Any way you choose to do it, pot pie is delish. :)

You need:

250-280g (or more) chicken/turkey meat (thigh is more flavourful; breast is lower in fat - a mix is nice!)
1 small onion, diced (if you don't use the leek, get a bigger onion)
1 medium leek (optional), diced
2 carrots, diced
3 medium potatoes (yukon gold are yummy!), diced
2 stalks of celery, diced
3 bay leaves
2 tbs butter
about 4 c chicken stock
salt and pepper to taste
1/2 package frozen puff pastry, or enough pie dough to cover the top of a 9 x 13 casserole
2 tbs flour mixed in water

1. Melt the butter in a large stock pot over medium-high heat. If your chicken is raw, cube it and add it now and brown. Add onions, celery, carrot, and leek and saute until the onions are translucent.

2. Add the potatoes, bay leaves, and enough chicken stock to just cover everything (and your left-over chicken, if that's what you decided to use) and boil until the potatoes are just about cooked through. Season with salt and pepper, and thicken with flour if you need it. There should be a nice gravy.

3. Pour the chicken mixture into your baking dish. Roll out the puff pastry according to the package directions and put it on top of the dish; or roll out your pie crust according to your personal whims. :)

4. Bake in a preheated oven at 450ºF for 20 minutes, or until the crust is golden and puffy. Allow the pie to cool for 10 minutes, because otherwise you will burn your mouth.

DIG IN! I hope you have a nice crackling wood fire to curl up to while you dine. :)

Digg Technorati Delicious StumbleUpon Reddit BlinkList Furl Mixx Facebook Google Bookmark Yahoo

Wednesday, October 14, 2009

Pho! A Daring Kitchen Challenge

I had never ever before yesterday, as far as I know, had pho. And yesterday, I made my own! This was, as the title of this post implies, the October challenge for The Daring Kitchen, hosted by Jaden of the Steamy Kitchen.


Here's the challenge recipe:

For the Chicken Pho Broth:
2 tbsp. whole coriander seeds
4 whole cloves
2 whole star anise
2 quarts (2 liters/8 cups/64 fluid ounces) store-bought or homemade chicken stock
1 whole chicken breast (bone in or boneless)
½ onion
1 3-inch (7.5 cm) chunk of ginger, sliced and smashed with side of knife
1 to 2 tbsps. sugar
1 to 2 tbsps. fish sauce

1 lb. (500 grams/16 ounces) dried rice noodles (about ¼ inch/6 mm wide)

Accompaniments:

2 cups (200 grams/7 ounces) bean sprouts, washed and tails pinched off
Fresh cilantro (coriander) tops (leaves and tender stems)
½ cup (50 grams/approx. 2 ounces) shaved red onions
½ lime, cut into 4 wedges
Sriracha chili sauce
Hoisin sauce
Sliced fresh chili peppers of your choice

Directions:

  1. To make the Chicken Pho Broth: heat a frying pan over medium heat. Add the coriander seeds, cloves and star anise and toast until fragrant, about 3-4 minutes. Immediately spoon out the spices to avoid burning.
  2. In a large pot, add all the ingredients (including the toasted spices) and bring to a boil.
  3. Reduce the heat to medium-low and let simmer for 20 minutes, skimming the surface frequently.
  4. Use tongs to remove the chicken breasts and shred the meat with your fingers, discarding the bone if you have used bone-in breasts.
  5. Taste the broth and add more fish sauce or sugar, if needed. Strain the broth and discard the solids.
  6. Prepare the noodles as per directions on the package.
  7. Ladle the broth into bowls. Then divide the shredded chicken breast and the soft noodles evenly into each bowl.
  8. Have the accompaniments spread out on the table. Each person can customize their own bowl with these ingredients.
Toasting the spices and the additional step of charring the ginger, which isn't in these instructions but can be found at Jaden's blog here, really brought out some amazing flavours. The soup was incredibly rich, even though I cheated and used bought-stock rather than my store of home-made.


I was nervous about cooking this because of all the toasting and charring, but actually, the whole thing didn't take very long, and it ended up being yet another recipe from The Daring Kitchen that will make it into the regular rotation. Adding a dollop of hoisin and some sriracha after it was all assembled really made the dish, as did the squeeze of lime juice. I just wish I had a bigger soup bowl! Digg Technorati Delicious StumbleUpon Reddit BlinkList Furl Mixx Facebook Google Bookmark Yahoo

Monday, July 20, 2009

Sun-Dried Tomato Cream Sauce

This was kind of an experiment. I didn't want to leave the house to shop, but I still wanted a delicious dinner. Armed with pantry ingredients, I ended up creating a pretty darn tasty sauce to serve over pasta.


You need (for 4 servings):

8 oz pasta of your choice (I used penne)
8 sun-dried tomatoes (not in oil - dry)
3 tbs olive oil
3 cloves of garlic
1 large chicken breast (mine was 12 oz)
1/4 c shredded basil leaves
freshly ground pepper
1 c water or chicken stock, divided
3 tbs cream cheese (optional)
freshly snipped chives (optional but lovely)

1. Soak the sun-dried tomatoes in 1/2 c water for about 30 minutes, or until they are soft.

2. Drain the tomatoes, reserving the soaking water. Place the tomatoes and the garlic and 1 tbs of olive oil (and a tbs of the soaking water if you need it) in a food processor and process until almost smooth (some chunks are good and tasty!).

3. In a large cast-iron skillet, heat 2 tbs olive oil over medium heat. When the pan is hot, brown the chicken on both sides and set aside. Pour the soaking water from the tomatoes into the pan and scrape up the browned bits on the bottom of the pan. Let simmer while you slice up your browned chicken breast into bite-sized slices. This would be a good time to start boiling your pasta water.

4. Return the chicken to the pan along with the tomato puree. Allow the chicken to cook through with the tomatoes. This would be a good time to cook your pasta. When the past is almost done lower the heat and add the cream cheese, if using, and the chives, pepper to taste, and the basil.


5. When the cream cheese has mixed in and your pasta is cooked, drain the pasta and toss it with the sauce. If it is too thick, add some liquid until you get the consistency you like. Pasta water is good for this, or stock. Serve with a sprig of basil on top, if you like!


Digg Technorati Delicious StumbleUpon Reddit BlinkList Furl Mixx Facebook Google Bookmark Yahoo

Friday, May 22, 2009

Paprika-Braised Chicken with Chickpea Puree and Crispy Shallots

Once again, Serious Eats saves the day.
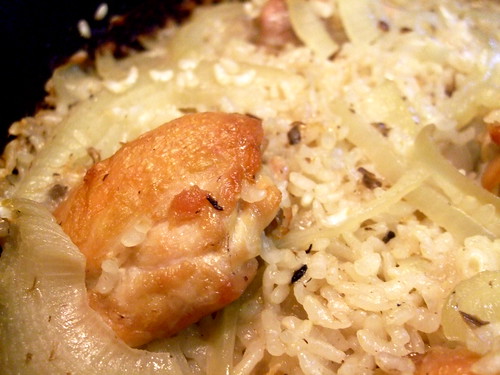

This dish 
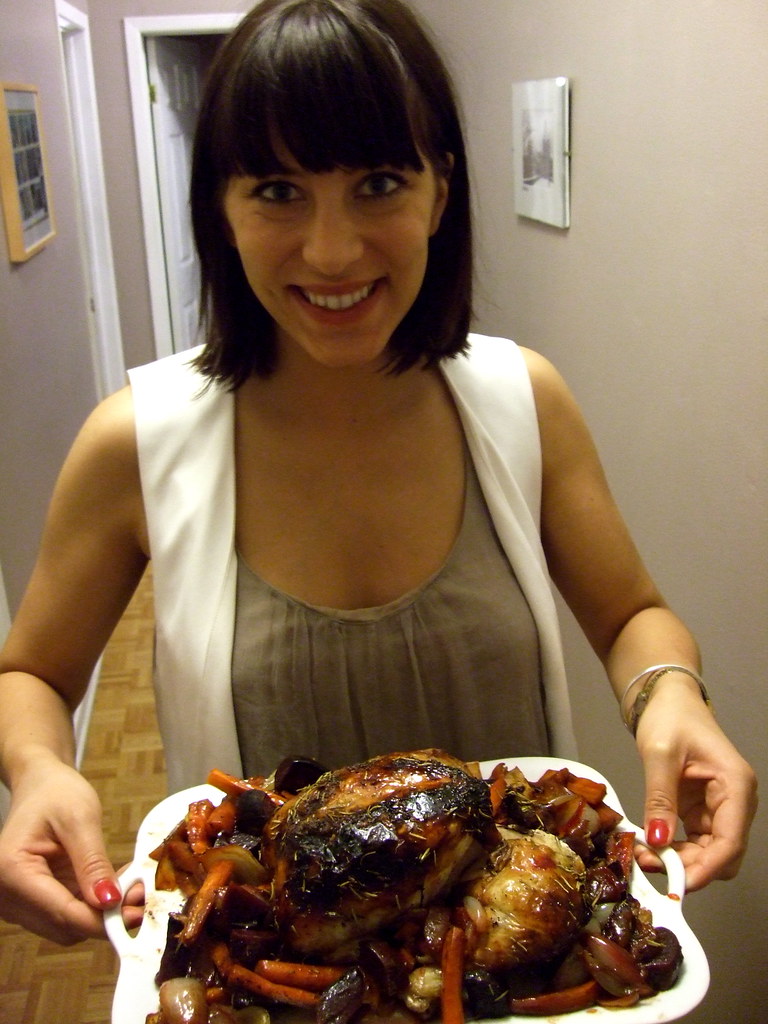
is very inexpensive to prepare and uses pantry staples to create something innovative and impressive. We were having company when we decided to make this, and it was a good choice, being economical enough to serve to a crowd, but at the same time not seeming like it.


For four eaters, you need (adapted from above link):

For the chicken
8 skin-on chicken pieces (thighs and drumsticks work best)
seasoned flour for dredging
4 tablespoons vegetable oil
4 oz salt pork, rind removed and finely diced (or pancetta!)
2 medium carrots, finely diced
2 medium onions, finely chopped
about 3.5 c. chicken stock (or two cans)
1 teaspoon paprika, preferably smoked
1 10oz package of frozen chopped spinach, thawed
4 tablespoons corn starch, dissolved in 1 tablespoon water
Salt and freshly ground black pepper

For the crispy shallots
2 large shallots, thinly sliced
Vegetable oil for deep-frying

For the puree
4 c cooked chickpeas (make your own! it's easy!)
1/2 cup water (I used chicken stock for extra yum)
2 tablespoon extra virgin olive oil
1 teaspoon ground cumin
Salt and freshly ground black pepper


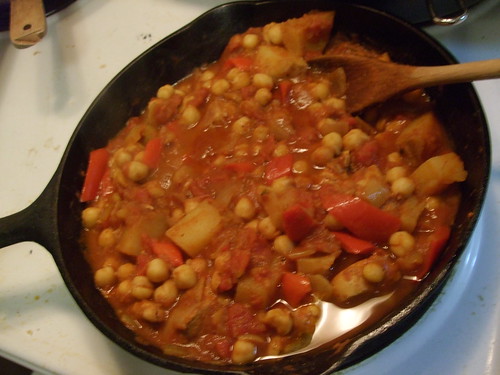
What to do (again, adapted from the above link):

1. Place the chickpeas, water, olive oil and ground cumin in a food processor or blender. Blend until texture is creamy and uniform, adding more water if necessary, 1 tablespoon at a time.

2. Place the shallots in a small saucepan and cover with vegetable oil. On low heat, bring oil to a simmer. Maintain a low, steady heat until shallots are golden brown, then remove with a slotted spoon and transfer to paper towels to drain.

3. Pat chicken dry and dredge in seasoned flour, dusting off excess. Heat vegetable oil in a large, heavy saucepan over moderate heat, until hot but not smoking. Place chicken pieces skin-side down in hot oil and sear 6-8 minutes, transferring to a plate once skin is golden brown.

4. Discard left-over oil and reduce heat to low. In the same saucepan, cook salt pork until crispy, about 4 minutes. Add carrots and onions, stirring to coat in rendered pork fat, and cook until onion is translucent.

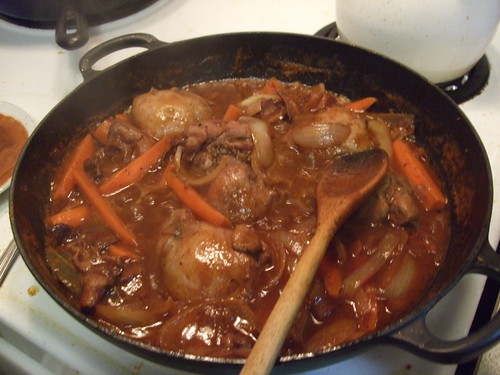
5. Add chicken broth and paprika and deglaze pan by boiling and scraping up any brown bits, 1 minute. Return chicken to pan, skin-side up, along with any juices that have accumulated on plate. Cover, reduce heat and simmer for 20-25 minutes, until chicken is cooked through.

6. Add chopped spinach and simmer, uncovered, for 5 minutes. Pour in cornstarch-water mixture, stirring to distribute, and cook until sauce is thickened, about 1 minute. Season to taste.

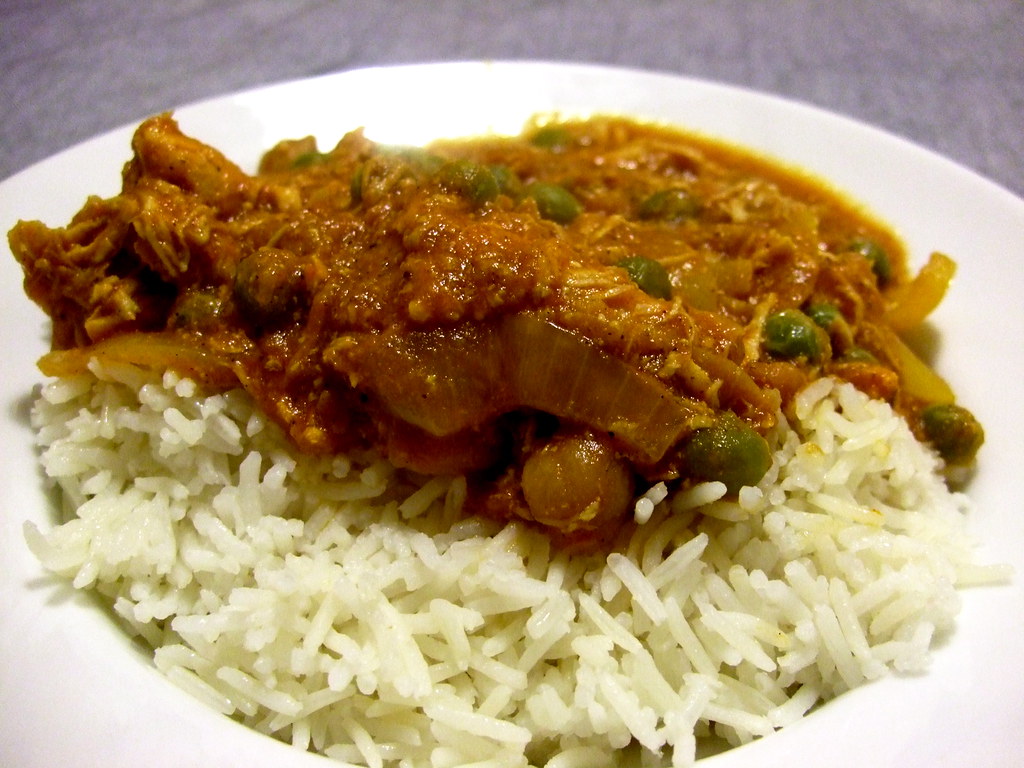
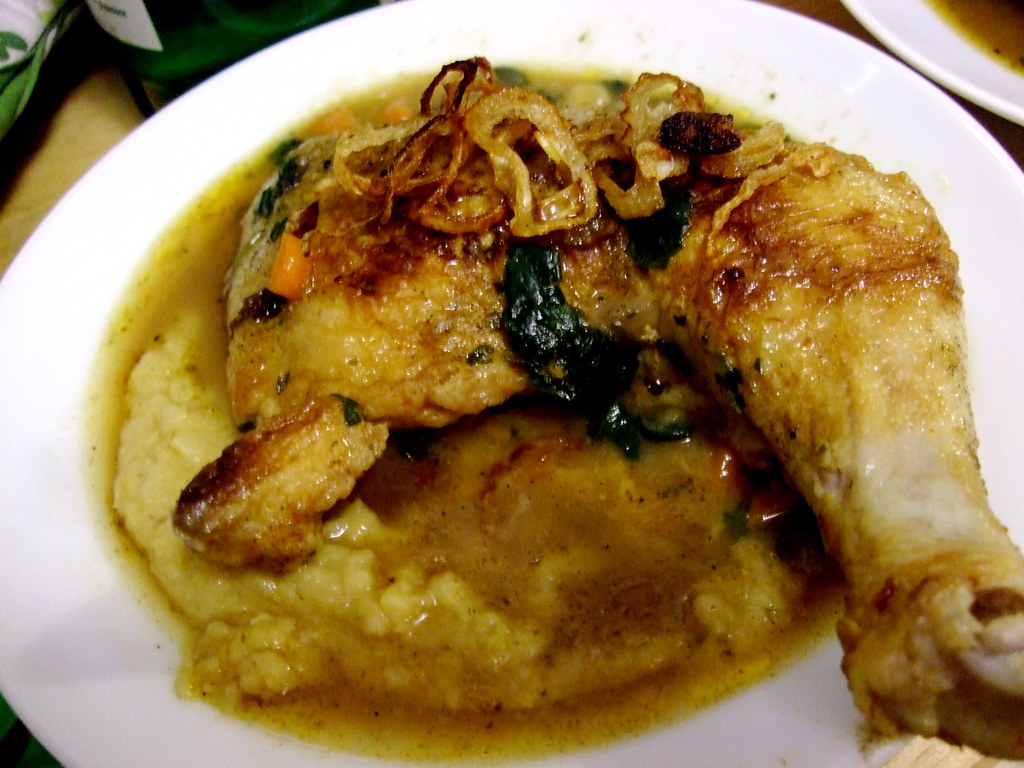
7. While you're simmering, transfer the chickpea puree to a saucepan over low heat and heat through. Season to taste. Serve puree topped with the chicken, sprinkled with crispy shallots. Top with some of the thickened sauce. Delish!

Digg Technorati Delicious StumbleUpon Reddit BlinkList Furl Mixx Facebook Google Bookmark Yahoo

Wednesday, May 6, 2009

Review: Campbell's Cream of Chicken Easy Cooking Sauce

Campbell's has really been pushing these new "Easy Cooking Sauces" - their people shoved about 5 flyers with coupons through my door, and the grocery store was having a crazy sale on them all of last month. I got a carton for about 70 cents, I think.

Anyways, each carton comes with a little recipe to show you how to use the sauce. I got Mediterranean Chicken Rotini Bake on the back of mine.

Basically, you mix the sauce with spices and pasta, put some veggies on top, then chicken, cover with cheese, and bake for about an hour. As with all these ready-made soups and sauces, the sodium levels are through the roof. Each serving has 720mg, out of a daily max of 2300mg.

It's supposed to come out looking like this:

(photo from Campbells.ca)

You need:

1 carton (500mL) CAMPBELL'S Cream of Chicken Easy Cooking Sauce
2 cups uncooked whole wheat rotini
1/4 cup chopped fresh basil *
2 cloves garlic, minced
2 cups (1/2” / 1 cm dice) zucchini **
2 tbsp chopped pitted black olives
1 cup chopped plum tomatoes
4 boneless, skinless chicken breasts ***
1/2 cup shredded part-skim Mozzarella cheese
2 tbsp grated Parmesan cheese
Additional chopped fresh basil for garnish

Directions

  • 1. Combine cooking sauce, pasta, basil and garlic in shallow 2 qt (2 L) baking dish.
  • 2. Spread evenly with vegetables. Top with chicken. Sprinkle with cheeses. Cover.
  • 3. Bake at 400ºF (200ºC) for 50 minutes or until hot and bubbly. Remove cover and broil until cheese is golden and bubbly – about 3 minutes. Stir pasta, sprinkle with additional chopped fresh basil and let stand 5 minutes before serving.

* I used about twice this much basil, as I had some to get rid of.
** I didn't have enough zucchini so I made up the difference with some red and green peppers and a bit of brocolli
*** I think that a whole chicken breast is really a lot for one person, so for four people I used two and just cut each in half.


Verdict:


Meh. It was fine, but nothing to write a blog post about, or anything.

Even though I only cooked it for a total of 50 minutes, rather than the recommended 53, the zucchini were very mushy, and the chicken was quite dry. Despite the amount of sodium, the dish was not overly salty, which was good. As far as flavour, the sauce didn't disappoint; I tasted it before mixing it in with the pasta, and it was nice. But the end product was a bit bland and lacked something.

If I made this again, I would double the garlic, at least, and leave out the zucchini in favour of more peppers, which stood up a bit better to the long baking. I would also add a diced red onion.

Digg Technorati Delicious StumbleUpon Reddit BlinkList Furl Mixx Facebook Google Bookmark Yahoo

Tuesday, May 5, 2009

Balsamic-Glazed Roast Chicken


This recipe is from my dear friend over at The Pantry Collective. You should go visit her and see what yummy things she makes. I've been drooling over that and other recipes for a while, and I finally got the chance to make it! Verdict: Delicious!!

I didn't have some of what was needed, so I improvised a bit. You might notice some differences between her recipe and mine here. :)

You need:

a roasting chicken
1/4 cup balsamic vinegar
1/4 cup extra virgin olive oil
2 tbs honey
2 teaspoons coarse sea salt
1 teaspoon freshly ground black pepper
1 tbs thyme
1 tsp oregano
1 tsp basil
2 tsp rosemary
1 large lemon, juiced and zested, quarters reserved
8 cloves of garlic, peeled
4 small beets, peeled and quartered
4 medium carrots, peeled and cut in large pieces
2 medium onions, quartered

1. Wash your chicken, inside and out, and preheat your oven to 500ºF. Pat the chicken dry.
2. Combine the rest of the ingredients, save the last four, in a small bowl and mix.
3. Arrange your chopped veggies in the bottom of a roasting pan. Plop the chicken down in the middle.
4. Stuff the chicken with some onion quarters, the lemon quarters, and all of the garlic. Pour the sauce over the chicken, being careful to cover all the surfaces.
5. Roast the entire pan, veg and all, lowering the temperature to 400 after you put the pan in.


It shouldn't take more than about 90 minutes or so, although if you have included beets in your mixed veg, make sure you don't mistake beet juices for uncooked chicken juice, or vice versa. We ended up roasting ours for so long that the bones all fell away! However, despite our error, the chicken was so so juicy and delicious, and the vegetables retained their shapes. We ate it with steamed green beans and orzo. And plenty of wine.

Bonus: my sister holding the plate of chicken and veg. She is a brave lady for carrying that chicken while wearing a white silk blazer/vest.


Digg Technorati Delicious StumbleUpon Reddit BlinkList Furl Mixx Facebook Google Bookmark Yahoo

Tuesday, April 7, 2009

Slow-Cooker Indian Butter Chicken

I've owned a slow-cooker for about eight years now, and tonight marks its inaugural use. It's not that I scorned the crock-pot; it's just that first of all, I love the act of cooking. I love standing in front of the stove and watching the flavours and colours come together. Second of all, I'm never really sure what I want for dinner until it's 4pm and I don't want to work any more and my mind and web browser turn to cooking and food blogs.

But this morning, having woken up with a sore throat, I knew that by the time my meeting-filled day wrapped up, I was going to be ready for nothing more than a couch, a cozy meal, and maybe a beer. Thus inspired, I looked through the many recipes my generous friends have sent my way, but I also looked to this lady, whose crock-pot blog is the go-to online for slow-cooker recipes.

I have been trying for years with no success to cook something akin to the butter chicken I order when at Indian restaurants. I decided to give it one more try, using this recipe, but with some modifications.


You need (adapted from the above link):

A 3.5 litre crock pot (but I bet you anything you could do this stove-top too!)

2 large-ish chicken breasts
2 onions, sliced into half-moons
1 can of tomato paste
1 can of coconut milk
5 cloves of garlic, minced
1.5" knob of ginger, minced
2 whole cinnamon sticks
15-20 whole cardomom pods
2 tsps whole pepper corns (I used mixed: red, green, and black)
1 tsp grated nutmeg
2 whole star anise
1 tsp whole cumin seeds
1 tsp whole cloves
2 bay leaves
1 tbs curry powder
2 cubes of chicken/veggie/beef stock (cheating, cheating, yes, yes.)
4 tbs butter
1/2 c frozen peas
1/2 c chopped sweet pepper (I had a yellow one on hand)
1/2 c cooked chickpeas (because they were there)

1. Put into the crock-pot all ingredients but the last three. I put my whole spices in a cheesecloth bag tied at both ends and I recommend you do the same.

2. Cook on low 7 hours or high 3.5 hours. After that time, taste it to adjust the spices and add in the last three ingredients. Cook another hour on low or another 30 minutes on high.

HOW EASY WAS THAT, HMMM? Serve it with basmati rice and naan bread, a recipe for which you can find here.

Digg Technorati Delicious StumbleUpon Reddit BlinkList Furl Mixx Facebook Google Bookmark Yahoo

Monday, April 6, 2009

"Bistro Chicken"

If you love crispy, juicy, herbed chicken with the skin on, you need to try this. It's delicious in the oven, but even better in the summer on the barbecue.


You need:

8-10 skin-on chicken drumsticks and/or thighs
1 tsp coarse sea salt
1 tbs dried or 2 tbs fresh rosemary, crushed
2 tsps dried thyme
1 tsp fresh ground black pepper
2 tbs olive oil
zest of one lemon (optional)

Preheat your oven to 400ºF and line a baking sheet with foil, if you're doing this in the oven. Otherwise, heat up your grill.

Mix all the non-chicken ingredients in a small bowl.

With your fingers, carefully separate the skin from the meat on a piece of the chicken. Stuff the space under the skin with a small amount of the herb paste. Repeat with the other chicken pieces. You may need more paste than I gave amounts for - I really just eyeball it and make more if I need it. The olive oil makes the meat super juicy and the herbs permeate throughout.

Arrange the chicken on the barbecue or on your baking sheet and bake/grill until the chicken is cooked through and the skin is crispy and golden.

This goes well with mashed potatoes and veg in the winter, and with grilled corn on the cob and potato salad in the summer. So easy and versatile, and your dinner guests will think you are made of magic.

Digg Technorati Delicious StumbleUpon Reddit BlinkList Furl Mixx Facebook Google Bookmark Yahoo

Thursday, March 26, 2009

Coq au Vin

When it's getting to be spring and you start to get a bit nostalgic for the wintery snows that left us only weeks ago, it's nice to get a day that is crispy and overcast because it justifies cooking something rich, hearty, warming, and cozifying.

I love all forms of chicken cooked in wine, and yet I've never made a proper Coq au Vin. Tonight a dear friend is coming, having just returned from overseas. I think she warrants something special; something special that involves bacon. Nothing warms a person's heart like one meat cooked in the fat of another meat. And chicken cooked in bacon and then simmered in a hearty red wine is pretty much the top of the cozy-dinner list.

Words cannot express how delicious, rich, and umami-fied this meal was. If you need a meaty, brothy, scrumptious fix, this is it. Trust me.

I'll say it right now: I don't like mushrooms and nothing anyone can do can induce me to cook with or eat them. Aside from that, and the fact that Provigo doesn't stock peeled, frozen pearl onions and I'm lazy, I'm not going to do any modifications to the classic Coq au Vin à la Julia Child. Sound good, Julia?

Recipe:
A half a pack of low-salt bacon, cut into rectangles about 1/4 inch across and 1 inch long. YUM BACON
6 boneless, skinless chicken thighs
pepper to taste
1/4 c cognac
3 c bold red wine
1-2 c chicken stock
2 tbs tomato paste
2 cloves mashed garlic
3 large carrots, sliced into 1/2" by 3" points
1/2 tsp thyme
2 bay leaves
2 onions, sliced into half-moons
1/2 lb sauteed mushrooms (I'm having none of it)
parsley for garnish

1. Sautee your bacon until it is very lightly browned. Julia wanted me to saute it in 2 tbs butter -- IMAGINE!!! Remove to a side dish. Use a dutch oven or fireproof casserole.

2. Brown the chicken in the hot fat. Season the chicken with salt and pepper and return bacon to the pot. Add the onions and the carrots. Cover, and cook slowly for 10 minutes, turning the chicken once.

3. Pour in cognac (I used brandy). OK and here is a direct quote from Mastering the Art of French Cooking: "Averting your face, ignite the cognac with a lighted match. Shake the casserole back and forth for several seconds until the flames subside." Uh... I'm not so sure I can do this. I'm not sure my landlord or my eyelashes would like it. I did not set my brandy on fire, but feel free to attempt this dangerous culinary feat at your own risk.

4. Pour in the wine (MOAR BOOZE) and add just enough stock to cover the chicken. Stir in the tomato paste, garlic, and herbs. Bring to a simmer and cover for 25-30 minutes, until the chicken is tender and the juices run clear. Skim off the fat. Julia says you should thicken the gravy with flour, but I found that I reduced it enough so that I didn't need to do this.

6. Then boil rapidly until the liquid is reduced to 2 1/4 cup. Discard bay leaf and remove from heat. Serve to your adoring guests!


I served it with roasted potatoes, and lots of wine although Julia also recommends buttered peas. Even though we were only three, and this recipe is supposed to serve 4-6, we polished off all of it and two bottles of wine. The bacon really made this meal, so use turkey bacon if you must, but don't omit it all together!


Digg Technorati Delicious StumbleUpon Reddit BlinkList Furl Mixx Facebook Google Bookmark Yahoo

Tuesday, March 24, 2009

Naan Bread and Chicken Madras


I love naan bread. I love Indian food. So does M.

I made a huge batch of delicious chicken madras the other day and froze some. Tonight we're busting it out for dinner #2, and because I can't seem to eat a dinner without working for it, I decided naan was in order. I made naan about two years ago with a yeast-based recipe, but the one I tried today is yeast-free and relies on baking powder for its puff.

Here's what you need (From BBC Food):

Ingredients
For the dough
250g/9oz plain flour
2 tsp sugar
½ tsp salt
½ tsp baking powder
110-130ml/3½-4½fl oz milk
2 tbsp vegetable oil, plus extra for greasing

1 tbsp butter, melted, to serve

Method
1. For the dough, sift the flour, sugar, salt and baking powder into a bowl. In another bowl, mix together the milk and oil.
2. Make a well in the centre of the flour mixture and pour in the liquid mixture. Slowly mix together the dough by working from the centre and incorporating the flour from the edges of the 'well', to make a smooth, soft dough. Knead well for 8-10 minutes, adding a little flour if the dough is too sticky.
3. Place the dough into an oiled bowl, cover with a damp tea-towel and leave in a warm place for at least an hour, until doubled in size. Then knock the dough back and form into five balls.
4. Preheat the grill to medium and place a heavy baking sheet on the upper shelf of the grill to heat.
5. Roll the dough balls out quite thinly, ideally in a teardrop shape, but really this is just aesthetic. Sprinkle over your chosen topping and press into the surface of the dough. Place the naans onto the hot baking sheet and grill for just 1-2 minutes, or until lightly browned. Brush with butter and serve hot.


My dough is currently sitting for its hour rest right now. A few minutes before dinner, I'll pop them on my baking stone for a few minutes and tell you how they turn out.


Edit: They turned out pretty good. I would cook them at hotter than the 400F I did this time, and for less time. Also, I would poke holes in them with a fork to release some of the air, as they got pretty puffy.


Here's my chicken madras recipe:

2 chicken breasts or equivalent amount of other boneless, skinless chicken, in cubes (Optional! You can use tofu, beef, just have chickpeas, etc!)
4tbs Patak's madras curry paste (yes, yes, it's cheating but it's tasty) or to taste.
2 medium onions, diced
1 green or red pepper, chopped
1.5 c chicken or veggie stock
1 large potato, skin on, diced
1 c chickpeas (optional)
2 c chopped fresh spinach (optional)
1 can diced tomatoes with juices
1 tbs oil

1. In a large cast-iron skillet or deep-sided pan, heat the oil on medium or medium high (medium for cast-iron, medium high for others). Add the chicken and brown on all sides.

2. Add the Patak's paste, the potato, and the onions and fry until onions are soft and everything is coated in paste.

3. Add the tomatoes and the broth, the pepper and the chickpeas, if using. Cover, reduce heat, and simmer until the liquid is reduced by half. Remember to check it every once in a while and scrape the bottom of the pan.

4. Add the spinach, stir, and serve with basmati rice (I cook mine with peas and butter), and the naan you made from the above recipe. I like yoghurt with mine, because I'm a spice wimp. :)

Digg Technorati Delicious StumbleUpon Reddit BlinkList Furl Mixx Facebook Google Bookmark Yahoo

Grandma's Chicken-Rice Casserole

This is a great, comforting, easy winter or fall dinner. You can make it with pork-chops if you prefer, but I'm a chicken kinda girl.


I'm sure this recipe is as old as tinned soup itself, but there's just something deliciously comforting about this meal.

Recipe:


1 can cream of mushroom soup
1 soup-can water
1 soup-can full of uncooked arborio or short-grain rice
as many chicken thighs as you like - i used 6 small boneless skinless thighs
1 tbs oil for frying
1 large raw onion, sliced finely (or more if you like - i used 1.5 because i like onion)
salt and pepper to taste

1. Preheat the oven to 375F.

2. Trim the chicken if you like. Heat oil in the pan to medium/medium high. I use a Le Creuset so it's all in one pan from start to finish, but you can do what you like! A skillet and a casserole dish work just as well, but it's best if the casserole has a lid, or at least a good covering of foil.

3. Sear the chicken on one side until brown and a bit crispy, and then the other side - about 5 minutes per side. Set aside on a plate. While you're doing the chicken, slice up your onion into thin slices.


4. To the same pan, add your can of soup and your water. Reduce heat a bit and deglaze, scraping up the brown bits from the chicken.

5. If you're using the same dish for everything, like I did, pour the soup out into a measuring cup/mixing bowl so that your baking dish is empty. If you're using a different dish for the baking, get it out now.

6. Lay down 1/4 of the onions in your casserole and sprinkle 1/4 of the rice over top. Plop in the chicken pieces, cover with more onion and rice until you've used them up.


7. Pour the soup mixture over the contents, making sure that the rice is covered, especially at the edges. it is not possible for me to take a picture of this step without it looking gross, so I'll leave that one to the imagination.

8. Cover the casserole and stick that baby in the oven. Check it after 45 minutes and test the rice for done-ness. It may need 10 more minutes, it may not. You should have some liquid left over by the time the rice is done.

Serve hot with salad. This makes great leftovers, too, and freezes well.

Digg Technorati Delicious StumbleUpon Reddit BlinkList Furl Mixx Facebook Google Bookmark Yahoo