Hello, dear readers!
Please, don't be alarmed: I will be away for a month.
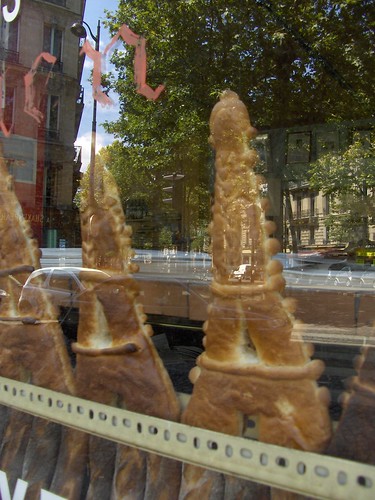
I'm taking a trip with my family to Paris and Madrid, and while we will be eating lots of yummy food, I won't be cooking much of it! I may get a chance to post some photos of things we're eating. For now, here's a photo from my last visit to Paris - a bakery had made baguettes in the shape of the Eiffel Tower!! :)
So please enjoy your August and I'll see you back in September! If any of you have any must-eat advice for Madrid (or Paris, although we may have our dinners planned out) drop me a line!
Friday, July 31, 2009
Saturday, July 25, 2009
Rainbow Stuffed Peppers
How beautiful are peppers? So succulent, and perfect for the summer - and available in a rainbow of colours! These stuffed peppers are a great light supper - I think you'll like them. I made them with turkey and brown rice, so they're also pretty healthy - you don't have to tell anyone that, though - they'd never guess.
You need:
1 lb lean ground turkey
1 tbs olive oil
1 c uncooked brown rice + enough stock to cook the rice in - I used chicken stock.
4 peppers of any colour you like
1/2 a large onion, finely diced
1 stalk of celery, finely diced
1/4 c finely minced herbs - I used basil, rosemary, and chives because that's what's growing in my garden
1 medium tomato, chopped
2 tbs tomato sauce
6 tbs finely grated parmesan cheese.
1. Start by cooking your rice according to the directions. Instead of water, use stock to cook the rice - it'll give you a better flavour.
2. While the rice is cooking, sautee the onion, celery, and turkey in the olive oil.
3. Slice the peppers in half lengthwise and clean out, leaving the stems intact. You can fit more filling in if you leave them.
4. When the rice is cooked, mix it with the celery-onion-turkey mixture along with the tomatoes, the tomato sauce, and the fresh herbs.
5. Fill the peppers with the rice mixture and place the peppers into a rimmed baking dish or casserole dish. Top with 1 tbs of parmesan each. Carefully pour 1/4 c water into the casserole dish, being careful not to get the insides of the peppers wet.
6. Bake in an oven which has been preheated to 375ºF for 40 minutes, or until the peppers are soft and the cheese has browned. Let rest 5 minutes, then serve!
Monday, July 20, 2009
Sun-Dried Tomato Cream Sauce
This was kind of an experiment. I didn't want to leave the house to shop, but I still wanted a delicious dinner. Armed with pantry ingredients, I ended up creating a pretty darn tasty sauce to serve over pasta.
You need (for 4 servings):
8 oz pasta of your choice (I used penne)
8 sun-dried tomatoes (not in oil - dry)
3 tbs olive oil
3 cloves of garlic
1 large chicken breast (mine was 12 oz)
1/4 c shredded basil leaves
freshly ground pepper
1 c water or chicken stock, divided
3 tbs cream cheese (optional)
freshly snipped chives (optional but lovely)
1. Soak the sun-dried tomatoes in 1/2 c water for about 30 minutes, or until they are soft.
2. Drain the tomatoes, reserving the soaking water. Place the tomatoes and the garlic and 1 tbs of olive oil (and a tbs of the soaking water if you need it) in a food processor and process until almost smooth (some chunks are good and tasty!).
3. In a large cast-iron skillet, heat 2 tbs olive oil over medium heat. When the pan is hot, brown the chicken on both sides and set aside. Pour the soaking water from the tomatoes into the pan and scrape up the browned bits on the bottom of the pan. Let simmer while you slice up your browned chicken breast into bite-sized slices. This would be a good time to start boiling your pasta water.
4. Return the chicken to the pan along with the tomato puree. Allow the chicken to cook through with the tomatoes. This would be a good time to cook your pasta. When the past is almost done lower the heat and add the cream cheese, if using, and the chives, pepper to taste, and the basil.
5. When the cream cheese has mixed in and your pasta is cooked, drain the pasta and toss it with the sauce. If it is too thick, add some liquid until you get the consistency you like. Pasta water is good for this, or stock. Serve with a sprig of basil on top, if you like!
Saturday, July 18, 2009
Muttar Paneer and Dal
I've been a little Cast-Iron Dormant of late - sorry about that. I won't bore you with excuses. Instead, accept this humble offering - three new recipes and accompanying pictures.
I've been wanting to make a nice dal in the crock pot for a while now, and finally decided today was the day to do it. But I decided I couldn't just have dal for dinner all by itself - that would be silly. Clearly I needed another curry to go along with it. And probably some naan bread, too. And so we called some folks and I made a vegetarian Indian feast - we had not only dal, but also muttar paneer, and naan bread.
The most fun part of today, the really new thing for me, was learning how to make paneer. I always try to order some paneer (or at least steal a bite of someone else's) when we go out for Indian, and I just assumed it was one of those really complicated things to make - that I'd have to buy rennet or a cow or something. Actually, it's pretty easy.
So here are the recipes, if you'd like to follow along. First, crock pot dal, as it's the one you need to start earliest (unless you don't use a crock pot to make it). It makes enough for dinner for four plus lots of leftovers, so if you have a smaller crock pot, feel free to halve the amounts.
You need:
3 c dry red lentils, rinsed and sorted
1 large onion, diced
2 cloves of garlic, minced
1 large knob of ginger, minced
1 bay leaf
1.5 tbs cumin
2 tsp cinnamon + 1 cinnamon stick
1 can coconut milk
1 c crushed tomatoes
3-4 c veggie or chicken stock
1.5 tbs garam masala
1 tbs tumeric
1 c plain yogurt, to add at the end if you want. We didn't but it would be good.
Just put everything except the yogurt in the crock, give it a stir, and turn it on low for about 6 hours, or until the lentils are cooked and everything smells nice. Easy. This one doesn't look so pretty when it's cooked, so no photos.
Next, making your own paneer. Paneer is a very mild and delicious non-melty Indian cheese. It kind of has the consistency of tofu, but not the flavour, which instead is mildly creamy. It only has two ingredients:
1 litre of whole milk
juice of 1 lime
You'll need to have some cheesecloth handy to make this, or a very fine seive. I found lots of great tutorials for how to make this online - this was the one I ended up following - very helpful, and lovely photos!
1. Bring the milk to a boil - a full boil. When it is boiling, add the lime juice and stir. The curds will separate from the whey, as you can see in this astonishingly unappetizing photo:
2. Using a slotted spoon, remove the curds and place in the cheesecloth bag to drain. You'll need to drain it for an hour or two. For the first hour I hung mine from a knob, letting the whey drain into a measuring cup below.
For the second hour I pressed it between a rack and a heavy casserole dish to make a firm cheese suitable for cutting and frying.
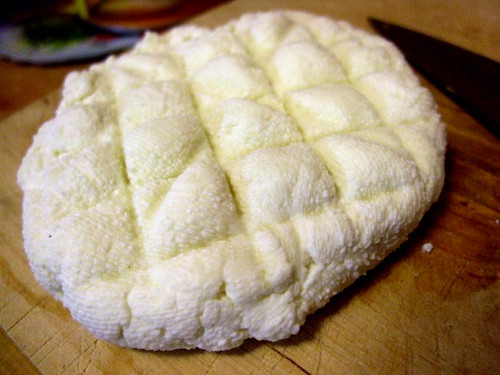
3. When the cheese is firm, remove the bag and cut it into little cubes. It's now ready to use.
My favourite ways to eat paneer are in saag paneer (with spinach) or in muttar paneer (with peas). Tonight was a peas night. I turned to Nigella for help.
You need:
20 oz (by weight) of frozen peas
your paneer that you just made
some oil for frying
1 onion, very finely diced
1 knob ginger, very finely diced
3 cloves of garlic, very finely diced
1/4 c crushed tomatoes or PLAIN tomato sauce
1.5 c veggie or chicken stock
2 tsp tumeric
2 tsp garam masala
1. Fry your paneer. Heat up a pan with some oil and then add the cubed paneer. Let it get brown on all sides, then remove it to a dish lined with paper towel to drain. They should look AMAZING. Resist popping them into your mouth like popcorn.
2. In the remaining oil, gently fry the onion, ginger, and garlic. Add the spices and fry again for a minute.
3. Add the frozen peas, the stock, and the tomato. Cover, and let simmer until the peas are soft.
4. Stir in the paneer pieces and heat through.
Serve with naan bread to your happy guests.
Friday, July 3, 2009
Mom's Amazing Seed Loaf
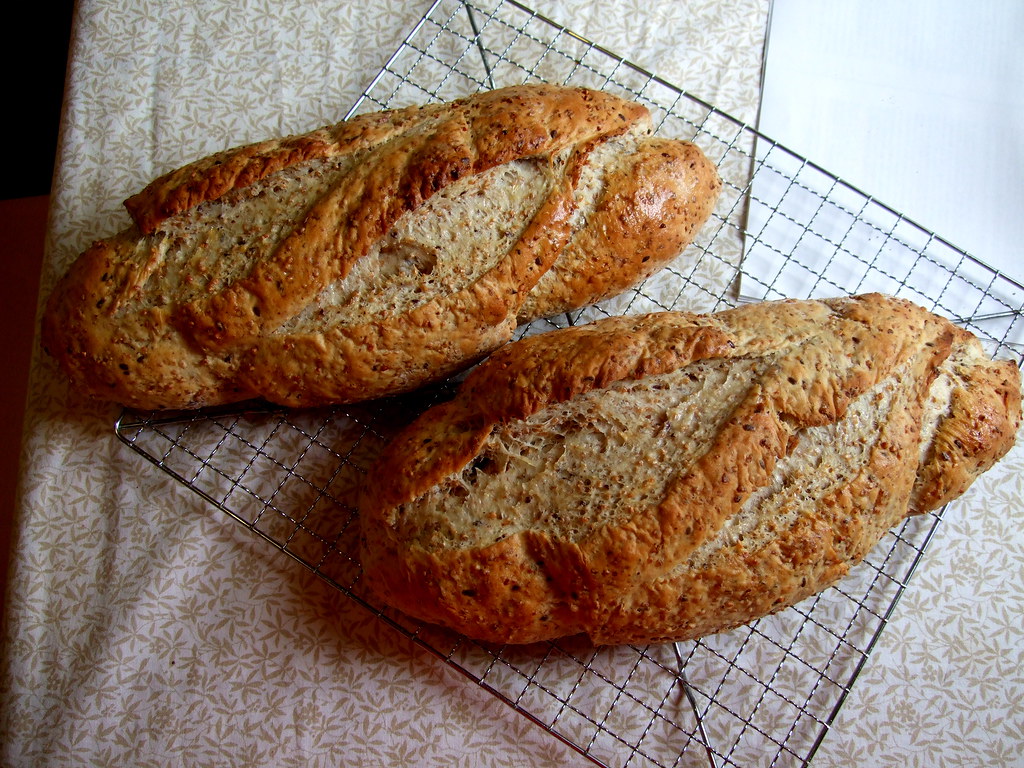
My mom (hi Mom!) sent me this recipe for the most delicious (and healthy!) bread. It's basically a white loaf except for the hefty dose of Red River Cereal, which adds a nice big dose of fiber to every slice. I only made one modification, which was to add some lemon juice. It was an experiment that paid off, as I'd heard that lemon juice is an excellent dough conditioner, and yields a fluffier, tastier loaf.
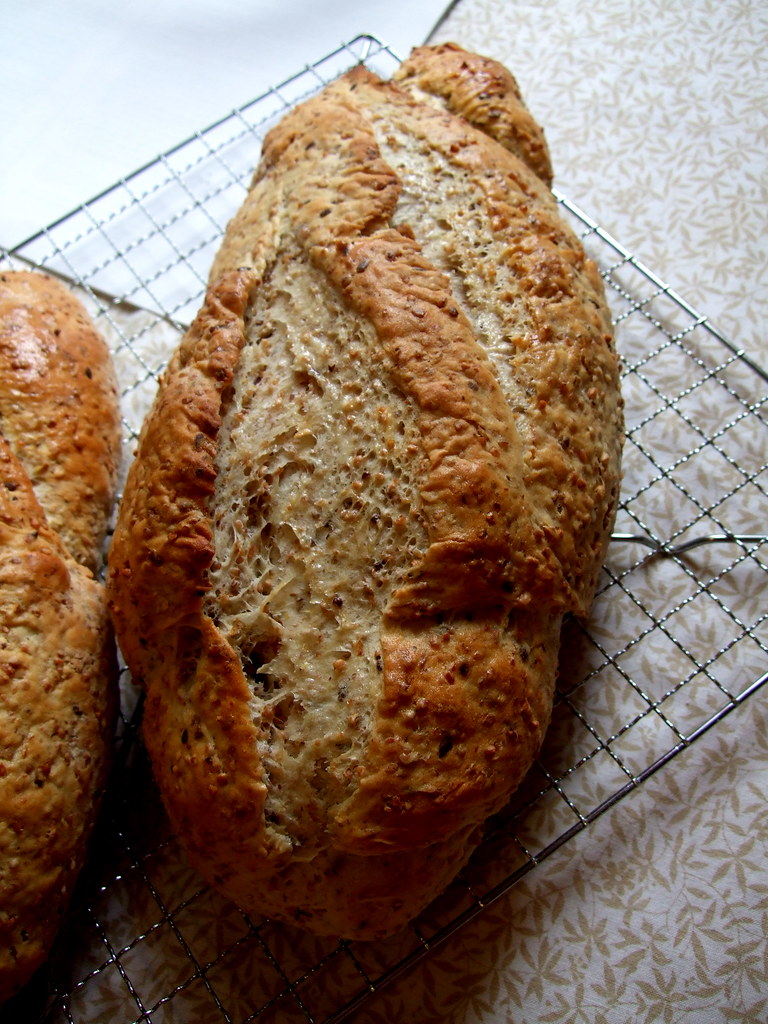
You can shape it either in loaf tins or freestyle, as I did. The inside crumb is light and soft, despite being so good for you. This might be an excellent bread to use to introduce a reluctant seedy-bread eater to the fold.
You need:
6 c all-purpose flour
2 c Red River cereal (I imagine Sunny Boy would also work)
3 c boiling water
1 tbs sugar or honey
1 tbs salt
4.5 tsp yeast
3 tbs lemon juice
2 tbs butter, for brushing on after.
1. In a large mixing bowl, combine the cereal and the boiling water. Let sit 20 minutes, until the cereal has cooled and absorbed much of the water.
2. Add 2 cups of flour and mix, then add the sugar, salt, yeast, and lemon juice. Make sure the mixture is not hot (warm is ok) otherwise it'll kill your yeasty-beasties.
3. Add the remaining flour 1/2 cup at a time and knead for 10 minutes.
4. Place the dough in a greased bowl and cover. Let rise about 45 minutes.
5. Shape into two loaves and let rise again for 40 minutes. If you shape them freestyle, slash them with a sharp knife just before baking.
6. Bake for 35 minutes at 400ºF. When done, remove and brush with the butter. Your house will smell like heaven.
Edit: Here is a shot of the crumb:
Thursday, July 2, 2009
Pastitsio!
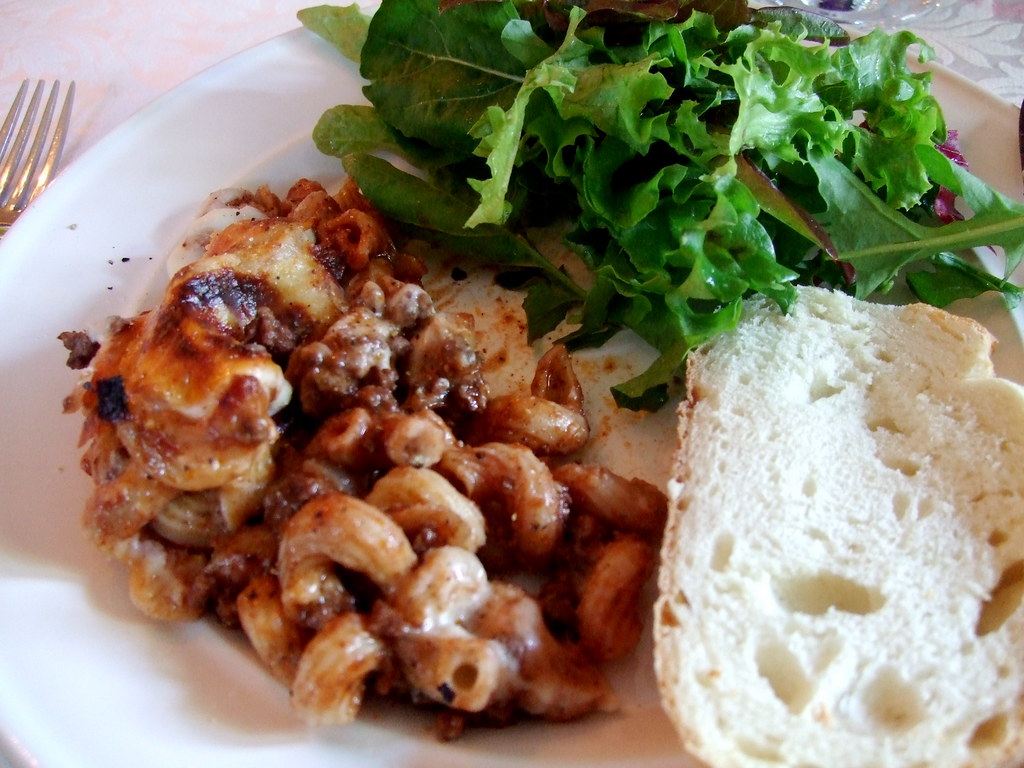
Pastitsio happens to be my oldest sister's favourite meal - with good reason: it's delicious! It's a Greek layered pasta dish made with meat sauce and Bechamel.The spicing of the meat distinguishes it from an Italian-style meat sauce and compliments the Bechamel.
This recipe is from an old Martha Stewart Living magazine - 2001, to be exact. It calls for ground lamb, which is so yummy if you can afford it, but if you can't, ground beef or turkey would do the trick - even veggie ground round might do it!
The recipe is found here, or you can read below; I've modified it only slightly, as I tend to like more spices than recipes tend to call for.
For the meat sauce:
2 tablespoons extra-virgin olive oil
2 white onions, cut into 1/4-inch dice
2 pounds ground lamb (or beef/turkey)
2 teaspoons coarse salt
3 teaspoons ground cinnamon
1/2 teaspoon freshly ground pepper
1/3 teaspoon ground nutmeg
1/2 cup dry red wine
1 can (6 ounces) tomato paste
2 dried bay leaves
2 cups beef stock
For the Bechamel:
6 tablespoons unsalted butter
1/2 cup plus 1 tablespoon all-purpose flour
2 teaspoons baking powder
3 cups whole milk
1 cup freshly grated Parmesan cheese
2 teaspoons coarse salt
1/4 teaspoon freshly ground black pepper
1/4 teaspoon ground nutmeg
1 pinch ground cayenne pepper
To assemble the dish:
butter for the baking dish, or cooking spray
1 pound cooked noodles, like Penne, Cavatappi, Rigatoni, or Ziti.
How to make it all work:
1. Make the meat sauce first. Saute the onions in olive oil over medium eat. Add the meat and the spices and cook until browned. Add the wine and cook until reduced, then add the tomato paste, the bay leaves, and the 2 cups of water. Simmer for 30 minutes and then cover and remove from heat. The smell of the cinnamon and nutmeg mixing with the onions and meat makes your whole house smell amazing! It is very difficult to not eat the sauce without waiting for the dish to be finished.
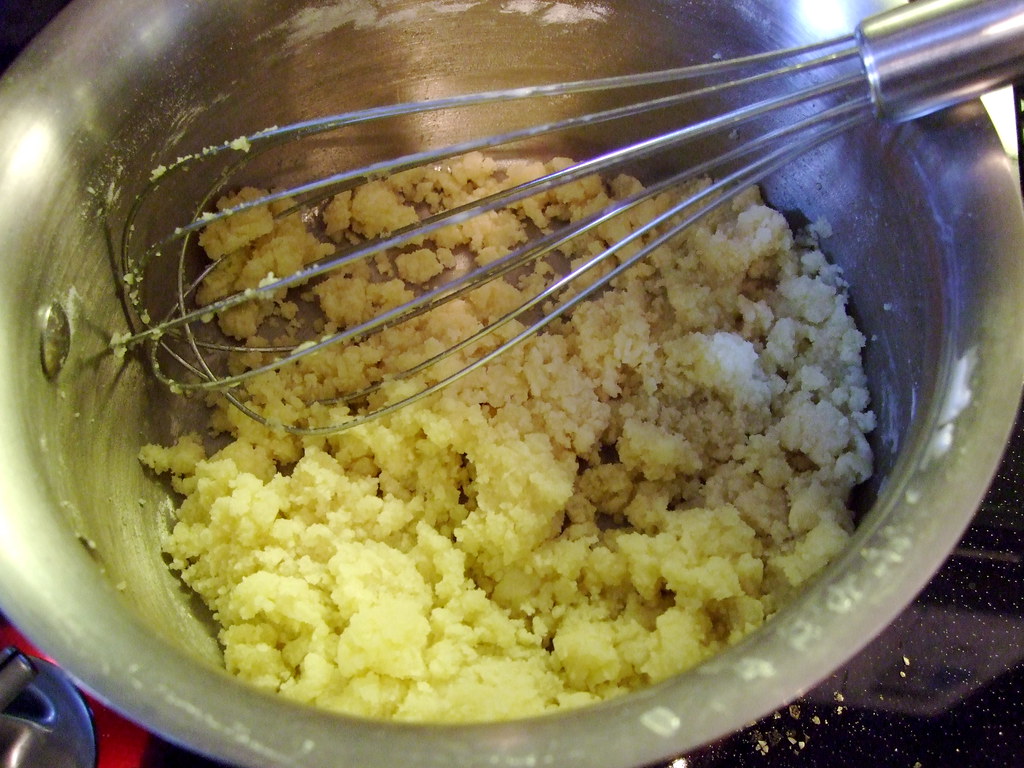
2. Next make the bechamel. Melt the butter over medium heat until it bubbles, and then add the flour and baking powder. Cook, stirring with a whisk, for about a minute. If it's lumpy at this stage, not to worry. When you whisk in the milk in the next step it'll smooth out nicely.
While still whisking, add the milk slowly. Whisk constantly until the sauce bubbles and thickens. Remove from heat, stir in the cheese and spices, and set aside, covered.
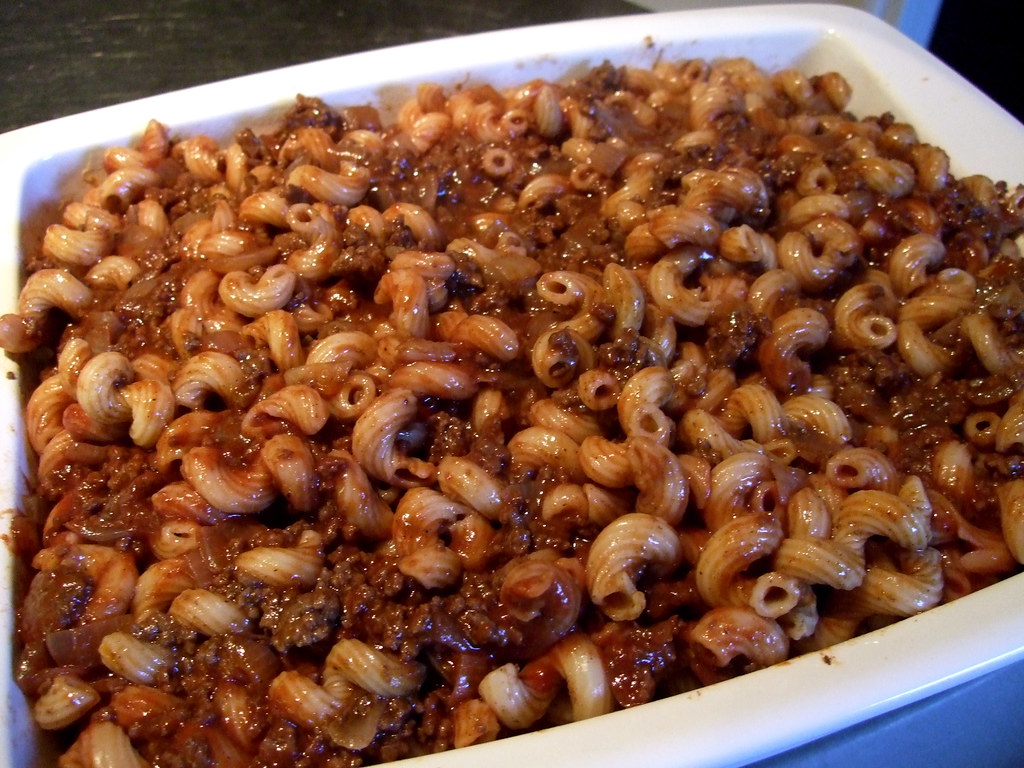
3. Now, preheat your oven to 375º and assemble your dish. Grease your baking dish (9-by-13 works well) with the butter or spray. Cook your pasta, if you haven't already done so - don't cook it as long as you would if you were eating it right away - very al dente is best. Drain the noodles and add them to the meat sauce; stir to combine. Pour the meat and pasta into the baking dish.
Then spread the Bechamel over top. Sprinkle with a bit more parmesan, if you have it, and bake until the top is golden, about 30-40 minutes. Let the dish settle for 10 minutes before you serve it.
Even my very picky nephews asked for seconds!
Subscribe to:
Posts (Atom)