Monday, October 4, 2010

Chili Hand Pies

Or, what to do with leftover chili!


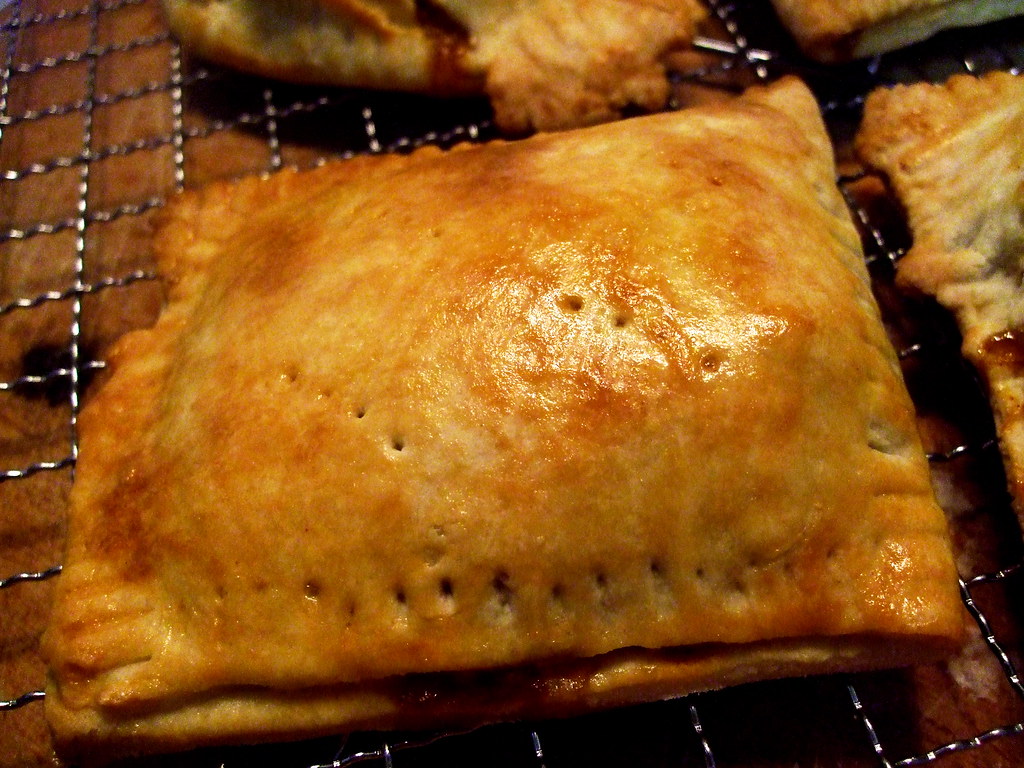
Hand pies are great because they are tiny pies. Everything is better if it is in miniature and/or in pie-form. The hand pie is superior to the regular pie in that the pie crust-to-filling ratio is greater than the traditional pot-pie, for example. This is also a great way to take chili on a picnic or to work/school for lunch, if your life is dull like mine and you don't go on picnics. It is a no mess, no cutlery way to both transport and eat delicious chili, or for that matter, any other stew-like filling.

The pastry, the recipe for which is from here, was delicious. It held together great even with the sloppy filling and was flaky as well as flavourful.

You need:


2 1/4 cups unbleached all-purpose flour
1 1/2 teaspoons salt
1 teaspoon sugar
1/2 cup cold unsalted butter, cut into 1/2-inch cubes
1 egg, slightly beaten
1/3 cup ice cold water
1.5 cups leftover chili


These instructions are from the above link; She said it so well and I followed them exactly, so here we are:

1. In a food processor fitted with the blade attachment, pulse together the flour, salt, and sugar. Add in the butter, and pulse a few times until the mixture is crumbly and resembles coarse meal. Combine the egg and water in a container (remove all ice pieces). While the processor is running, pour the water/egg mixture in and pulse until mixture just comes together.

2. Pour mixture out onto a floured board and knead a few times to bring all the ingredients together. Dough can be rolled out immediately, or it can be wrapped in plastic and refrigerated for up to 2 days.

OK now back to me.

3. Roll out the dough on a lightly floured surface until it is about 18" by 22" and 1/8" thick.

4. Use a knife to cut the dough in half, then each half into thirds so you have six pieces of dough. If they aren't all perfectly square it is fine. Mine weren't all perfectly square and they baked up nicely!

5. Spoon 1/4 cup of chili or filling of your own imagination into one side of the dough, then wet the edges with dampened fingertips and fold over the empty half to cover the filled half. Using a fork, crimp the edges to seal the dough pocket. Poke holes in the top and repeat with the other five pies.
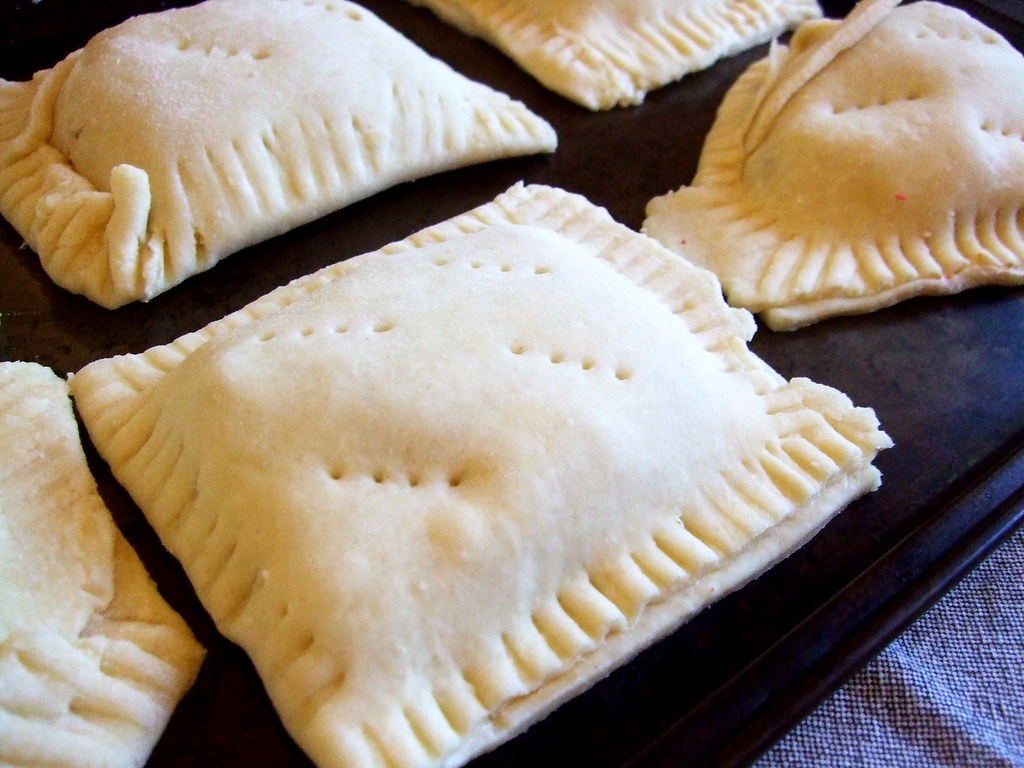


6. Place the pies on a baking sheet and bake for 15 minutes at 425ºF. If you like, brush the tops with a beaten egg prior to baking -- that is how I made mine all shiny like that.

To reheat, ideally a toaster oven would be used, but I didn't have one this afternoon at school and used a microwave; it was still delicious.

. Digg Technorati Delicious StumbleUpon Reddit BlinkList Furl Mixx Facebook Google Bookmark Yahoo

Sunday, September 19, 2010

Onion Focaccia

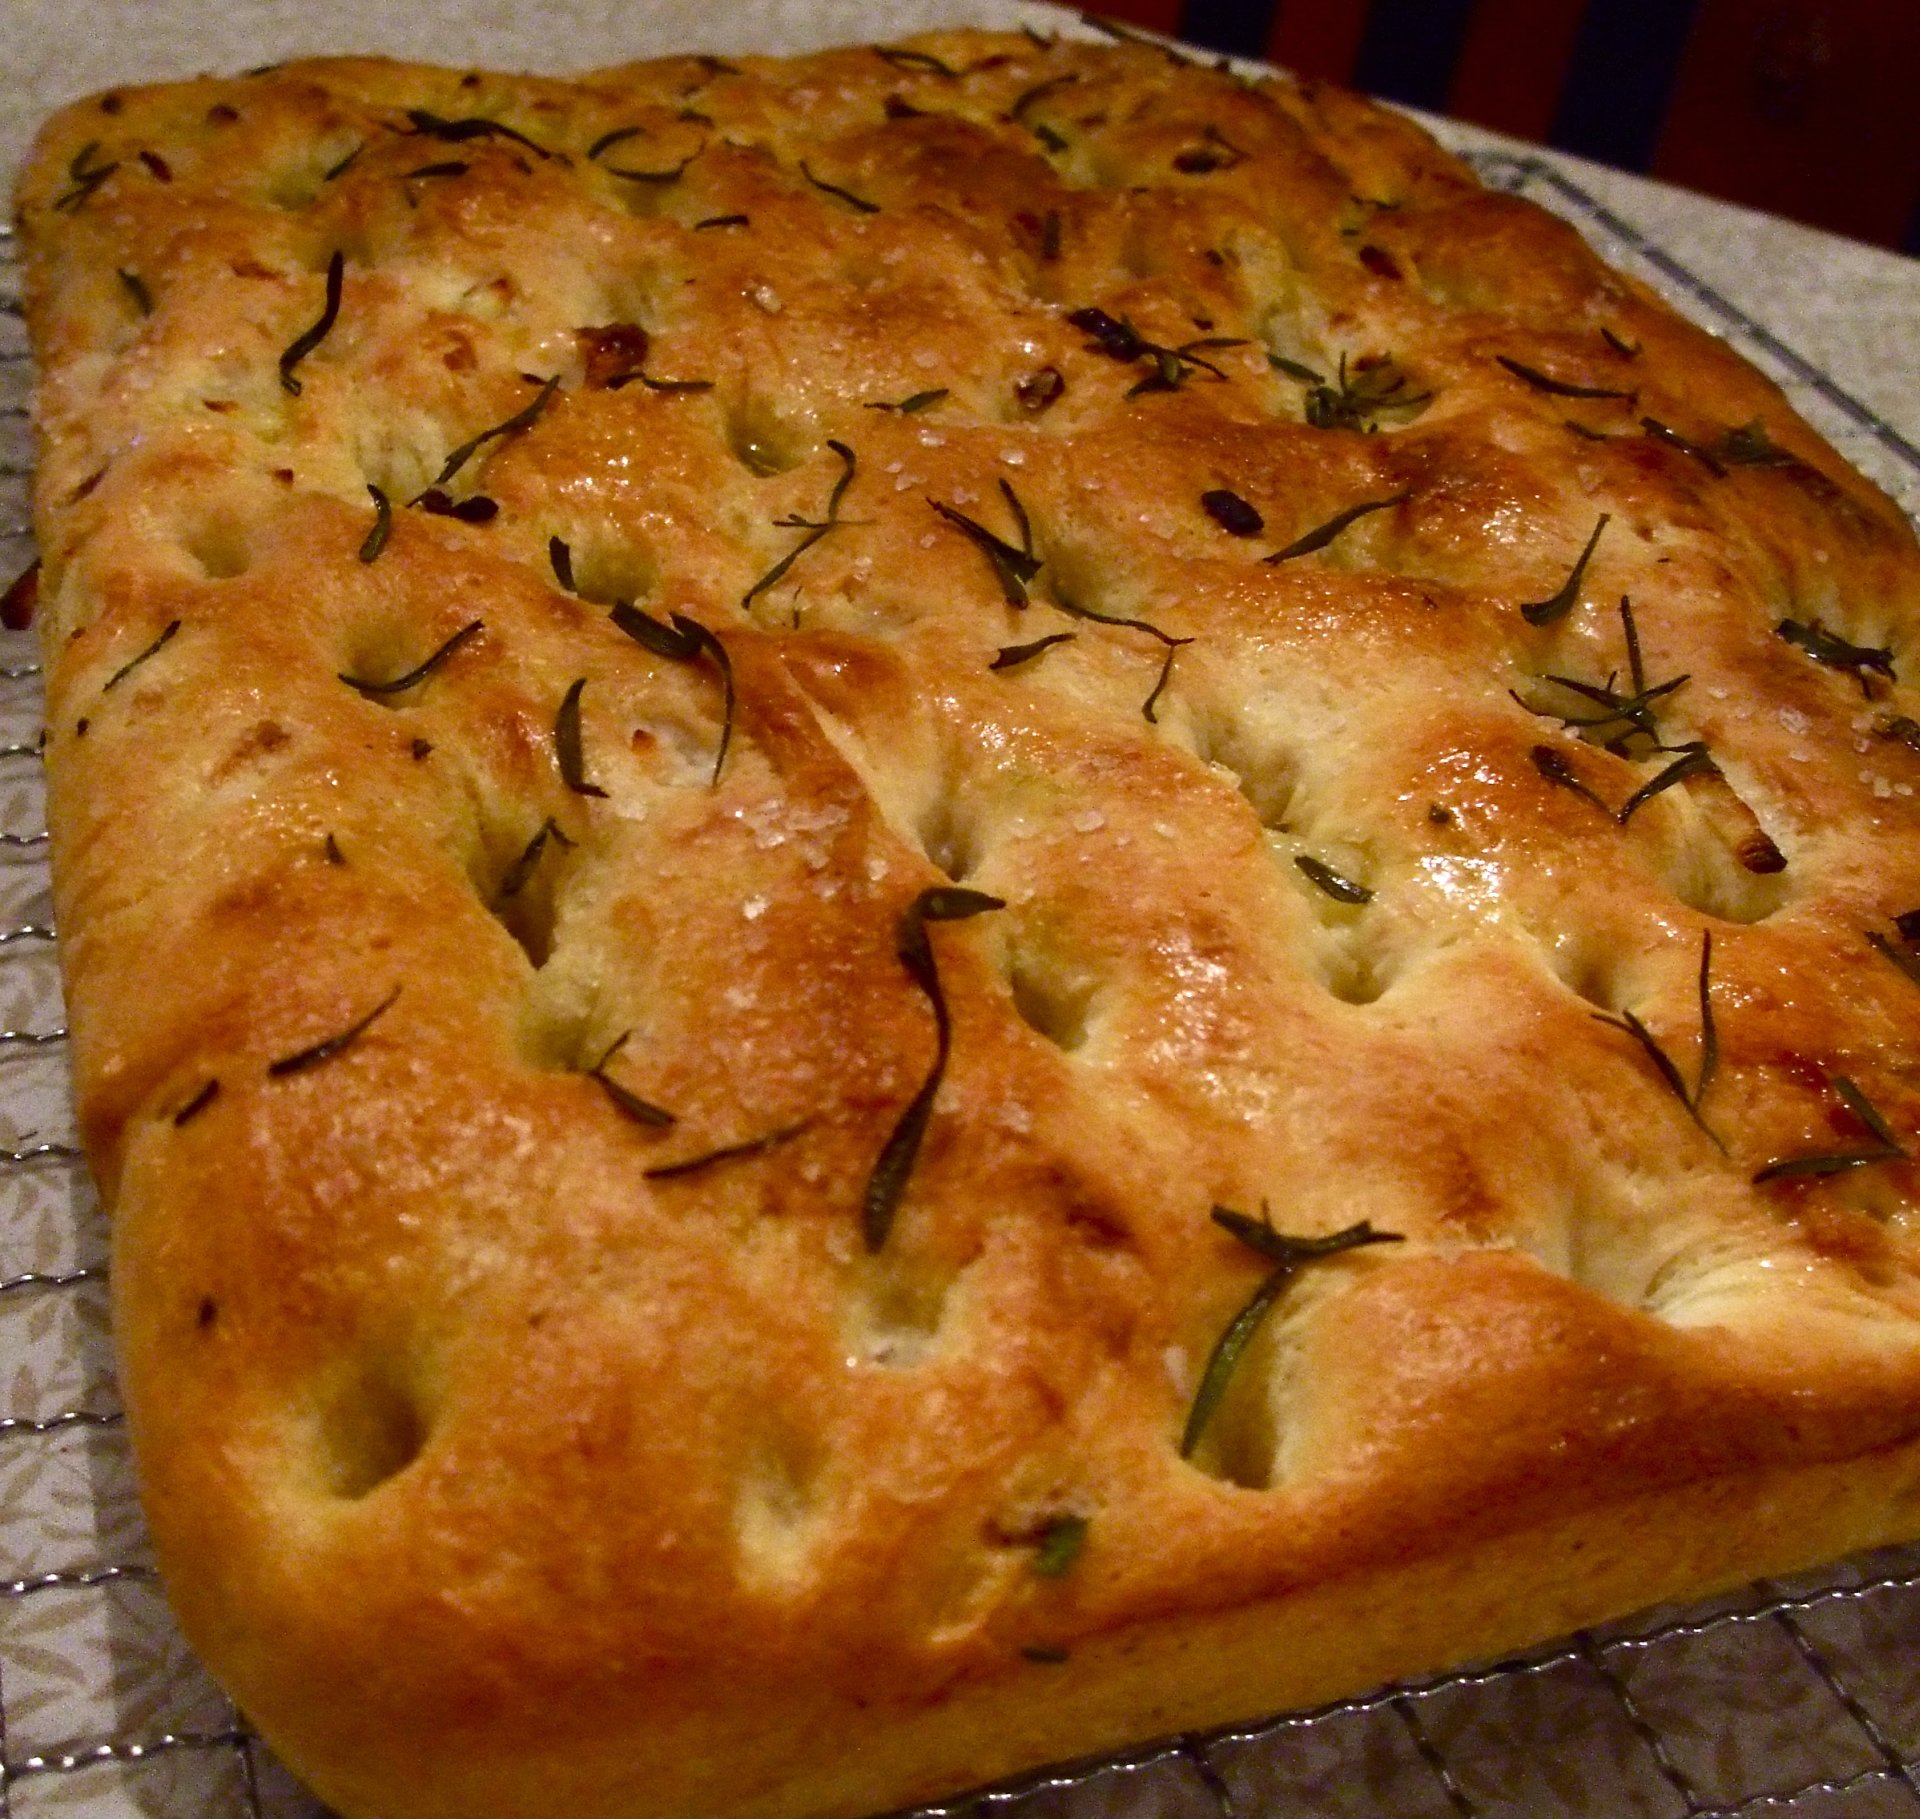
I'm not usually a focaccia fan, but this is a focaccia to write home about. Or at least share semi-anonymously with people on the internet. I think it's usually because I find focaccia really dry and this one is not, because it has DELICIOUS ONIONS baked into it as well as the traditional olive oil and salt, which also grace the top of the bread. I think I'm on an onion kick these days, what with the caramelized onion burgers from a while back.

This recipe is from a Williams-Sonoma cookbook called Bread, which is actually really good. Probably because the recipes are by Beth Hensperger. It has basic yeast breads as well as quick breads without yeast and special breads like challah and focaccia. Every recipe I've tried so far has been great. And actually, if you are going to start making bread, this is a good recipe to start with. It's pretty straight-forward.

So here, for your enjoyment, is the recipe:

You need:

1 TBS yeast
1 TBS sugar
1.5 c warm water
1/2 c good olive oil plus some for greasing and topping
1.5 TBS table salt
4-4.5 c flour
1 medium (not gigantic) yellow onion, chopped
2 sprigs of fresh rosemary
Coarse sea salt for sprinkling

1. Proof the yeast by sprinkling it over the warm water and the sugar and let it sit for 10 minutes. It should get foamy.

2. Slowly mix in the flour, the salt, and half the olive oil a bit at a time, then mix in the onion. You should end up with a really soft shaggy dough that is slightly sticky -- you don't have to add all the flour if you don't need it but do be sure to knead the bread for at least 10 minutes.

3. Put the dough in an oiled bowl and cover it. Let it rise for 20 minutes.

4. Line a heavy-rimmed baking sheet with parchment paper and brush the paper with oil. Then turn out the dough onto the sheet and press it into shape with your fingers. It should be about an inch thick all the way around. Cover it with oiled plastic wrap and let it rise again for about an hour.

5. Make nice deep indentations in the bread with your fingers, almost to the bottom of the pan. Drizzle the top with the rest of the olive oil (1/4 c) and let rise again, covered, for another 30 minutes while you preheat the oven to 425ºF.

6. Sprinkle the top of the bread with sea salt and rosemary leaves and bake for 20 to 25 minutes, until the top is nicely golden. Let it cool a bit, then slice into it and devour with gusto. It's delicious when dipped in olive oil and balsamic, but it also makes a nice sandwich bread, for a change.


.
. Digg Technorati Delicious StumbleUpon Reddit BlinkList Furl Mixx Facebook Google Bookmark Yahoo

Tuesday, August 24, 2010

Grilling Things

This time, for real! Remember a long time ago I made some burgers? And remember how I complained about having to make them inside because there was snow everywhere and I couldn't get to my barbecue? Now it's summer.


It's been summer for quite some time now, actually, and we've been using the grill a lot. We've grilled the standard burgers, but we've also branched out and tried pizzas on the grill, both rather successfully if I do say so myself. So here is the first of two posts about grilling!

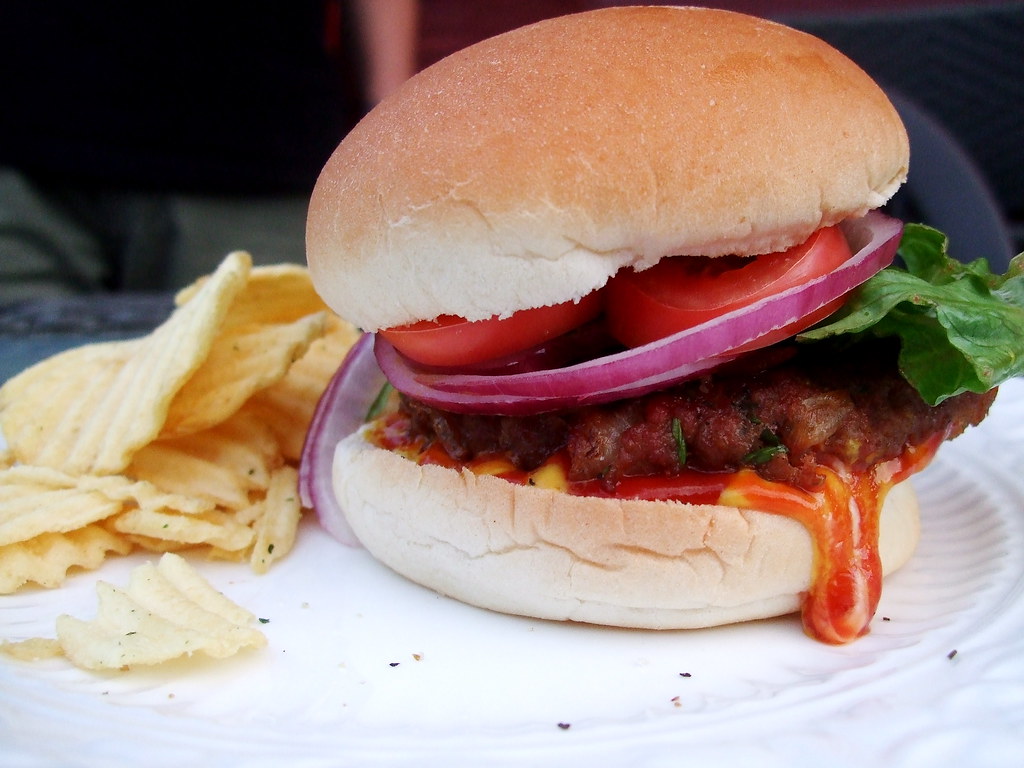
First, burgers. You can pretty much do burgers with anything ground - beans, beef, turkey, chicken - as long as you bind it and flavour it well. These are beef burgers, but they have a special twist - caramelized onions. The onions are mixed into the burgers themselves, not just plopped on top like an afterthought. And the onions are not just boring old normal caramelized - they are caramelized in bacon fat. Mmmmm...

For 6 burgers, you need:

1.5 lbs ground beef
1 large onion, thinly sliced
1 tsp white sugar
6 slices of bacon, cut in half
1.5 cups breadcrumbs
1 egg
1 tsp powdered mustard
1 TBS Worcestershire sauce
1 TBS HP sauce
1 TBS finely minced chives
1 tsp finely minced basil
1/2 tsp cinnamon (trust me, it's good)

1. In a skillet, preferably cast iron, cook the bacon slowly over low heat until it is crispy and the fat is rendered. Remove the bacon and drain it on paper towels. Pour out all but 1 TBS of the fat and saute the onions over low with the sugar until they are golden brown and translucent - this takes a long time - like an hour - but it is worth it. Let the onions cool down until they are room temperature.

2. In a large bowl, mix all the ingredients together including the onions but not the bacon - that's for putting on your burgers later. I find your hands work best for this - just remember to take off any rings before you get all up in the beefiness. If you find that the mixture is too loose, add some more breadcrumbs.


3. With a plate at the ready, form the mixture into 6 patties. Make sure they are of even thickness so the edges don't get dry while the insides stay raw.


4. Heat up your grill and slap those patties on there. After flipping them once, you can top the patties with a couple of slices of cheese and those bacon slices you cooked a while back. Or you can brush them with barbecue sauce, or both! Top as you like - we had fresh tomatoes from the garden, lettuce, and the other customary accoutrements of burger-eating, like ketchup, mayo and mustard. There may have even been some pickles involved.

Digg Technorati Delicious StumbleUpon Reddit BlinkList Furl Mixx Facebook Google Bookmark Yahoo

Thursday, August 5, 2010

Summer Bounty

This isn't a recipe at all. It is merely an opportunity to brag/blog (brlag?) about what I came home to after my lovely holiday in BC.


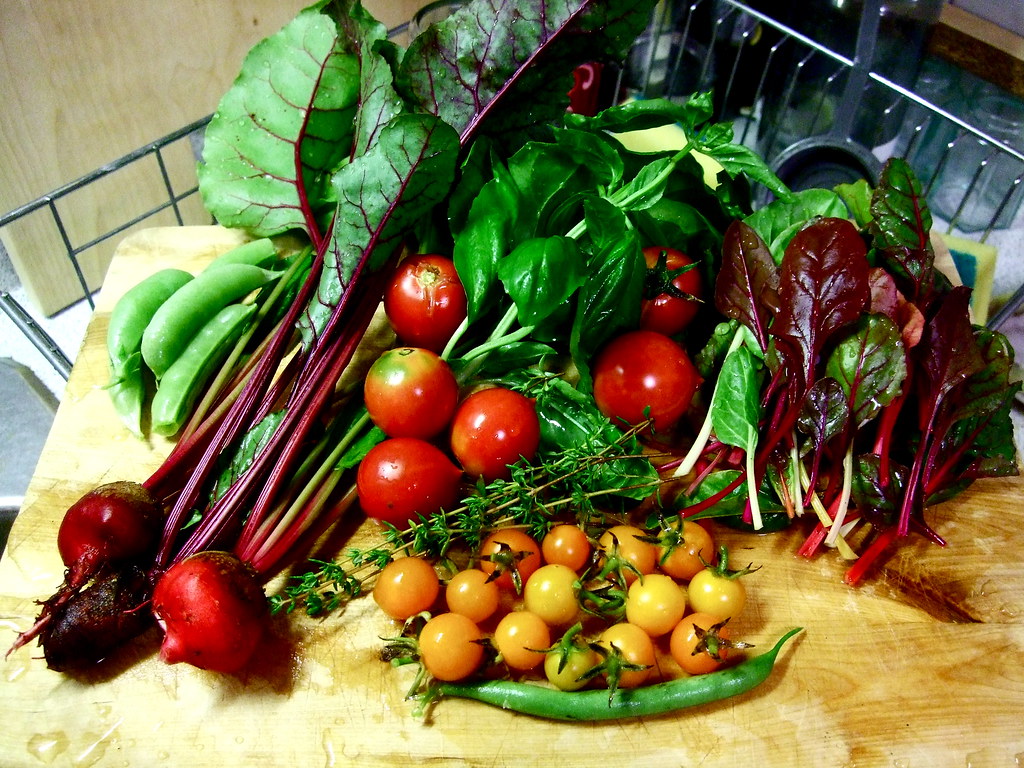
These are all things my boyfriend and I grew in pots on our back patio. Everything but the tomatoes and basil are from seed, which we haphazardly sprinkled over our dollar-store soil. We've got sugar snap peas, beets, tomatoes (two kinds!), basil, thyme, a lone green bean, and lovely rainbow swiss chard!

Now that we're back I can't wait to eat all the garden goodies and maybe even share some more recipes with everyone.

. Digg Technorati Delicious StumbleUpon Reddit BlinkList Furl Mixx Facebook Google Bookmark Yahoo

Sunday, July 11, 2010

Pulled "Char Siu" with Scallion Pancakes

Well hello there... long time no see! Life kind of got away from me for a bit. Taught a summer course, sister moved to a different continent, tried (it's an ongoing battle) to write about my dissertation topic...

But enough about me: on to the food.


This is a slow cooker recipe. This is because it was actually three billion degrees here (five billion with the humidex) and I could not bear to turn on the stove, let alone the oven. We tried once, and it ended in tears. Tears and pizza, but tears none the less. If you don't have a slow cooker, just stick it in the oven on low for a few hours (have fun with the heat!) and it'll be fine.

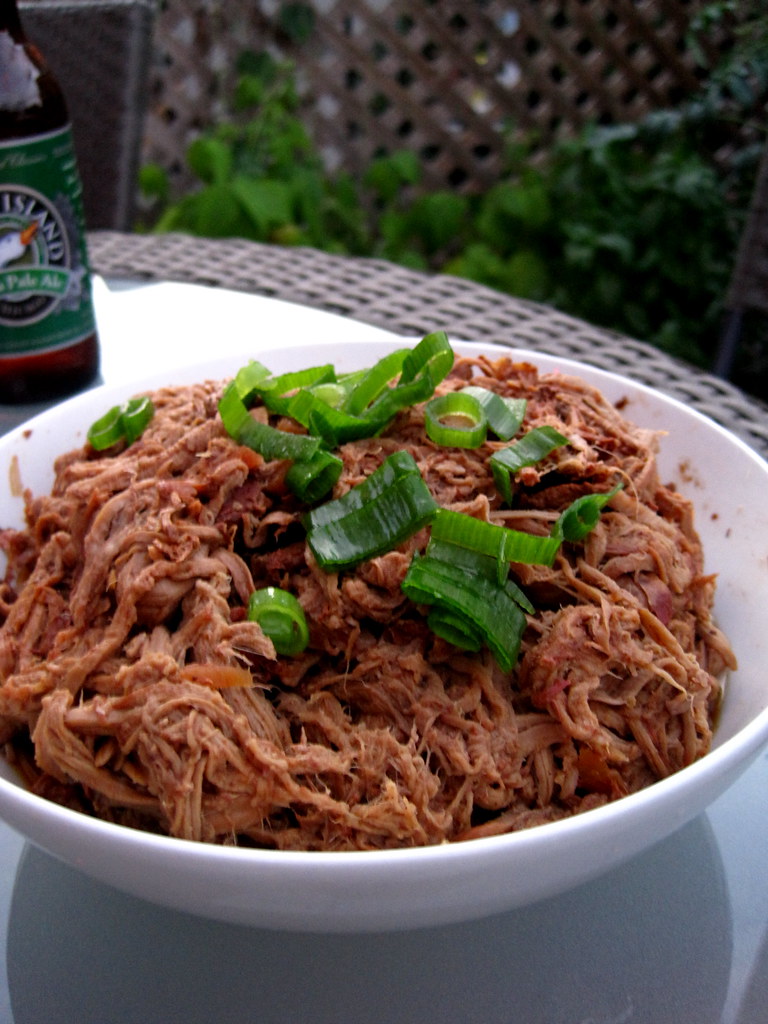
These "Chinese Tacos", as they are now called in my house, have been so popular that we have made them twice in the past month -- something that doesn't happen that often, actually.

You need:
A slow cooker: mine was a wee little 1.5 litre one; 3 litres would do fine also
2 pounds of pork, the cheaper the better. Shoulder works really well.
1/4 c soy sauce
1/4 c hoisin sauce
2 tsps 5 spice powder
2 tsps minced ginger
3 cloves of garlic, minced
1 tsp sriracha chili sauce (optional)
1 tsp dark sesame oil

1. Put everything in the slow cooker (or covered baking dish) and stir it around so it gets all mixy. Mmmm mixy.
2. Turn the slow cooker on low for 8 hours. Go away.
3. Come back later. The pork will be all nice and shredable now. Take it out and shred it in a bowl, or shred it in the crock - your choice. If you shred it in a bowl, when it is all shreddy put it back in to soak up all the juices. YUM!
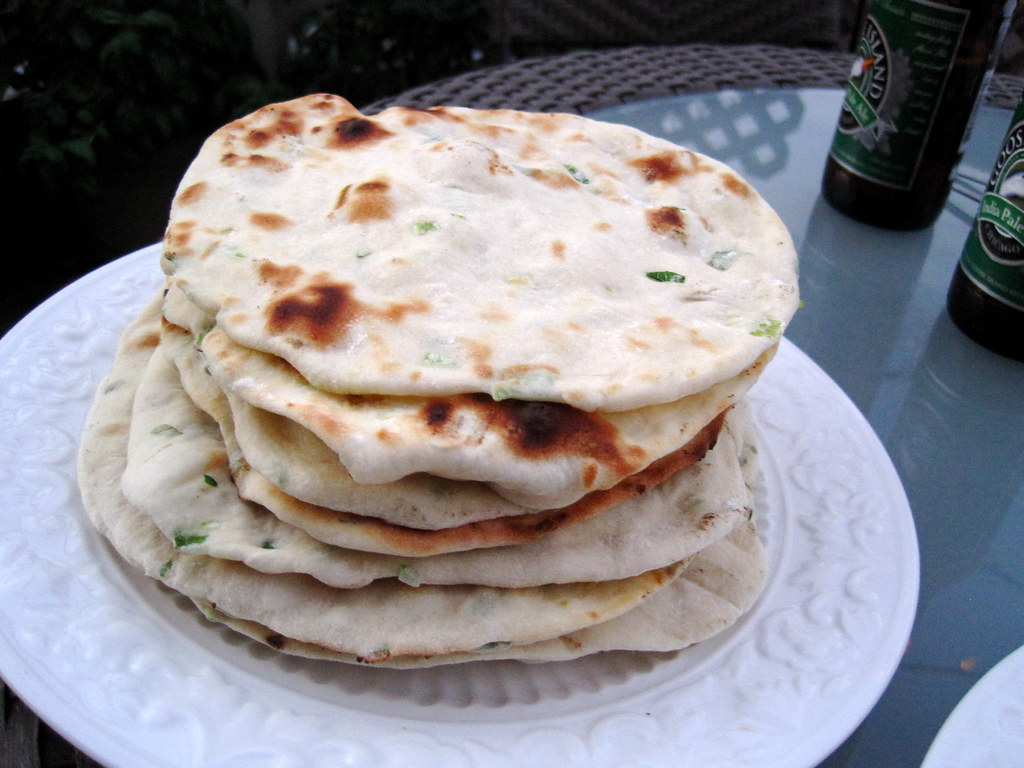
4. Serve with the scallion pancakes you find below, and maybe some Goose Island IPA you'd been saving from your trip to Chicago a while back.


Scallion Pancakes (makes 12):

3 c all purpose flour
2 tsp salt
6 green onions/scallions, white and light green parts only, finely sliced
2 tsp baking powder
2 TBS vegetable oil
1 TBS dark sesame oil
1 c water


1. Mix the dry ingredients together, except for 1 cup of  the flour. Make a well in the centre and stir in the wet ingredients. Add in the scallions.

2. Knead the dough until it is smooth and elastic, about 5 minutes. Add the rest of the flour if you need it.

3. Let the dough rest for 30 minutes, covered with plastic wrap, then divide the dough into 12 pieces.

4. Form each piece into a ball, then flatten it and roll it out with a rolling pin on a lightly floured surface. Each dough piece should make an 8" circle when flat.

5. You can cook these in the frying pan with a bit of sesame oil over high heat for a minute or two on each side, but we did ours on the barbecue, because of that problem with the heat and the oven and the tears. A minute or two each side - til grilled and bubbly - worked really well.

6. Serve with the above pork recipe and the sliced green parts left over from the scallions!

. Digg Technorati Delicious StumbleUpon Reddit BlinkList Furl Mixx Facebook Google Bookmark Yahoo

Thursday, May 13, 2010

Spatchcocked Chicken: A Grotesque Step-by-Step

The secret to delicious, perfectly cooked whole chicken is also a really fun word to say: Spatchcock. It either sounds like a sneeze or a foreign swear word. Or both. You do have to get a little down and dirty with your chicken, but look at the reward:


Look at all that delicious browned crispy chicken skin. Look at those roasted whole garlic cloves and red onions. Spy the roasty-toasty carrots hiding in the sides of the pan. You, too, can enjoy a roast chicken on a weeknight, and in about an hour from start to finish.

The secret is cutting out the backbone of the chicken and flattening it. This makes the chicken cook more quickly and more evenly, so you get a juicier breast without having underdone legs. That sounds like the cover of a glamour magazine. ANYWAYS. After you have spatchcocked your bird, the seasonings and accompanying vegetables are really up to you -- really, anything goes (within reason - I don't want any comments saying you tried it with chocolate sauce and marshmallow fluff and it didn't work and I'm a liar).

But if you want to make what I made, here's what you need:

One whole chicken
2 TBS olive oil
One red onion, cut into wedges
2 carrots, cut into sticks
One head of garlic, peeled but in whole cloves
1 lemon (or more if you like) cut in half
1 TBS honey
1 tsp coarse salt
Freshly ground pepper.

Your instructions and gruesome raw chicken photos are after the jump! But also some lovely roasty after shots - don't despair! Click here to keep reading.

Digg Technorati Delicious StumbleUpon Reddit BlinkList Furl Mixx Facebook Google Bookmark Yahoo

Friday, May 7, 2010

Amazing Pita Bread

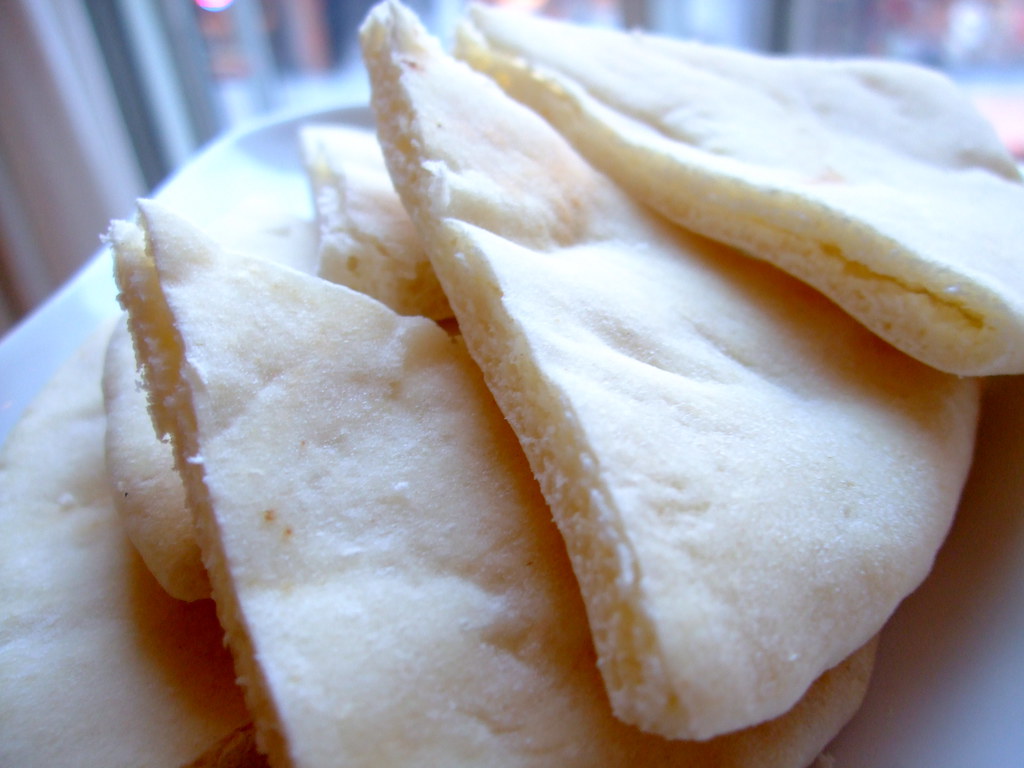
I had a bit of a problem with this pita bread. The problem wasn't in the kneading or rising or baking -- it was getting it photographed. I even made another batch the very next day and still - the pieces kept disappearing before I could get a decent photo! But really, I should just take that as a sign that this is some mighty fine pita. Once again, The Fresh Loaf comes to the rescue.


I know I keep saying how all my bread recipes that I post on here are soooo easy, but they are. And this one is no exception. If you can make cookies, you can make bread. If you can play with playdough, you can make bread. It's just measuring, mixing, a wee bit of kneading, some patience, and a hot oven.

You need:

3 cups of flour
1 1/2 teaspoons of salt
1 Tablespoon of sugar or honey
2 teaspoons of yeast
1 1/4 to 1 1/2 cups water, roughly at room temperature
2 tablespoons of olive oil, vegetable oil, butter, or shortening. I used olive oil because it is delicious.

1. Mix the sugar in 1 1/4 c of the water and sprinkle the yeast on top. Let it sit for a few minutes until the yeast gets foamy.

2. Mix the flour and salt in a bowl together. When the yeast is ready, add the water-yeast-sugar mixture and the olive oil and mix. I used my KitchenAid so this was really easy.  If the dough seems really dry, add the rest of the water.

3. When the dough is more or less cohesive and/or your wooden spoon revolts, start kneading. Knead for about 10 minutes then put the dough in a greased bowl and cover with plastic wrap or a clean dish towel and let it sit and rise for about 90 minutes.

4. After it has risen divide the dough into 8 even pieces and shape into balls. Let these rest another 20 minutes, again covered with something. At this point, turn on your oven to 400º and make sure your baking stone is in there, or if you don't have a baking stone, a baking pan flipped upside-down. My baking stone BROKE during a tragic Tarte-Tatin accident and I have yet to replace it.

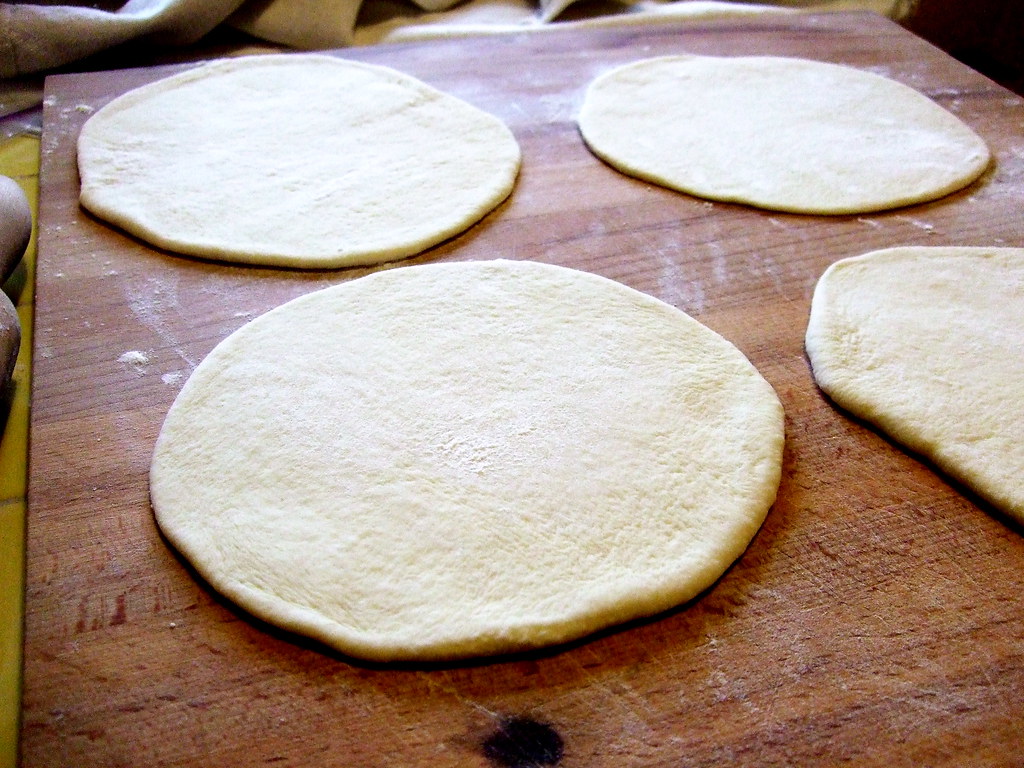
5. After 20 minutes, lightly flour your work surface and roll out the dough into flat circles about 1/4 inch thick or a little thinner.


6. Bake them two at a time for about 3 minutes. They will get nice and puffy, making lovely pockets for you to stuff with delicious things later on.


These are great for stuffed pita sandwiches or you could try serving them with a delicious white bean dip!

. Digg Technorati Delicious StumbleUpon Reddit BlinkList Furl Mixx Facebook Google Bookmark Yahoo