Showing posts with label baking. Show all posts

Sunday, March 3, 2013

Grandmaw's Oatmeal Cookies

First of all, sorry for the long hiatus. It's been an intentional break to try to get my dissertation done, and it's working so far. I'm just breaking my "fast" to post these awesome cookies because they deserve to be on here.


Instagram photo because (1) I'm kind of lazy and (2) my camera needs to go to the repair shop since I dropped it in Ireland over the summer.

But seriously, don't let that stop you from making these quick and delicious cookies. YOU DON'T EVEN NEED EGGS. The recipe is my great-grandmother's, and I remember eating these when I was little and we went for tea at her house. My mom used to make these too. She still does, actually. Hi mom!

These are a very crumbly, spiced biscuit, great with tea in the afternoon. They come together very quickly in one bowl and you don't even need to grease the pan.


Ingredients:

1/2 c softened butter
1/2 c firmly packed brown sugar
1/2 tsp baking soda dissolved in 2 tbs hot water
1/2 tsp vanilla
1 c white flour
1 c oats
1/4 c dried coconut (unsweetened)
1/8 tsp (heaping) nutmeg


1. Preheat oven to 300ºF.

2. Cream butter and sugar until well mixed, then add in the baking soda mixture and the vanilla.

3. Stir in the flour, oats, and coconut. Mix. You'll have a crumbly-looking dough but don't worry.

4. Using your hands, form walnut sized balls of the dough. I find it works best if you flatten them a little bit so you have kind of a fat disk of dough, about 1 cm thick. If you are having trouble, you can add a tiny bit more water to help the dough form, but be careful not to add too much—1/4 tsp at a time!

5. Arrange the first batch on your ungreased baking sheet and then GENTLY press down on each cookie with a fork dipped in milk (to prevent sticking). This pressing gives the cookies their crumbled-looking edges. Don't press too hard or the cookie might fall apart.

6. Bake for 15 minutes, then let cool slightly on the pan before moving to a cooling rack and doing your second batch.


This amount of ingredients gives 2 dozen; the original recipe is double this and obviously gives 4 dozen, but we are only 2 people and 48 cookies is a lot for us.

Let me know how you like them!

. Digg Technorati Delicious StumbleUpon Reddit BlinkList Furl Mixx Facebook Google Bookmark Yahoo

Tuesday, December 7, 2010

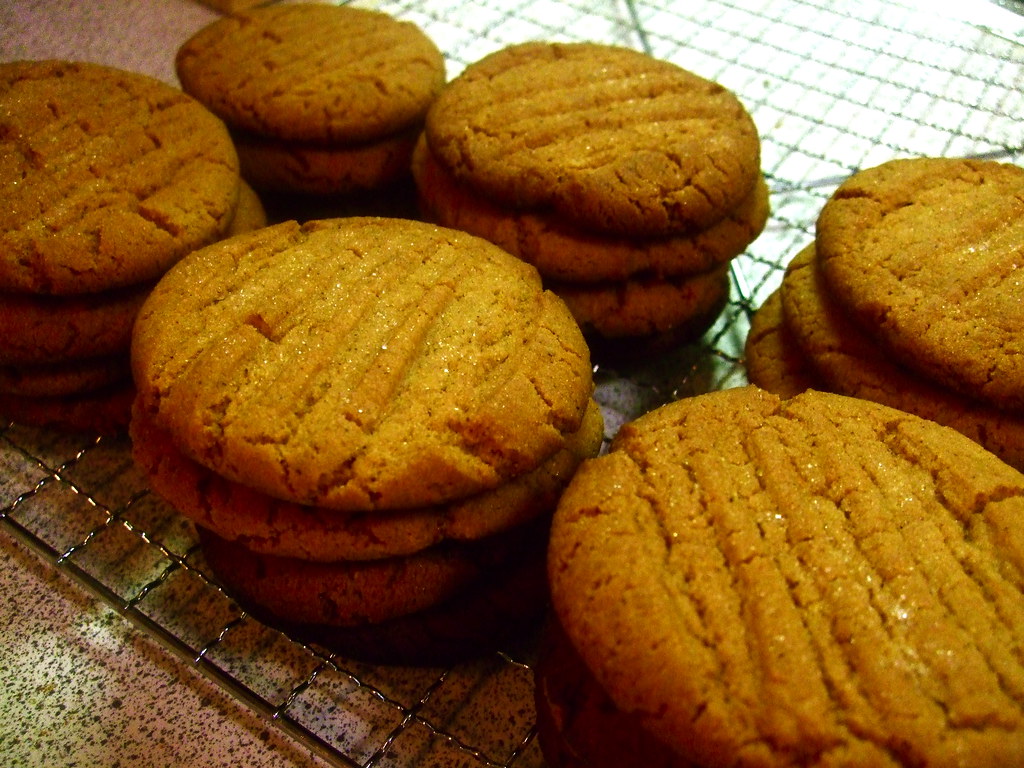
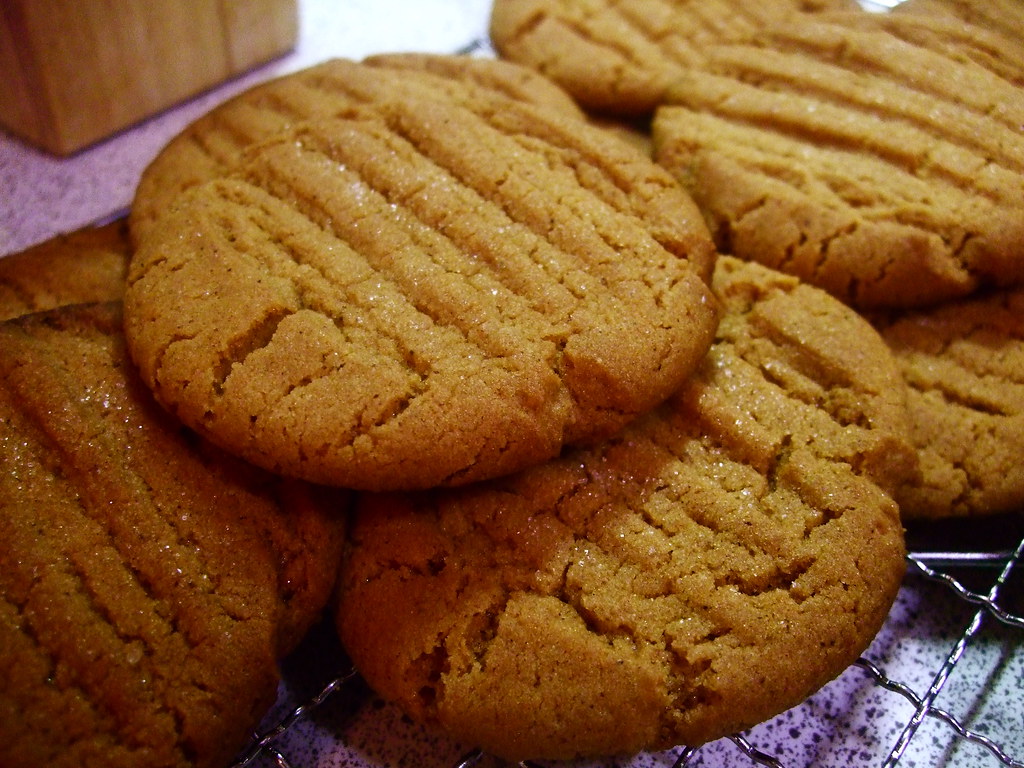
Grandma's Ginger Crisps

This is my grandma when she was around 20:


These are her cookies, which she makes every year for Christmas; every year my dad probably eats half of them. Every year I eat the other half. Not really. But I would if I had no decency. I have just enough decency.


These cookies don't have the "snap" that ginger snaps have; the cloves and cinnamon even out the ginger. The end result is a crispy, slightly chewy in the middle cookie that tastes exactly like Christmas. They are also really good on a rainy or snowy afternoon with a cup of tea, any time of the season. Now that I have acquired this highly guarded secret recipe, I can make them for snowy afternoons if I want to!


You need:

3/4 c shortening
1 c white sugar, plus a bit extra
1 egg
1/4 c molasses
2 c flour
1/2 tsp salt
2 tsp baking soda
1 tsp cinnamon
1 tsp ground cloves
1 tsp ground ginger

1. Cream the shortening and 1 cup of sugar; add the egg and molasses and mix until creamy.

2. Mix the dry ingredients together and add the dry to the wet and mix until you get something that looks like cookie dough.


3.  Lightly grease a couple of baking sheets, or line them with parchment paper. Make 1.5 tbs balls of dough and roll in some white sugar. Place the dough balls about 1.5" apart on the baking sheet. Press each ball down gently with a fork.

4. Bake for 10-12 minutes (watch them after 10 minutes!) in a 375ºF oven. Let cool, then devour them all and share them with no one. No no. I didn't mean that. I mean wrap them up and give them to friends and family in the spirit of the season.


. Digg Technorati Delicious StumbleUpon Reddit BlinkList Furl Mixx Facebook Google Bookmark Yahoo

Sunday, September 19, 2010

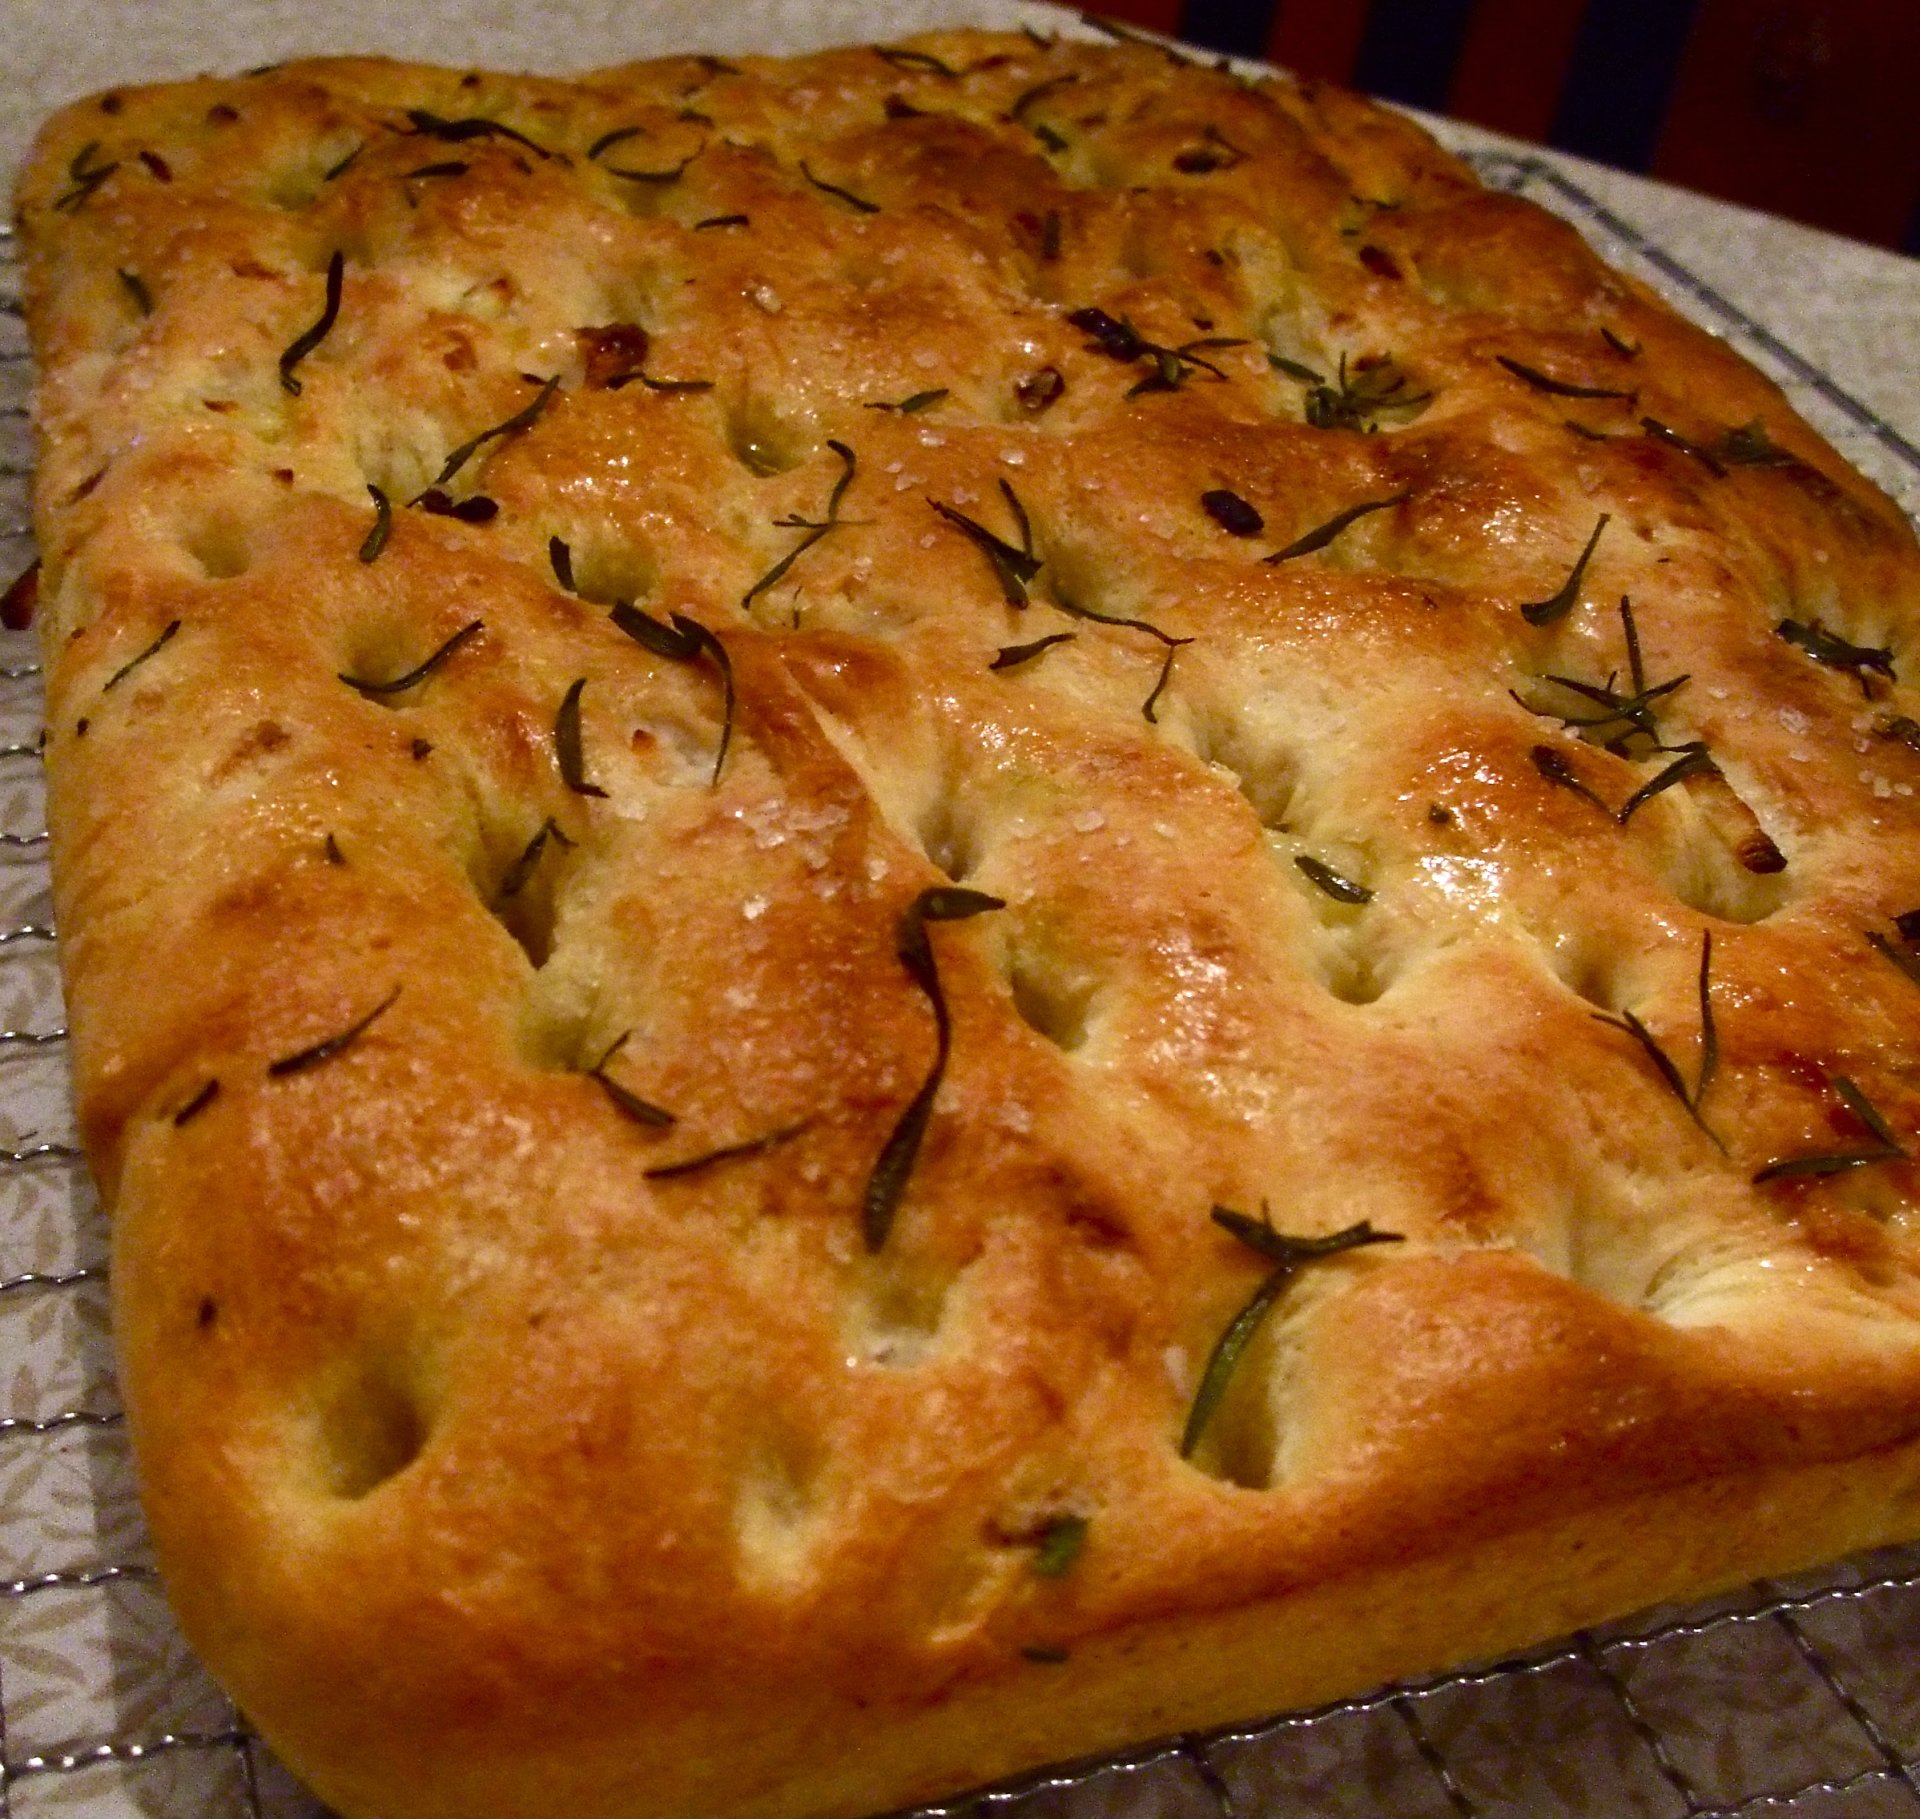
Onion Focaccia

I'm not usually a focaccia fan, but this is a focaccia to write home about. Or at least share semi-anonymously with people on the internet. I think it's usually because I find focaccia really dry and this one is not, because it has DELICIOUS ONIONS baked into it as well as the traditional olive oil and salt, which also grace the top of the bread. I think I'm on an onion kick these days, what with the caramelized onion burgers from a while back.

This recipe is from a Williams-Sonoma cookbook called Bread, which is actually really good. Probably because the recipes are by Beth Hensperger. It has basic yeast breads as well as quick breads without yeast and special breads like challah and focaccia. Every recipe I've tried so far has been great. And actually, if you are going to start making bread, this is a good recipe to start with. It's pretty straight-forward.

So here, for your enjoyment, is the recipe:

You need:

1 TBS yeast
1 TBS sugar
1.5 c warm water
1/2 c good olive oil plus some for greasing and topping
1.5 TBS table salt
4-4.5 c flour
1 medium (not gigantic) yellow onion, chopped
2 sprigs of fresh rosemary
Coarse sea salt for sprinkling

1. Proof the yeast by sprinkling it over the warm water and the sugar and let it sit for 10 minutes. It should get foamy.

2. Slowly mix in the flour, the salt, and half the olive oil a bit at a time, then mix in the onion. You should end up with a really soft shaggy dough that is slightly sticky -- you don't have to add all the flour if you don't need it but do be sure to knead the bread for at least 10 minutes.

3. Put the dough in an oiled bowl and cover it. Let it rise for 20 minutes.

4. Line a heavy-rimmed baking sheet with parchment paper and brush the paper with oil. Then turn out the dough onto the sheet and press it into shape with your fingers. It should be about an inch thick all the way around. Cover it with oiled plastic wrap and let it rise again for about an hour.

5. Make nice deep indentations in the bread with your fingers, almost to the bottom of the pan. Drizzle the top with the rest of the olive oil (1/4 c) and let rise again, covered, for another 30 minutes while you preheat the oven to 425ºF.

6. Sprinkle the top of the bread with sea salt and rosemary leaves and bake for 20 to 25 minutes, until the top is nicely golden. Let it cool a bit, then slice into it and devour with gusto. It's delicious when dipped in olive oil and balsamic, but it also makes a nice sandwich bread, for a change.


.
. Digg Technorati Delicious StumbleUpon Reddit BlinkList Furl Mixx Facebook Google Bookmark Yahoo

Sunday, July 11, 2010

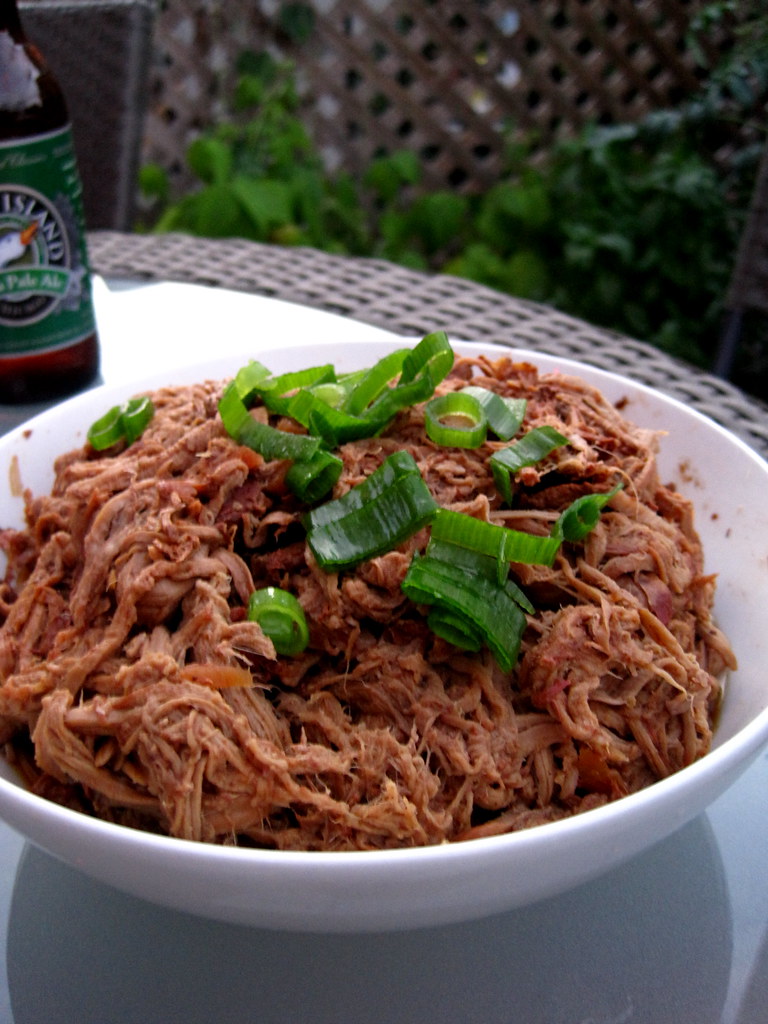
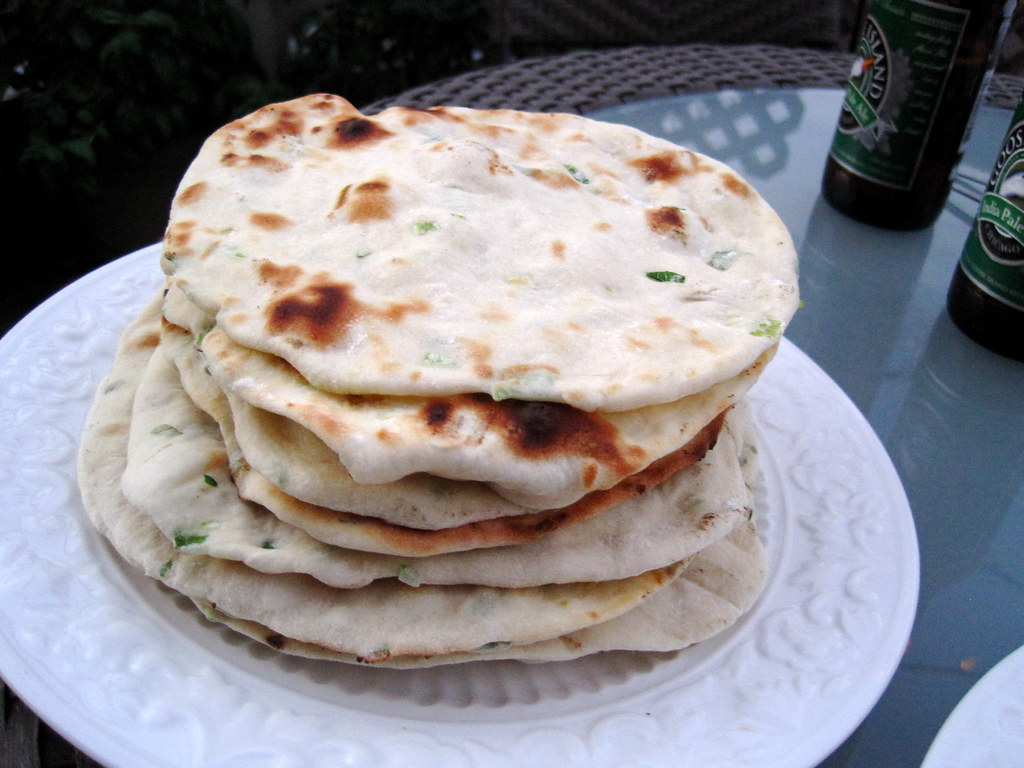
Pulled "Char Siu" with Scallion Pancakes

Well hello there... long time no see! Life kind of got away from me for a bit. Taught a summer course, sister moved to a different continent, tried (it's an ongoing battle) to write about my dissertation topic...

But enough about me: on to the food.


This is a slow cooker recipe. This is because it was actually three billion degrees here (five billion with the humidex) and I could not bear to turn on the stove, let alone the oven. We tried once, and it ended in tears. Tears and pizza, but tears none the less. If you don't have a slow cooker, just stick it in the oven on low for a few hours (have fun with the heat!) and it'll be fine.

These "Chinese Tacos", as they are now called in my house, have been so popular that we have made them twice in the past month -- something that doesn't happen that often, actually.

You need:
A slow cooker: mine was a wee little 1.5 litre one; 3 litres would do fine also
2 pounds of pork, the cheaper the better. Shoulder works really well.
1/4 c soy sauce
1/4 c hoisin sauce
2 tsps 5 spice powder
2 tsps minced ginger
3 cloves of garlic, minced
1 tsp sriracha chili sauce (optional)
1 tsp dark sesame oil

1. Put everything in the slow cooker (or covered baking dish) and stir it around so it gets all mixy. Mmmm mixy.
2. Turn the slow cooker on low for 8 hours. Go away.
3. Come back later. The pork will be all nice and shredable now. Take it out and shred it in a bowl, or shred it in the crock - your choice. If you shred it in a bowl, when it is all shreddy put it back in to soak up all the juices. YUM!
4. Serve with the scallion pancakes you find below, and maybe some Goose Island IPA you'd been saving from your trip to Chicago a while back.


Scallion Pancakes (makes 12):

3 c all purpose flour
2 tsp salt
6 green onions/scallions, white and light green parts only, finely sliced
2 tsp baking powder
2 TBS vegetable oil
1 TBS dark sesame oil
1 c water


1. Mix the dry ingredients together, except for 1 cup of  the flour. Make a well in the centre and stir in the wet ingredients. Add in the scallions.

2. Knead the dough until it is smooth and elastic, about 5 minutes. Add the rest of the flour if you need it.

3. Let the dough rest for 30 minutes, covered with plastic wrap, then divide the dough into 12 pieces.

4. Form each piece into a ball, then flatten it and roll it out with a rolling pin on a lightly floured surface. Each dough piece should make an 8" circle when flat.

5. You can cook these in the frying pan with a bit of sesame oil over high heat for a minute or two on each side, but we did ours on the barbecue, because of that problem with the heat and the oven and the tears. A minute or two each side - til grilled and bubbly - worked really well.

6. Serve with the above pork recipe and the sliced green parts left over from the scallions!

. Digg Technorati Delicious StumbleUpon Reddit BlinkList Furl Mixx Facebook Google Bookmark Yahoo
Tuesday, January 26, 2010

Fish Tacos

I have reclaimed Mondays for the living. Everyone hates a Monday - even if you don't have an actual Monday to hate, you have to start back to work after a break at some point. No one is immune from Monday... UNTIL NOW.

Actually it's pretty simple. I plan something fun for Mondays. Usually my friend Emily and I go out for a cocktail and catch up. Last night my sister had just returned from out of town so we had family dinner. And because she is always raving about how awesome fish tacos are, and because I had never even tried them let alone made them, I decided that was what was on the menu.

Now as far as a Monday-night dinner party goes, the menu is pretty do-able. There is a fair amount of chopping and slicing but there's not a whole lot of actual cooking. Even with the Mexican chocolate cake I added, the whole thing took less than an hour from start to finish. Not including eating, of course. I can't guarantee that your Monday night dinner guests won't be so enamoured of you that they won't stay until midnight!

Fish Tacos (serves 4 or 5)


1 lb of white flaky fish.*
1/4 c canola oil
1 Tbs chili powder
1 tsp cumin
1/4 c diced cilantro leaves
the juice of 1 lime

8 tortillas, flour or corn
sour cream or plain yoghurt
cilantro leaves
sliced green onions
sliced red onions
shaved red cabbage
sliced avocado
lime wedges
lettuce
minced fresh hot peppers
salsa

1. In a baking dish, mix the lime juice, cumin, chili powder, oil, and 1/4 c cilantro leaves. Add the fish on top. Cover and refrigerate 20 minutes, flipping the fish over part way. If you have time to marinate it longer, feel free!

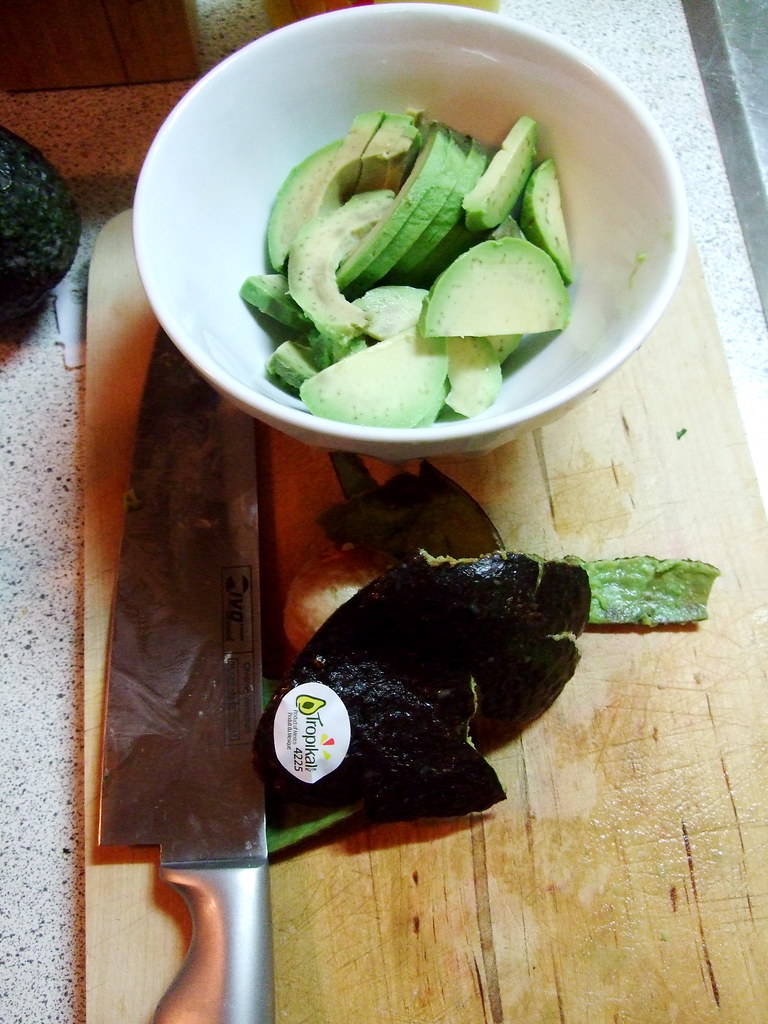
2. Meanwhile, do all your chopping. Put the toppings in little bowls on the table so your guests can top their own. Make sure you have a Simon to slice the avocado. Simons are avocado experts!
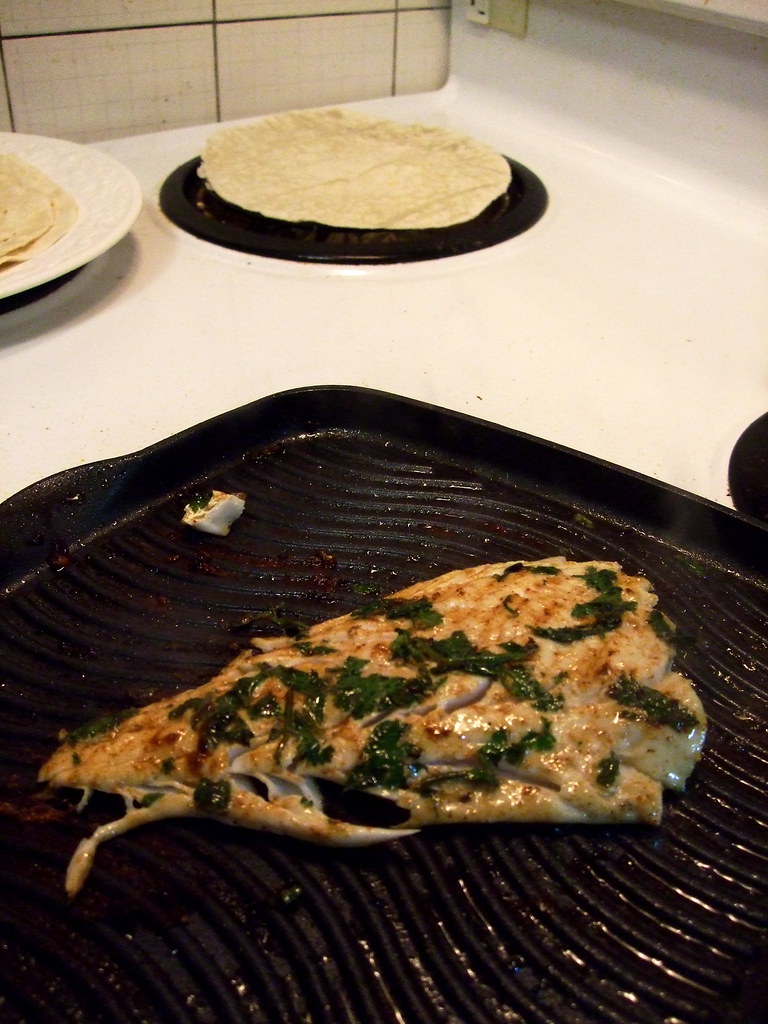
3. When everyone has a beer or a glass of wine, get that fish on the grill pan. Heat it up nice and hot, but not too hot - about medium-high - and grill for about 4 minutes a side or until it's cooked through and there are lovely grill marks.

4. While you're doing this, have your sister heat up the tortillas. Some people might use the conventional "damp towel in the oven" method, but we prefer to live on the wild side so she used the element on medium-low. We also got some lovely grill marks on the tortillas.

 5. And you're done! Pile your tacos high and enjoy! Or stay tuned for spicy chocolate cake.


"Mexican" Chocolate Cake

This is actually a very VERY easy cake. It is so easy that after you make it a few times you will ha ve it memorized. That easy. It's from the Moosewood cookbook and it is in fact VEGAN although no one will be able to tell. It is moist and fluffy and delicious, and very adaptable, as we shall see.

You need:

1.5 c flour
1/3 c cocoa powder
1 teaspoon baking soda
½ teaspoon salt
1.5 tsp chili powder
1 Tbs cinnamon
1/2 tsp cumin
1/2 tsp freshly ground black pepper
1 cup sugar
½ cup vegetable oil
1 cup cold water
1 teaspoons vanilla extract
2 tablespoons vinegar of some sort


1. Mix all the dry ingredients together in a bowl, having preheated your oven to 350ºF. I did this while the fish was marinating and before I sliced and diced my veggies.

2. Add all the wet ingredients EXCEPT the vinegar and mix.

3. Making sure you have a greased cake pan at the ready, quickly fold in the vinegar. Pour directly and immediately into the greased cake pan and stick it in the oven for 30 minutes.


BAM. Easiest cake ever. We served ours with caramel sauce from a jar (!!!) but vanilla ice cream etc would be lovely. If you double the vanilla and leave out the spices, you will have a plain but equally delicious normal chocolate cake.


*Hey! If you are choosing fish for this recipe, DON'T USE COD. They are almost gone. And while you're at it, take a look at this list and see if you can find something sustainable. Thanks! :)
.
Digg Technorati Delicious StumbleUpon Reddit BlinkList Furl Mixx Facebook Google Bookmark Yahoo

Tuesday, January 5, 2010

NEW AND IMPROVED!

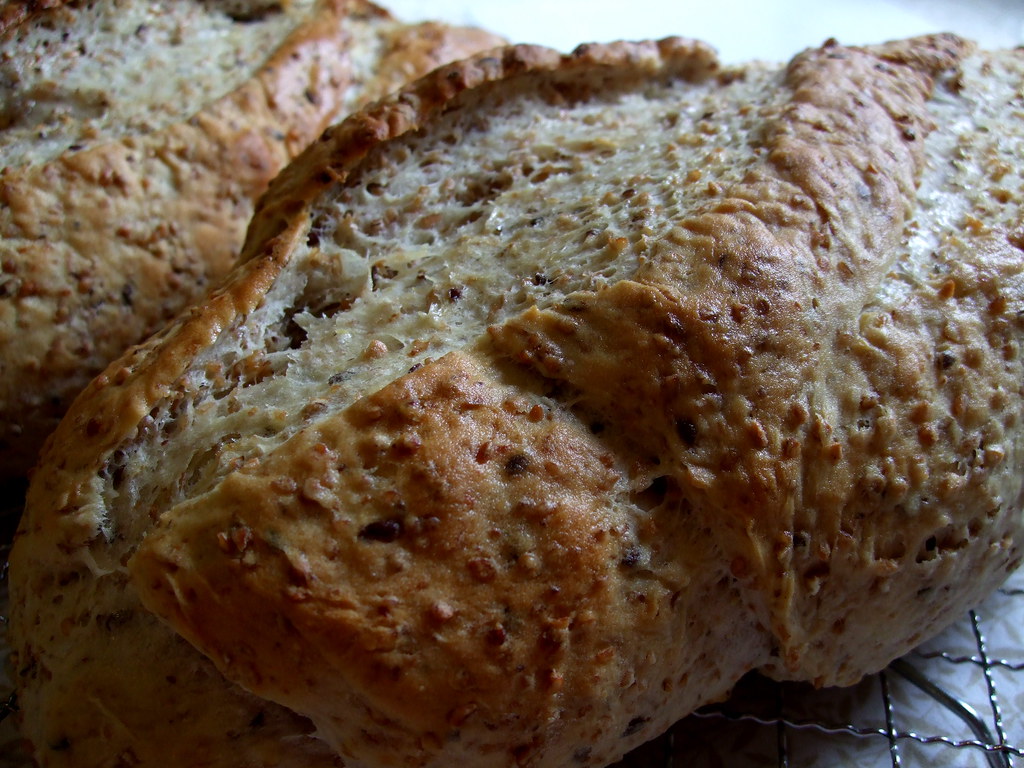
Stop what you are doing right now and listen up: I HAVE PERFECTED MY SEEDY BREAD RECIPE. I know you all thought it was perfect before, but you didn't know that it could be made perfecter. Now you know!


The secret is buttermilk! This is officially my new favourite bread. It is just as soft as bought bread and sooo much tastier. And cheaper! And better for you! Buttermilk, contrary to what I thought until yesterday, is not fatty milk. It's milk with good bacteria in it! It tastes kind of like plain yoghurt. Who'd-a-thunk-it. Anyways, it makes a pretty delish loaf of bread. Apparently you can also use it in salad dressings.

So now that you have stopped what you were doing before, it's time to get out your flour, because you are making this bread right now. You will thank me.

You need:

5-6c all purpose flour
2 c Red River or Sunny Boy or equivalent cereal*
3 c buttermilk
4.5 tsp yeast
1/4 c sugar or honey or some combo of the two
1 Tbs salt
2/3 c water

Ok so the night before, mix up the buttermilk and the cereal and stick it in the fridge with plastic wrap over it.

Next morning, or afternoon, or whenever you happen to remember about it, take it out and warm it up in the microwave so it's baby-bottle temperature. While you're at it, get your 2/3 c water at about that temperature, too. Mix the sugar/honey with the water and add the yeast to it.

Put the cereal mush in a large bowl, unless you used a really large bowl to start, and start adding your flour a cup at a time. When you've added 2 cups, add the sugar/yeast mix and continue to add your flour until you can't mix it any more and it's time to knead.

Knead in the rest of the flour until you have a really soft elastic dough. It shouldn't be sticky, but it shouldn't be dry either. Err on the side of less flour - I used 5 cups.

Let the dough rise, covered, for 2 hours in a warm-ish place. Then shape it into two loaves and stick those in two greased loaf pans to rise again for another hour. Meanwhile, preheat your oven to 400ºF.

Bake them for 30 minutes, or until the bottoms sound hollow when you tap them and the tops are brown. Resist slicing open right away - make sure you wait until they have cooled!

-----
* If you can't find these cereals, use a combo of whole flax seeds, wheat bran, and cracked wheat - that should do the trick. These cereals are both made up of a mix of flax, rye, and wheat so use your imaginations! Digg Technorati Delicious StumbleUpon Reddit BlinkList Furl Mixx Facebook Google Bookmark Yahoo

Saturday, January 2, 2010

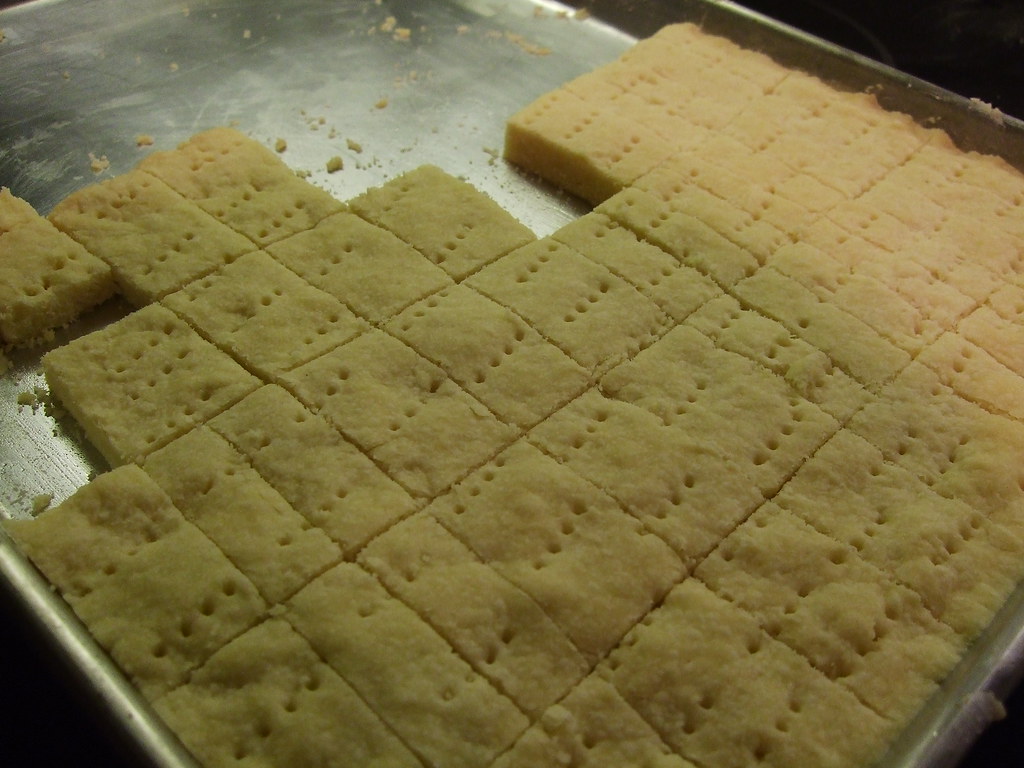
Melting Shortbread

Hello blog! I had a lovely holiday! I made lots of cookies and ate lots of yummy things and I took photos, too. First up is shortbread. I have been trying to come close to my Nana's shortbread for a few years - it was magically melty and somehow she managed never to let it brown.

My mom got her hands on an old collection of recipes from the olden days. It is a thick wad of loose pages clipped together and well-thumbed by many ladies. It has a bunch of shortbread recipes, all with the names of the women who made them famous attached. I have been working my way through them each Christmas. This year, while I don't think I have exactly replicated Nana's recipe, I found one that I think I am happy with - it has a good balance of flakiness and firmness and I managed to bake them at a low enough temperature that none of them got the least bit brown. Also nobody in my family seemed to be able to stop eating them - I ended up making three batches in a week!


So here you go: the recipe.

You need:

3 c flour
1/2 c cornstarch
1 c icing sugar
2 c (1 pound) room-temperature butter.

1. Cream together the butter and the sugar. I used my (clean and scrubbed) hands to do this - you can use your hands for the whole recipe - fewer dishes and more likely to closely resemble the methods of Mrs. Periwinkle of 1915 Saskatoon, right?

2. Add the flour and cornstarch and mix until the mixture is crumbly and fluffy.

3. Press the dough into an ungreased, rimmed baking sheet. This recipe fills half a 18 by 13 inch jelly roll pan so you could do a double recipe or use a smaller pan, which I didn't have. Prick the dough deeply with a fork all over.

4. Bake for an hour and twenty minutes (about) at 270ºF - I put the timer on for 20 minutes at a time and checked them. Don't let them start to brown or turn golden around the edges!

5. Use a pizza cutter or a really sharp knife to slice the cookies into fingers and let cool. The serve them up! They were very popular with Santa this year. :)


Digg Technorati Delicious StumbleUpon Reddit BlinkList Furl Mixx Facebook Google Bookmark Yahoo

Tuesday, December 15, 2009

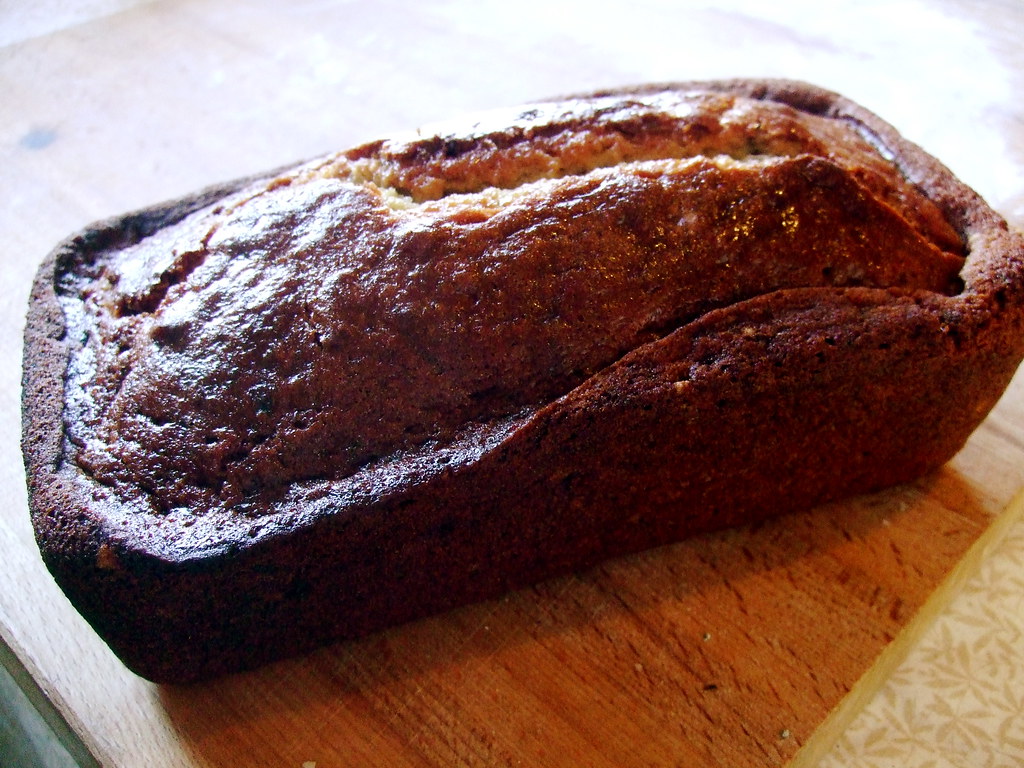
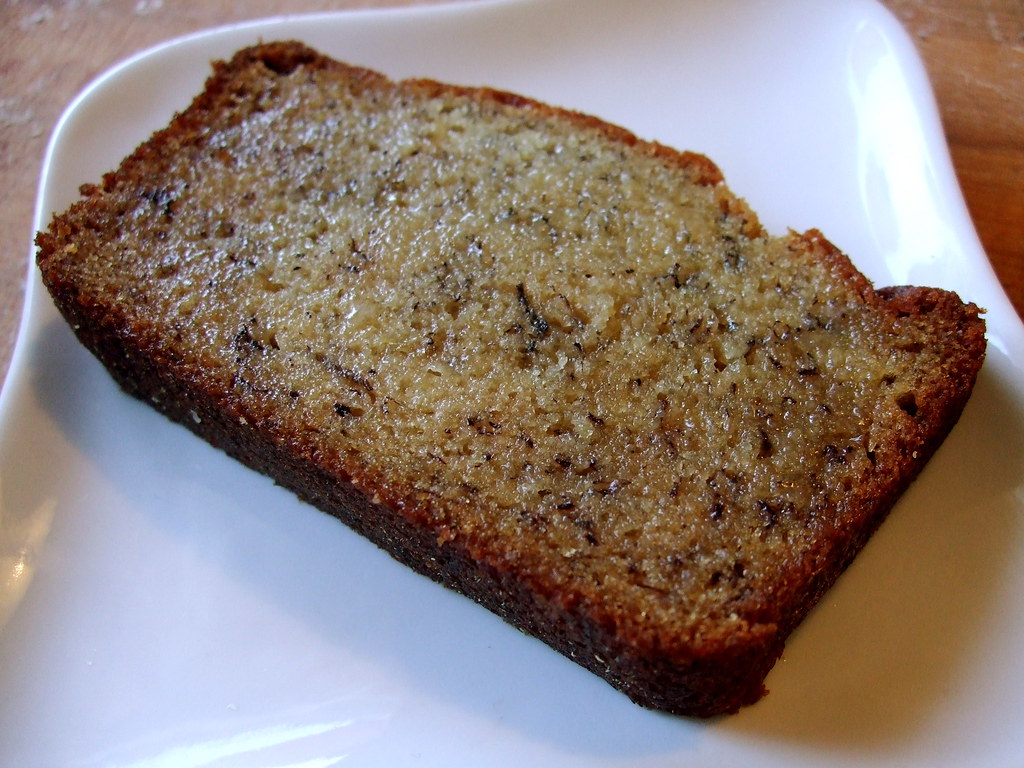
Best-Ever Banana Bread

I'm serious. This actually is the best banana bread you will ever taste. Whichever minion of Martha's came up with it deserves a nice firm handshake and a cigar. Or something. Anyways, this is the moistest (moistest?) banana bread you will taste. It keeps really well, although I don't think you'll have to worry about that.


Martha's original recipe calls for sour cream - this is the only thing I changed. I don't keep sour cream in the house usually, so I always make this bread with plain yogurt - fat free, even! It always turns out AWESOME. If you have sour cream to get rid of, feel free to use it instead of the yogurt in the recipe below. You can also add 1/2 c chopped nuts in at the end if you feel the urge.

You need:

1/2 c butter, softened, plus some for your loaf pan
1 c white sugar
2 large eggs
1 1/2 c flour
1 tsp baking soda
1 tsp salt
2-3 very very ripe bananas, mashed thoroughly
1/2 c plain yogurt
1 tsp vanilla

1. Preheat your oven to 350ºF and butter a 9×5×3" loaf pan. Preparation is important! :)

2. Cream the butter and sugar until it's light and fluffy, then beat in your eggs. I used my KitchenAid for this; you can use a hand mixer or even your own arms plus wooden spoon!

3. In a different bowl, mix your dry ingredients, except the nuts, if you're using them. Add the dry mixture to the butter mixture and combine gently. Then add your bananas, the yogurt, and the vanilla. After you have mixed all this in, you can add your nuts. Or chocolate chips, for that matter.

4. Pour the batter into the greased loaf pan and bake for about an hour and ten minutes. A toothpick or knife should come out clean when it's done. After it cools in the pan for about 15 minutes, you can cool it on a rack, or just eat it. Warm banana bread is the best - that way if you put butter on it (mmmmm) it gets all melty (see below). :)


Digg Technorati Delicious StumbleUpon Reddit BlinkList Furl Mixx Facebook Google Bookmark Yahoo

Wednesday, December 2, 2009

Beer-drinking Pretzels

Salty, poofy, chewy, and delicious.


These are amazing dipped in mustard. And even better with a nice cold pint.

I found the recipe somewhere on a Fresh Loaf thread somewhere, but the direct link is here. These are super easy, so if you've been reluctant to approach yeast before, here is a good opportunity.


You need:

1 tbs yeast
1 1/4 c warm water
1/4 c brown sugar
4 c flour

coarse salt
melted butter (about 3 tbs)
1/2 c baking soda dissolved in 3 c water at a simmer


1. Dissolve the sugar in the warm water and add the yeast to proof it. The yeast should get foamy after about 5 minutes.

2. Add the flour and mix it gently. The dough should be sticky but well combined. Don't over-knead it or you'll get tough pretzels.

3. Let the dough rise in a covered, oiled bowl for about 20-30 minutes depending on how warm your house is.

4. Divide the dough into 10 equal pieces and shape into long ropes about 1" in diameter. Shape these into pretzel shapes and prepare some greased baking trays. Dip each pretzel into the water-baking soda mixture and submerge for about 20 seconds. Then place each onto the tray.

5. Bake at 450ºF for about 5 minutes or until the pretzels are golden and smell like heaven. Remove from the oven, brush with butter, and sprinkle with coarse salt. TRY to wait as long as you can before chowing down on them, but they are really really good warm.


I also think this would be a fun baking activity to involve kids in if you happen to have any around! Kids are really good at making dough ropes. :) Digg Technorati Delicious StumbleUpon Reddit BlinkList Furl Mixx Facebook Google Bookmark Yahoo

Sunday, November 15, 2009

Yorkshire Pudding!

oh yeah, and roast beef, too. And gravy, and peas, and roasted carrots, and garlic mashed potatoes. But most importantly, YORKSHIRE PUDDING.


This was my first attempt at this grand and most favourite meal. I did overcook the meat, which I think is a common issue, but it was still so so tasty. I am currently enjoying cold roast beef sandwiches with mustard.

SO: Roast beef. I bought a "French Roast" for $7/kg. I made deep slits in the meat and inserted slivers of garlic into it. I guess I used about four cloves of garlic. I seasoned the outside with salt and pepper, and seared the outside in hot oil in a cast iron pan until the outside was browned.

Then I put it on a rack in a roasting pan surrounded by carrots and onions and tented it with foil. It went in the oven at 350 until my thermometer read 145 - according to everything I've read, that would have been medium-rare, but I guess next time I'll take it out sooner as it was closer to well-done.

While the meat was cooking, I chopped up a bunch of potatoes and threw them in a big pot of water with 6 or 7 whole garlic cloves. When the potatoes were soft, I drained them and mashed the potatoes and the garlic cloves with lots of butter, milk, garlic salt, and some ricotta cheese for creaminess. I kept the potato water to make gravy later.

The Yorkshire pudding recipe I got from Gordon Ramsay via Serious Eats. I had seen Gordon Ramsay lecture people about proper Yorkshire puddings so I figured he was the guy to go to for instructions on this matter.

So I stirred together a cup of flour with 1/2 tsp of salt and added 4 eggs and (in two goes) 1 1/4 c milk. I beat the mixture until it was smooth and then I just let it sit on the counter until it was ready.

About 15 minutes before I thought the roast would be ready, I turned up the temperature of the oven to 450 and poured 1 tsp of canola oil into each hole of a 12-hole muffin tray and preheated the oil in the tray. Then I divided the batter between the muffin holes - it should sizzle in the hot oil when you add it - and then stuck the tray back in the oven until the puddings are brown and puffy. I had taken out the roast by this time, of course.

While the roast is resting and the puddings are baking, you can cook your peas and make your gravy out of the drippings from the roast and your potato water.

Serve the puddings in a basket lined with paper towels, because they are a little greasy. But they are the perfect compliment to a roast dinner and go amazingly well with gravy.

Digg Technorati Delicious StumbleUpon Reddit BlinkList Furl Mixx Facebook Google Bookmark Yahoo

Monday, November 2, 2009

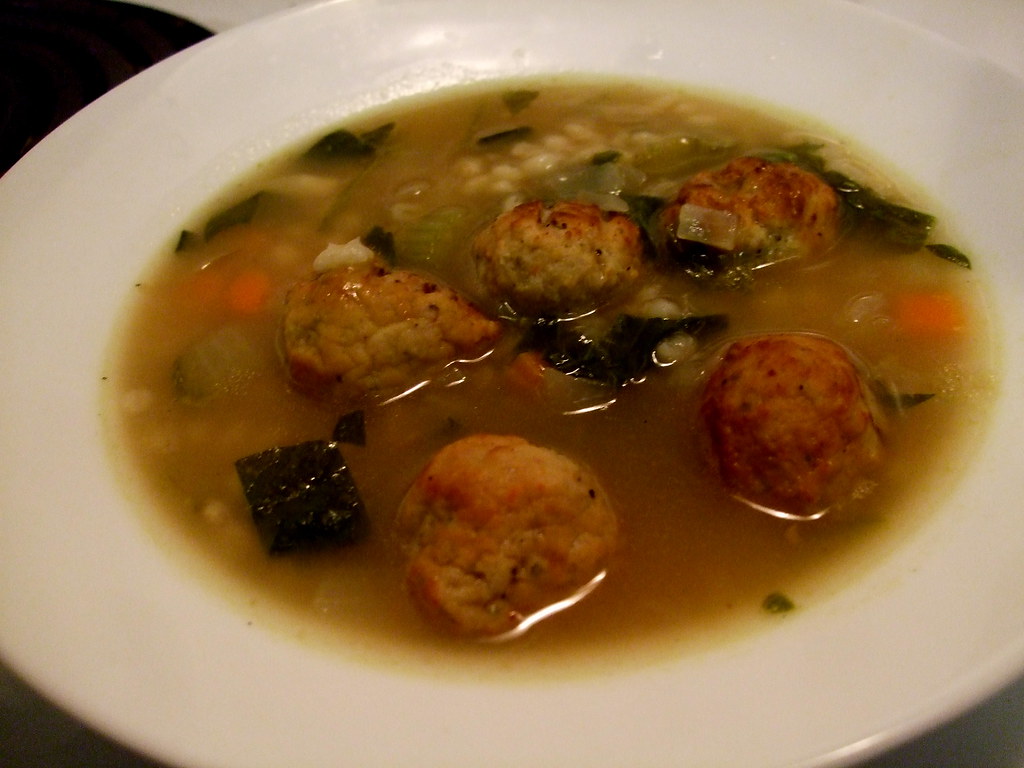
Italian Wedding Soup

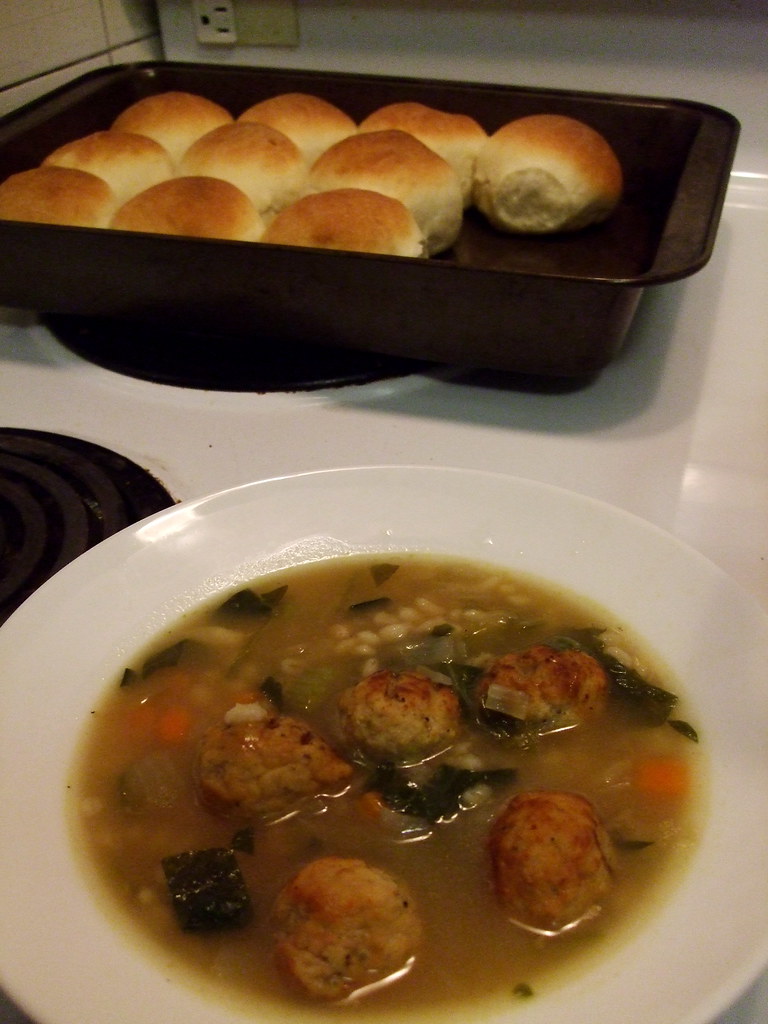
You may have noticed that things are getting a little cozier around here - soups, pies, breads - they're going to get cozier, too! Winter is a-comin'! That's where this hearty meatball soup comes in. Usually, Italian wedding soup is made with small pasta, but I decided to use barley instead. It's a bit heartier than pasta and it's what I had on hand! It turned out really nicely - barley added a great texture to the soup.


You need:

1 tbs olive oil
1 medium onion, finely diced
1 stalk of celery, finely diced
1 carrot, finely diced
2/3 c pot barley
8 c chicken stock
3 c fresh baby spinach, roughly chopped
20 home-made or store bought chicken or turkey meatballs

1. First, saute your onion, celery, and carrot in the olive oil. When the onions are translucent, add the stock and the barley and bring to a boil. Leave it at a vigorous simmer for 30 minutes or so - until the barley is cooked.

2. Add the meatballs and the spinach and boil until the meatballs are cooked (if you used fresh/raw) and the spinach is wilted.

Serve with yummy 60-minute dinner rolls: YES they only take 60 minutes!! AND they are fluffy and delicious! It's like magic. :)


I opted for a half recipe so what you see here makes 12 rolls, not 24 as in the original recipe. I'm sure this will work without a kitchenaid, but it's what I have!

You need:

1/4 c. milk
2 tbs sugar
1 tsp salt
1.5 tbs butter
3 1/3 tsp yeast
3/4 c lukewarm water
3 c flour

1. Melt the butter, milk, sugar, and salt in the microwave. Stir to make sure they are all dissolved.

2. In the bowl of your mixer, dissolve the yeast in the warm water. Then add the milk mixture to it and stir.

3. Add the flour a bit at a time, mixing all the while, until all the flour is added. Knead until you get a sticky but cohesive dough ball.

4. Let the dough rise for 15 minutes in an oiled covered bowl.

5. Shape the rolls into 12 portions and place in an oiled baking pan - 9 X 13 worked for me but muffin tins do the trick too. Let rise another 15 minutes.

6. Bake in a preheated oven at 425ºF for 12 minutes. The rolls should be deliciously golden at this point.


Digg Technorati Delicious StumbleUpon Reddit BlinkList Furl Mixx Facebook Google Bookmark Yahoo

Monday, October 26, 2009

Yet another loaf!

My usual, go-to bread is the french loaf, but I like to play around with different breads. My goal is to find a brown bread recipe that is just as soft and cushy as the bought loaves but without all those scary cushy-making chemicals.

I made this 100% whole wheat loaf a while ago, but it wasn't quite right - 100% whole wheat is a little intense for me. But neither was I interested in the 100% white loaf on which it was based. So I came to a delicious compromise:


2 c warm water
2/3 c sugar (yes it is a lot)
1.5 tbs yeast
1.5 tsp salt
1/4 c oil
3 c white flour
1 c oats
1 3/4 c wheat flour
1/4 c vital wheat gluten.

1. In a small bowl, mix water, sugar, and yeast together. Let the yeast foam - about 5 minutes.

2. In a large bowl, or the bowl of your mixer, mix all the flours and the salt and the oats.

3. Add the yeast mixture and the oil to the flour mixture and mix until combined. Then knead it until you get a cohesive dough that is smooth but not tough.

4. Let the dough rise, in a covered, greased bowl, for about an hour - until the dough has doubled.

5. Shape it into 2 loaves and let rest for about 30 minutes, or until the dough rises 1" above the greased loaf pans you put it into.

6. Bake at 350º for 30 minutes. Remember to let it cool before cutting! The gluten is still developing. :)


This loaf is as soft as store-bought but you can pronounce all the ingredients. It's really great for sandwiches and does really well in the toaster. It's slightly sweet tasting, so if you're not into that, you could omit some of the sugar, but if you don't add enough you won't get the squishy texture I was going for.

Digg Technorati Delicious StumbleUpon Reddit BlinkList Furl Mixx Facebook Google Bookmark Yahoo

Friday, July 3, 2009

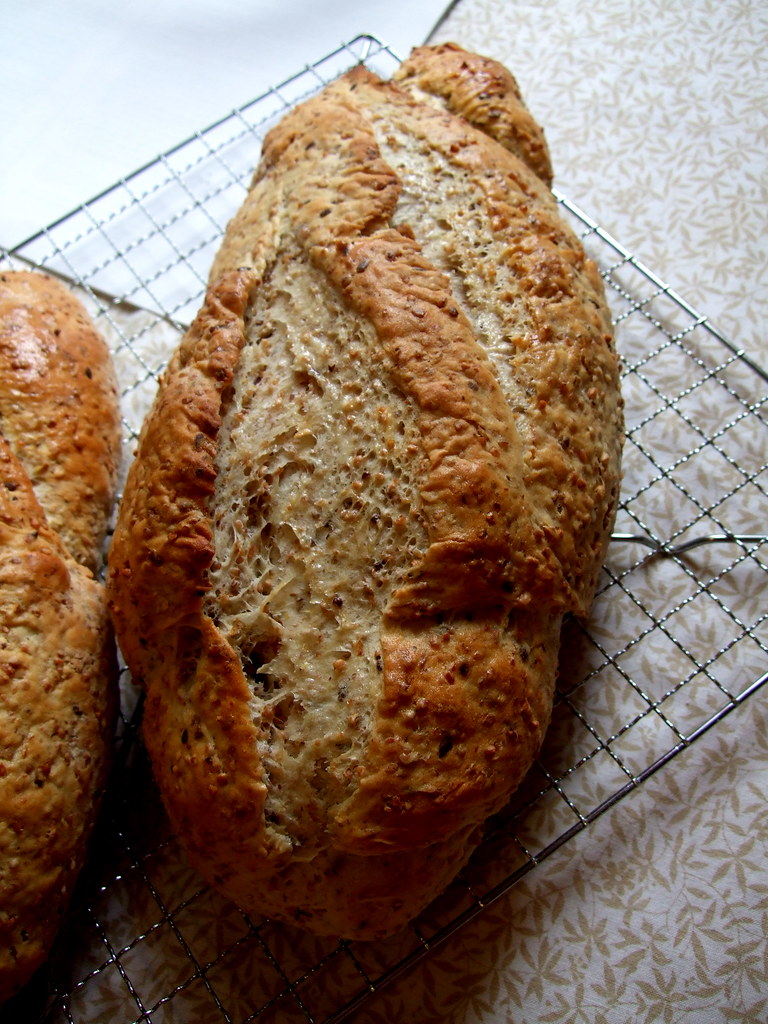
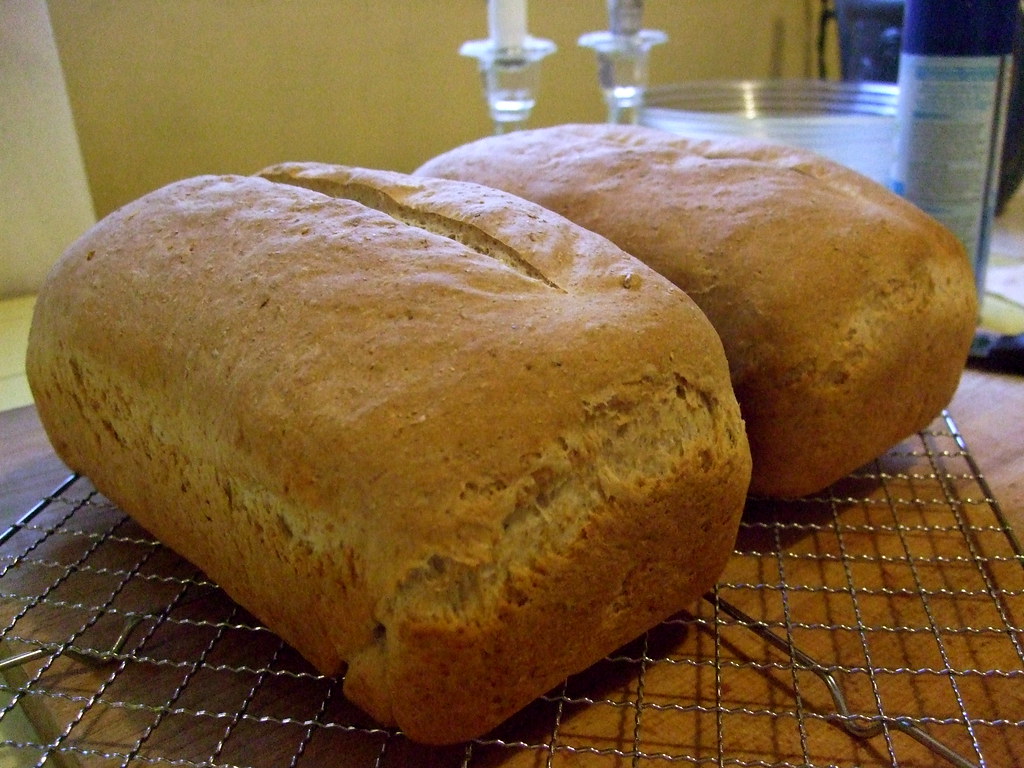
Mom's Amazing Seed Loaf

My mom (hi Mom!) sent me this recipe for the most delicious (and healthy!) bread. It's basically a white loaf except for the hefty dose of Red River Cereal, which adds a nice big dose of fiber to every slice. I only made one modification, which was to add some lemon juice. It was an experiment that paid off, as I'd heard that lemon juice is an excellent dough conditioner, and yields a fluffier, tastier loaf.


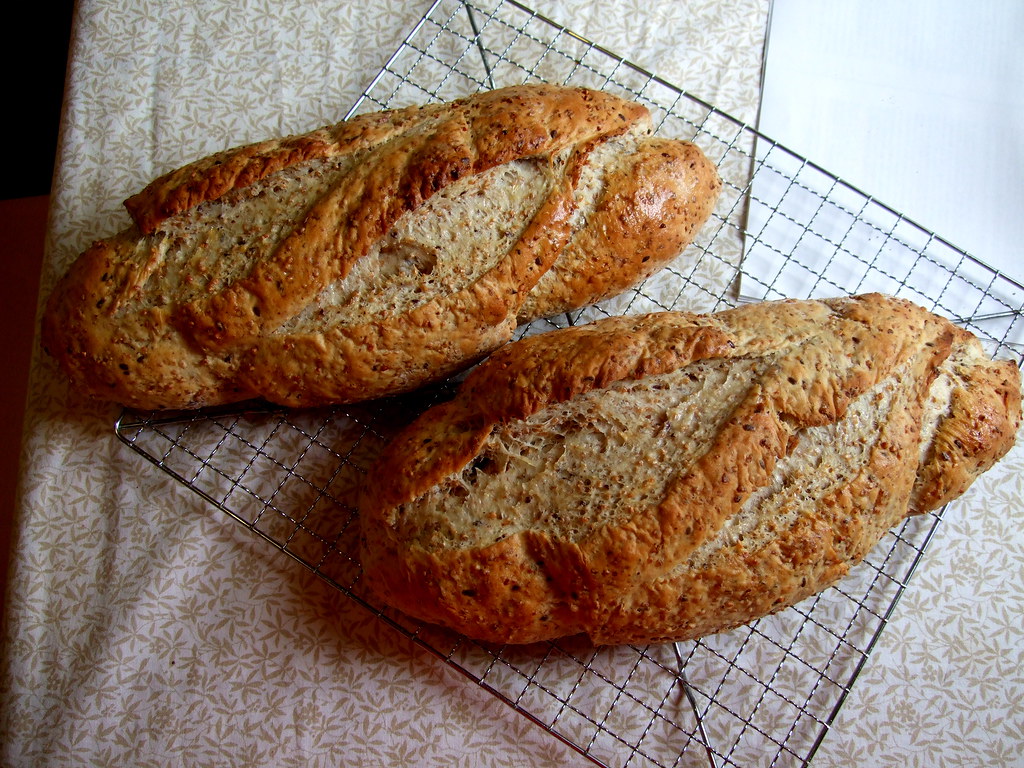
You can shape it either in loaf tins or freestyle, as I did. The inside crumb is light and soft, despite being so good for you. This might be an excellent bread to use to introduce a reluctant seedy-bread eater to the fold.


You need:

6 c all-purpose flour
2 c Red River cereal (I imagine Sunny Boy would also work)
3 c boiling water
1 tbs sugar or honey
1 tbs salt
4.5 tsp yeast
3 tbs lemon juice
2 tbs butter, for brushing on after.

1. In a large mixing bowl, combine the cereal and the boiling water. Let sit 20 minutes, until the cereal has cooled and absorbed much of the water.

2. Add 2 cups of flour and mix, then add the sugar, salt, yeast, and lemon juice. Make sure the mixture is not hot (warm is ok) otherwise it'll kill your yeasty-beasties.

3. Add the remaining flour 1/2 cup at a time and knead for 10 minutes.

4. Place the dough in a greased bowl and cover. Let rise about 45 minutes.

5. Shape into two loaves and let rise again for 40 minutes. If you shape them freestyle, slash them with a sharp knife just before baking.

6. Bake for 35 minutes at 400ºF. When done, remove and brush with the butter. Your house will smell like heaven.


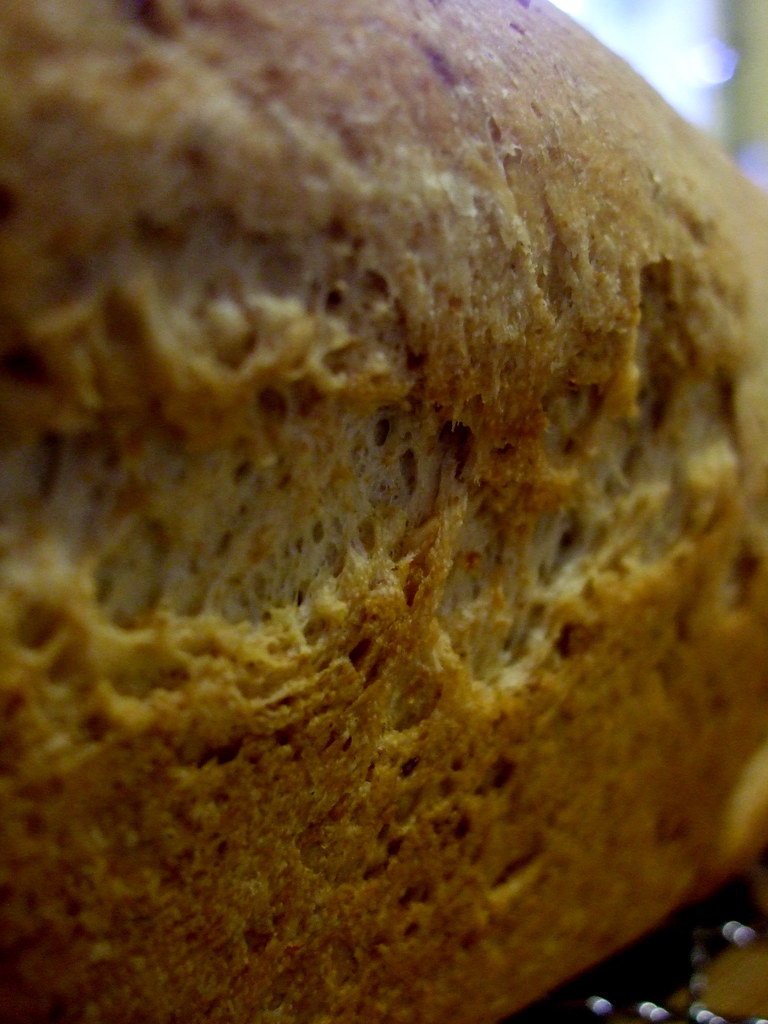
Edit: Here is a shot of the crumb:


Digg Technorati Delicious StumbleUpon Reddit BlinkList Furl Mixx Facebook Google Bookmark Yahoo

Thursday, July 2, 2009

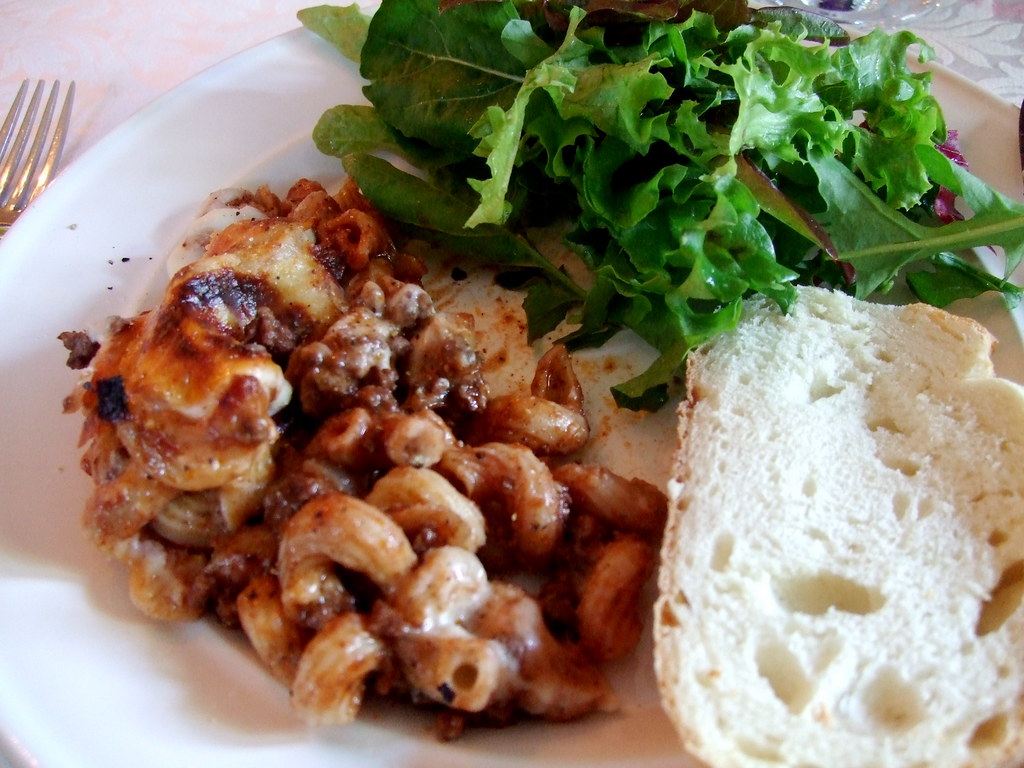
Pastitsio!

Pastitsio happens to be my oldest sister's favourite meal - with good reason: it's delicious! It's a Greek layered pasta dish made with meat sauce and Bechamel.The spicing of the meat distinguishes it from an Italian-style meat sauce and compliments the Bechamel.


This recipe is from an old Martha Stewart Living magazine - 2001, to be exact. It calls for ground lamb, which is so yummy if you can afford it, but if you can't, ground beef or turkey would do the trick - even veggie ground round might do it!

The recipe is found here, or you can read below; I've modified it only slightly, as I tend to like more spices than recipes tend to call for.


For the meat sauce:

2 tablespoons extra-virgin olive oil
2 white onions, cut into 1/4-inch dice
2 pounds ground lamb (or beef/turkey)
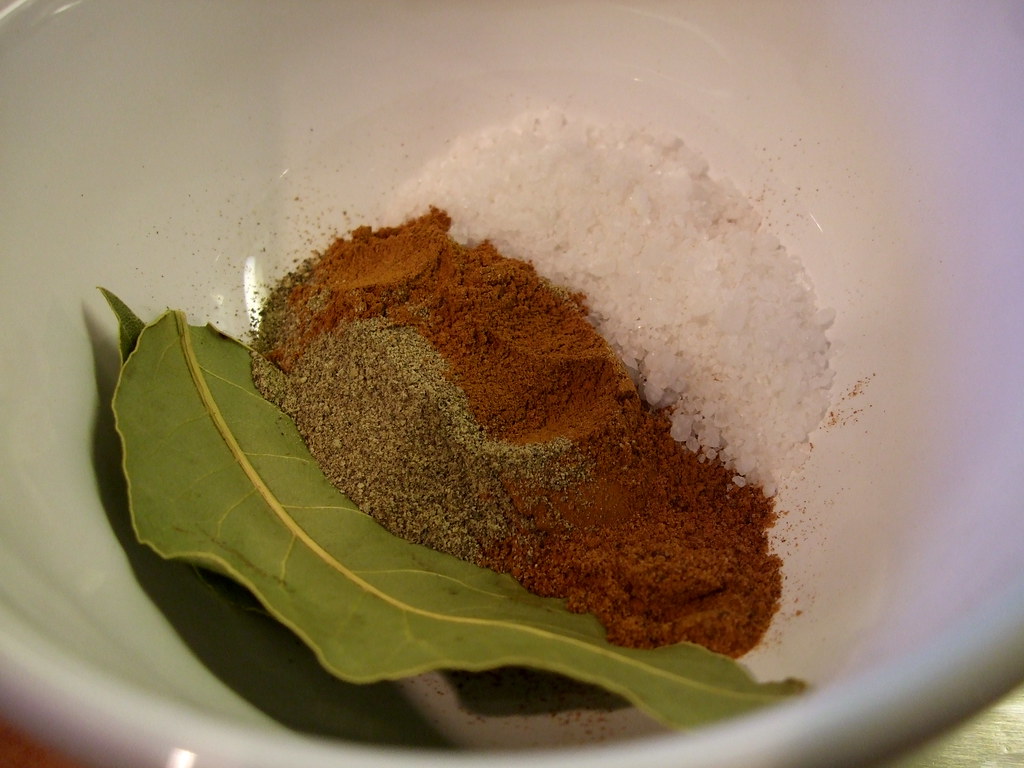
2 teaspoons coarse salt
3 teaspoons ground cinnamon
1/2 teaspoon freshly ground pepper
1/3 teaspoon ground nutmeg
1/2 cup dry red wine
1 can (6 ounces) tomato paste
2 dried bay leaves
2 cups beef stock

For the Bechamel:

6 tablespoons unsalted butter
1/2 cup plus 1 tablespoon all-purpose flour
2 teaspoons baking powder
3 cups whole milk
1 cup freshly grated Parmesan cheese
2 teaspoons coarse salt
1/4 teaspoon freshly ground black pepper
1/4 teaspoon ground nutmeg
1 pinch ground cayenne pepper

To assemble the dish:
butter for the baking dish, or cooking spray
1 pound cooked noodles, like Penne, Cavatappi, Rigatoni, or Ziti.

How to make it all work:
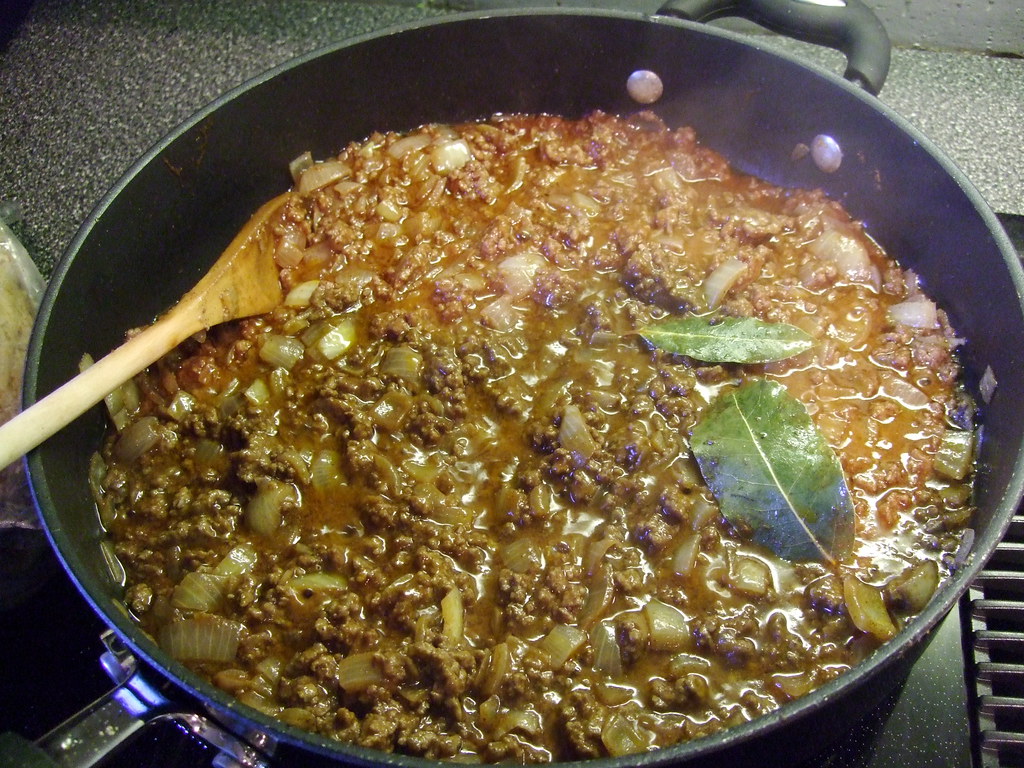
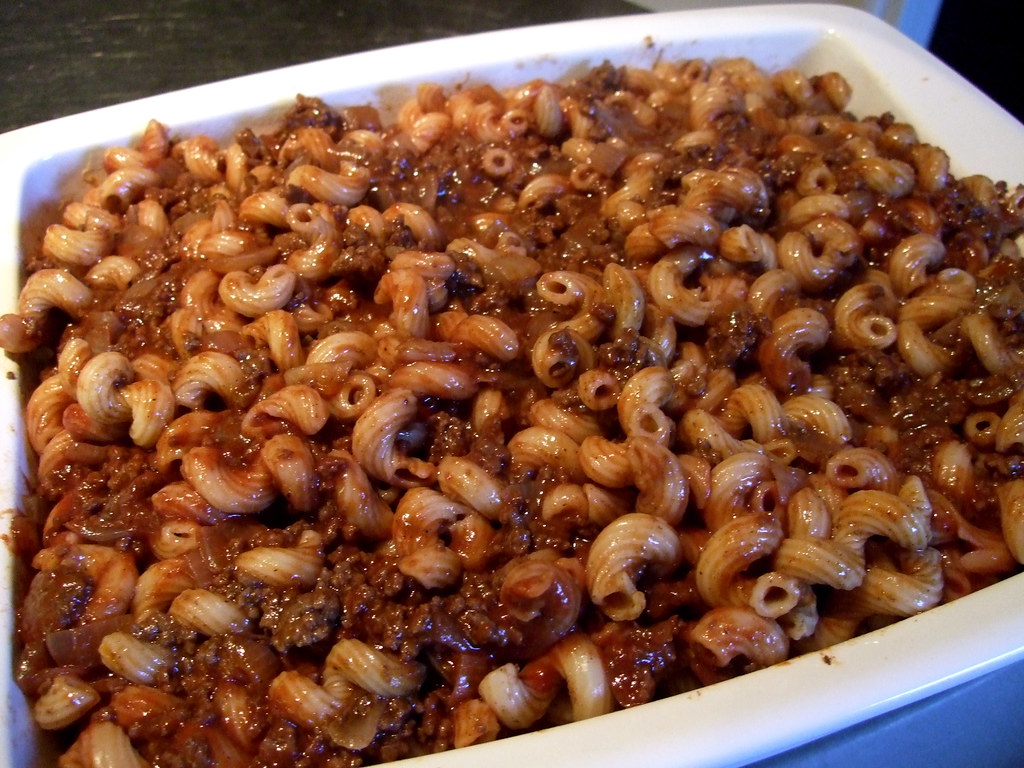
1. Make the meat sauce first. Saute the onions in olive oil over medium eat. Add the meat and the spices and cook until browned. Add the wine and cook until reduced, then add the tomato paste, the bay leaves, and the 2 cups of water. Simmer for 30 minutes and then cover and remove from heat. The smell of the cinnamon and nutmeg mixing with the onions and meat makes your whole house smell amazing! It is very difficult to not eat the sauce without waiting for the dish to be finished.


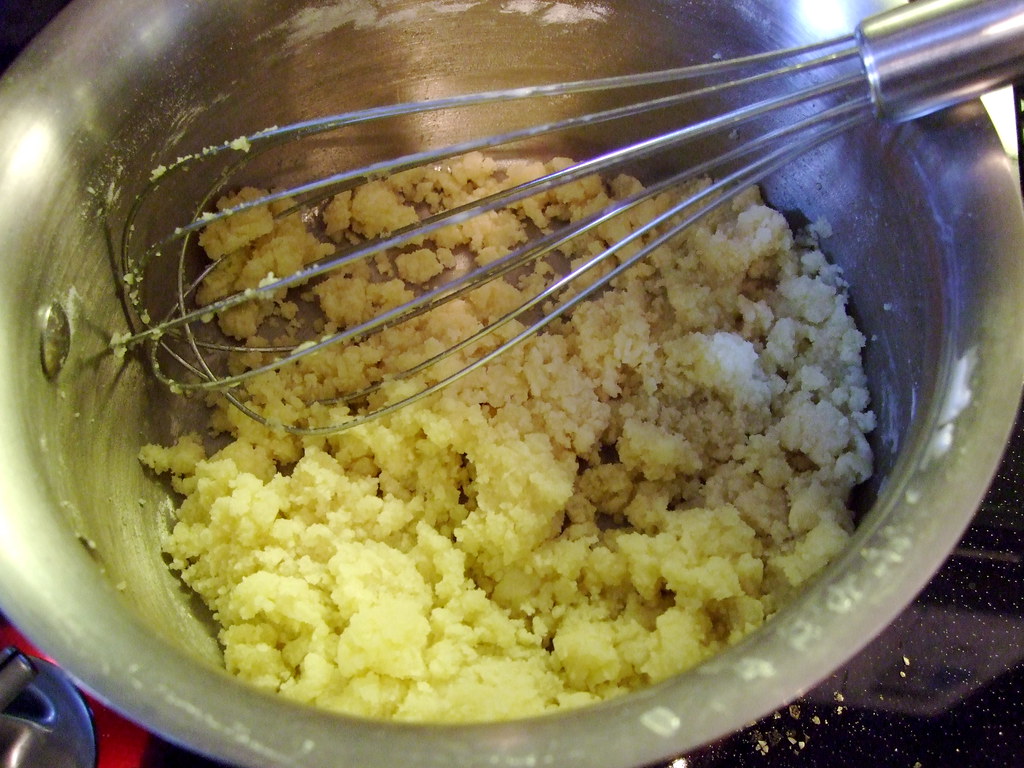
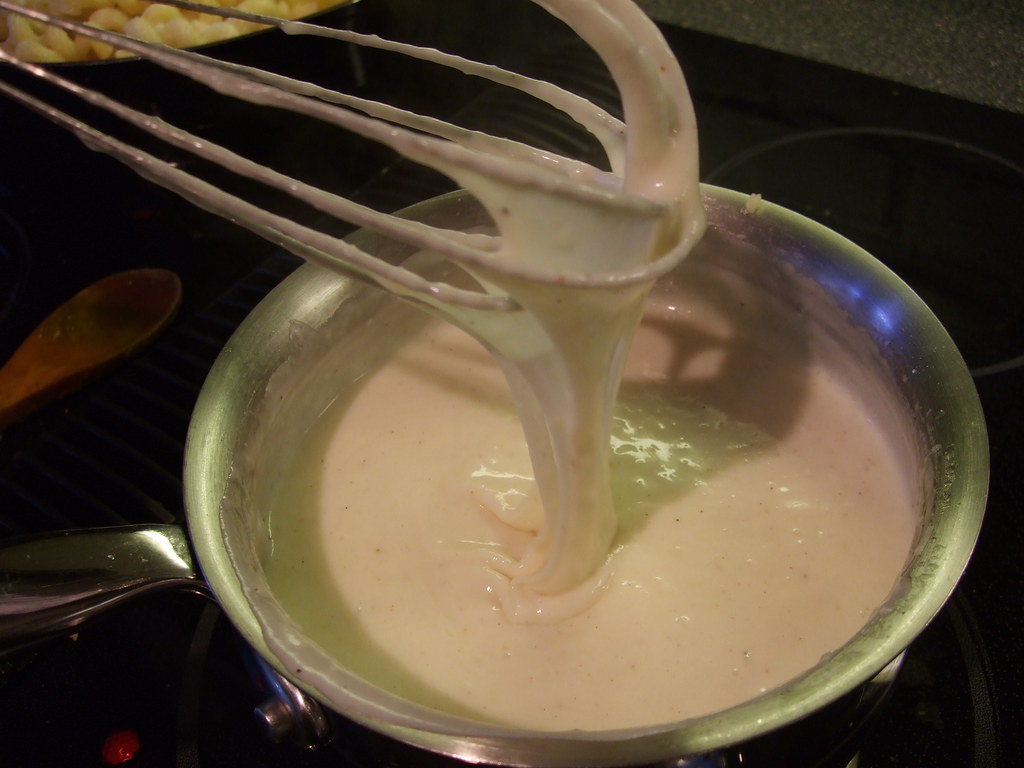
2. Next make the bechamel. Melt the butter over medium heat until it bubbles, and then add the flour and baking powder. Cook, stirring with a whisk, for about a minute. If it's lumpy at this stage, not to worry. When you whisk in the milk in the next step it'll smooth out nicely.


While still whisking, add the milk slowly. Whisk constantly until the sauce bubbles and thickens. Remove from heat, stir in the cheese and spices, and set aside, covered.


3. Now, preheat your oven to 375º and assemble your dish. Grease your baking dish (9-by-13 works well) with the butter or spray. Cook your pasta, if you haven't already done so - don't cook it as long as you would if you were eating it right away - very al dente is best. Drain the noodles and add them to the meat sauce; stir to combine. Pour the meat and pasta into the baking dish.


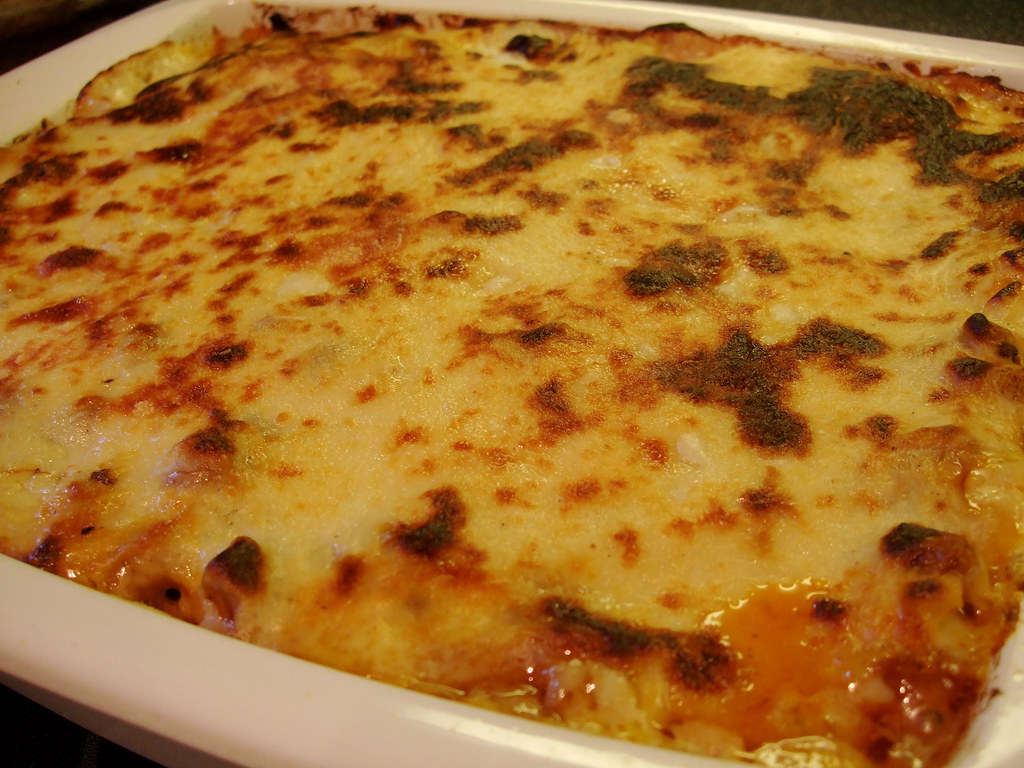
Then spread the Bechamel over top. Sprinkle with a bit more parmesan, if you have it, and bake until the top is golden, about 30-40 minutes. Let the dish settle for 10 minutes before you serve it.


Even my very picky nephews asked for seconds!


Digg Technorati Delicious StumbleUpon Reddit BlinkList Furl Mixx Facebook Google Bookmark Yahoo

Sunday, June 7, 2009

Oatmeal-Potato Bread

I have not been cooking as much as I would like. Well, I've been cooking my same amount, but it's not really anything to show off - shake n bake, plain pasta, pizza, etc. I'm trying to get a big project done, and while I would *love* to procrastinate by daydreaming about what meals I could cook, sometimes school comes first.

Enter the sandwich. A very important school-going staple; not to be trifled with. It requires decent bread that can stand up to the rigours of a back pack and tomatoes without falling apart.

I play around with sandwich loaves - I haven't yet found a whole wheat one that I'm entirely happy with. I've used this one, which is delicious but has so much sugar in it, and various others floating around online, or in my thousands of cooking and baking books. This recipe comes from Beth Hensperger's The Bread Bible and makes two good-sized loaves. I chose it because I had some left-over mashed potato waiting to be used up, and not enough time or energy to want to do a 24 hour whole wheat loaf as Peter Reinhart suggests. Maybe when these two are done.


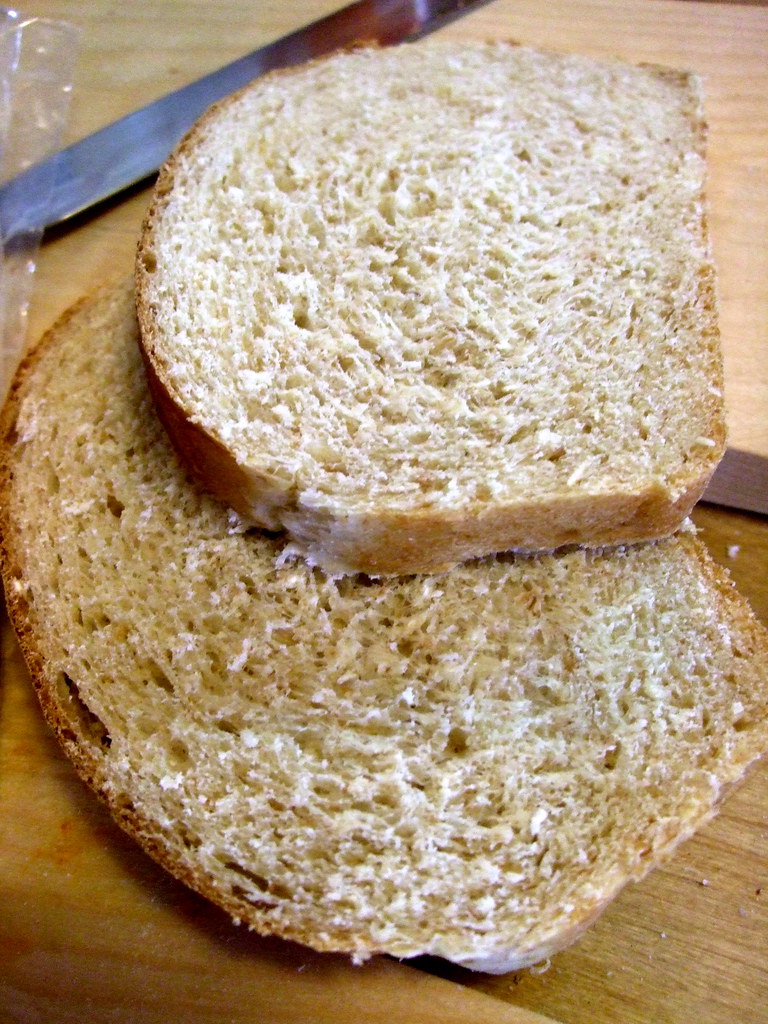
Beth describes the bread as moist and slightly sweet, and very easy to make. She's right - mine rose beautifully even though my house is usually on the chilly side. When it was baking, the house smelled delicious and slightly nutty. I really wish you could photograph smell! When it was ready to cut, I discovered that the crumb is light and airy and makes perfect toast! It has a delicious flavour and a soft texture. This is a keeper of a recipe, at long last!

Look at the crumb in this shot! Representative of what is inside...


You need:

1 c mashed potato
2 tbs butter (unless your mashed potato already has butter in it, like mine did)
1 tbs yeast
1/2 c warm water
1 tbs sugar + 1 pinch
1.5 c warm milk (I was out so I used 3 tbs plain yogurt mixed in with enough water to make 1.5 c)
1 tbs salt (I did not add salt as my potatoes were already salted enough)
1.5 c rolled oats
5 c all purpose flour (I used 2 c whole wheat and 3 c white unbleached)


1. Dissolve the pinch of sugar in the 1/2 c warm water and sprinkle the yeast on top to dissolve. Let proof 10 minutes, until foamy.

2. In a mixing bowl or a stand mixer, put the potato, yeast mixture, the rest of the sugar, the milk, salt, oats, and 2 c of the flour. Beat until it's combined. Add the rest of the flour by the half-cup until you have a very moist dough that only just clears the sides of your dough. If you add too much flour to make a stiffer dough, the oats will suck up all the moisture and you'll end up with dry, terrible bread. When you're done kneading the dough should be smooth and springy.

3. Put the dough in an oiled bowl and cover. It'll rise for about 1.5 hours and get nice and puffy.

4. Tip the dough out onto your work surface, which you've floured so the dough doesn't stick. Divide it in two - you're making two loaves. Shape the dough into loaves by following this amazing tutorial on The Fresh Loaf. Put each loaf in a greased 9-by-5 loaf pan and let rise again, covered, for another 40 minutes.

5. Preheat your oven to 425. Bake the loaves for 10 minutes at this heat, then at 350 for another 35-40. The loaves should sound hollow when you tap them on the bottom. Let them cool completely before cutting into them - I know it's hard, but the bread won't taste as good if you cut into it too early! Promise!

Digg Technorati Delicious StumbleUpon Reddit BlinkList Furl Mixx Facebook Google Bookmark Yahoo

Tuesday, May 26, 2009

Cheater's Ciabatta

Normally, ciabatta, the delicious, porous, Italian bread, takes hours and hours of waiting. The gluten strands that make those nice, big, ready-for-butter holes take time to develop. You can cheat a bit, though.

The reason all those no-knead breads work is that if you give bread dough enough time, the gluten strands will develop on their own. They just need 18-24 hours to do so. Usually we knead bread to speed up the development of the gluten so that a loaf of French bread might only take 8-10 hours. It's kind of logical that if you leave a dough for a long time and don't have to knead it, you'd be able to knead the dough a lot and not have to wait, right?


This ciabatta recipe only takes 4-5 hours because you knead this dough within an inch of its life. Once again, The Fresh Loaf has come to the rescue and made last-minute fresh bread possible.

-------

You need:
500g bread flour (I used all-purpose and added a few tbs of vital wheat gluten - kind of an experiment)
475g water
15 g salt
2 tsp yeast

Directions (from the above link):

1. In Kitchen Aid style mixer: Mix all ingredients roughly till combined with paddle, let it rest for 10 minutes.

2. With the paddle , beat the living hell out of the batter; it will start out like pancake batter but in anywhere from 10 to 30 minutes it will set up and work like a very sticky dough. if it starts climbing too soon, then switch to the hook. You'll know it's done when it separates from the side of the bowl and starts to climb up your hook/paddle and just coming off the bottom of the bowl. I mean this literally about the climbing, i once didn't pay attention and it climbed up my paddle into the greasy inner workings of the mixer. It was not pretty! Anyway, it will definetely pass the windowpane test. (Note: See a great picture tutorial on what it's supposed to look like here.)

3. Place into a well oiled container and let it triple! it must triple! For me this took about 2.5 hours

4. Empty on to a floured counter, cut into 3 or 4 pieces. Spray with oil and dust with lots o' flour. Let them proof for about 45 minutes, which gives you enough time to crank that oven up to 500F.


5. After 45 minutes or so the loaves should be puffy and wobbly. Now it's iron fist, velvet glove time. Pick up and stretch into your final ciabatta shape (~10" oblong rectangle) and flip them upside down (this redistributes the bubbles, so you get even bubbles throughout), and onto parchment or a heavily floured peel. Try to do it in one motion and be gentle, it might look like you've ruined them completely, but the oven spring is immense on these things.

6. Bake at 500F , rotating 180 degrees half way through.


-------

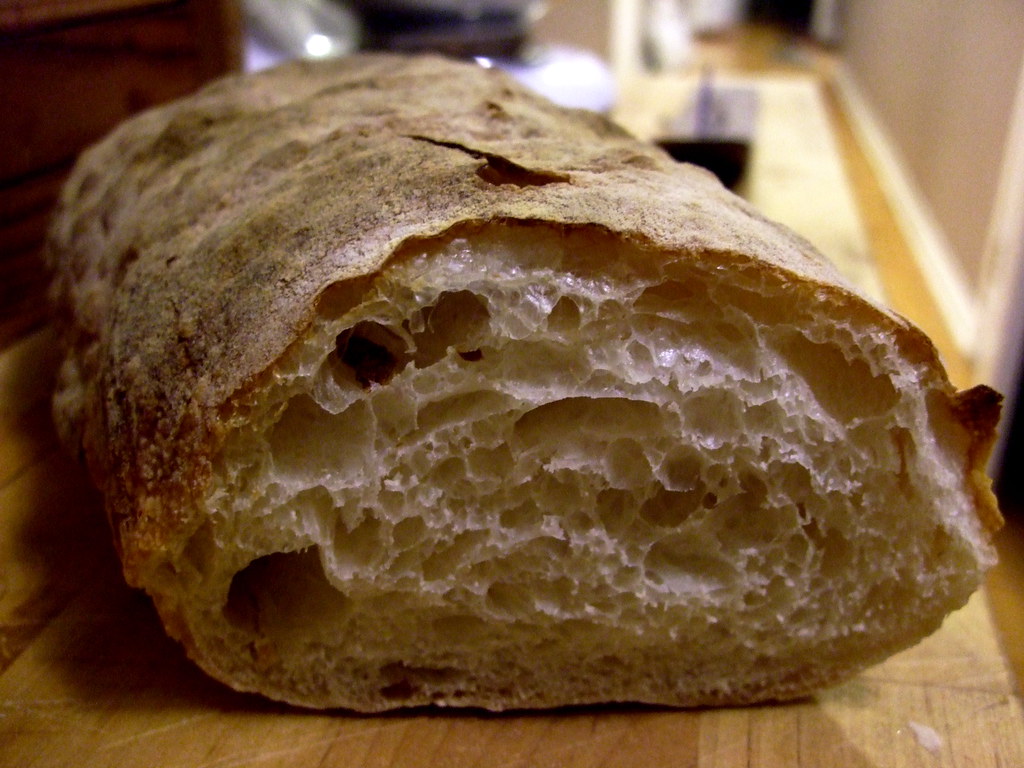
The crumb in this bread is great - big and porous - and the crust is delicious - golden and chewy. I usually make a few loaves of french bread the long way every two weeks or so and freeze extra, but I think this way will enable me to have fresh bread every day if I wanted to!

I'm pretty sure I didn't stretch mine out enough - it looked so flat when I put it in the oven, but the recipe is right - big oven spring! I think "real" ciabatta is supposed to be a bit flatter.

Also, if you don't have a kitchen aid or something like that, you can, of course, beat the living daylights out of your dough by hand - it'll just take a bit longer and your arm may fall off.

Digg Technorati Delicious StumbleUpon Reddit BlinkList Furl Mixx Facebook Google Bookmark Yahoo

Saturday, May 9, 2009

EPIC RAINBOW CAKE OF NOM!

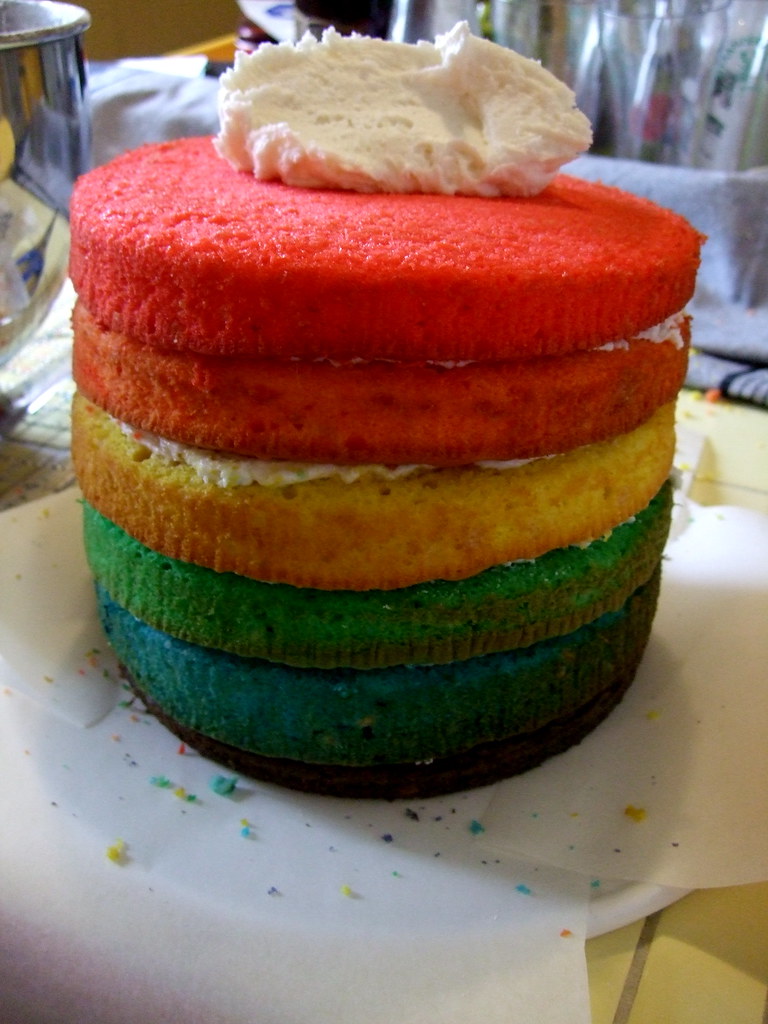
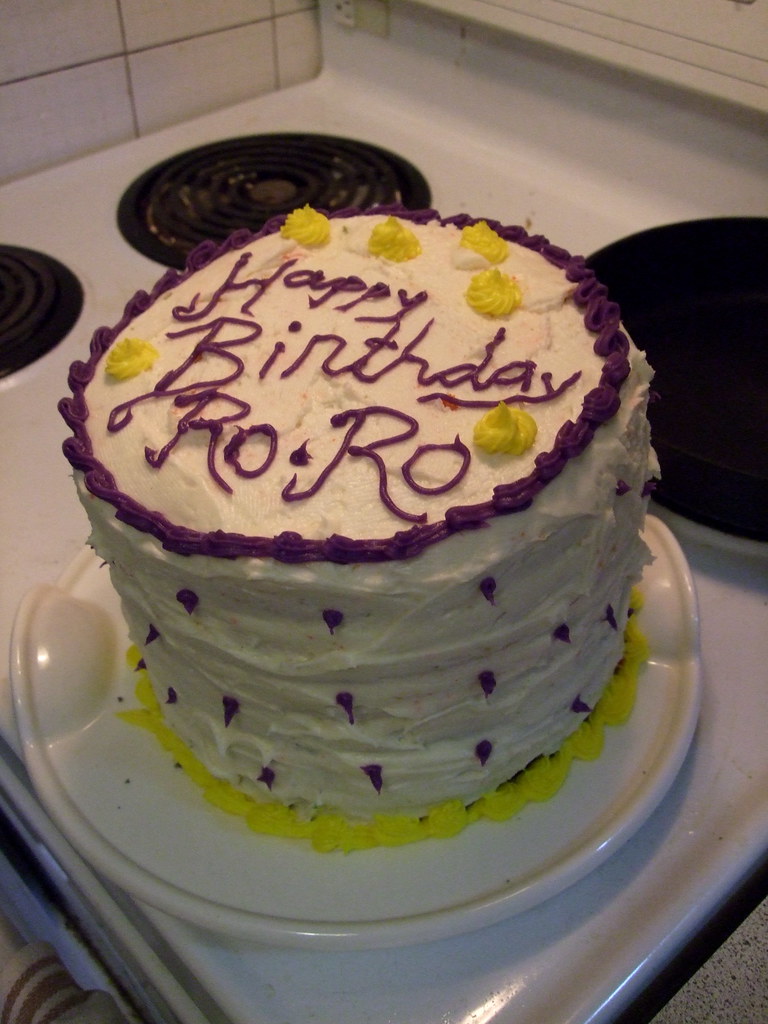
The rainbow cake has been spreading through the foodblogosphere like butter on a hot roll since at least January - that's when I heard about it from The Omnomicon. I've been waiting for an opportunity to use my gel food colours, thinking of this cake, and thinking that perhaps my own birthday might be the occassion for their inaugural use. But then a party was announced and Roxy became the lucky recipient of a magical six-layer rainbow cake.

The idea is fairly simple but keeping a six-layer cake level and in one piece, especially when serving, is hard to execute. I am by no means a proficient cake-maker, but I like cake, and I feel like that is half the battle. It's not the half that makes your cake stand up straight, though, I discovered.

You need:
  • 2 batches of the cake recipe of your choice! It should be a white cake so that the colours stand out well. You can even use two box mixes! But, if you do this, I recommend adding two boxes of vanilla pudding (dry) to the mix - you'll end up with a richer, more structurally sound cake.
  • red, yellow, green, and blue GEL food colours. I don't recommend using liquid food colours as you'll have to add too much and the cake consistency will change.
  • icing recipe of your choice - you will need a LOT of icing. More than you think. Again, feel free to use disgusting canned icing.
  • decorations of some sort! icing of various colours and/or a piping bag will do the trick.

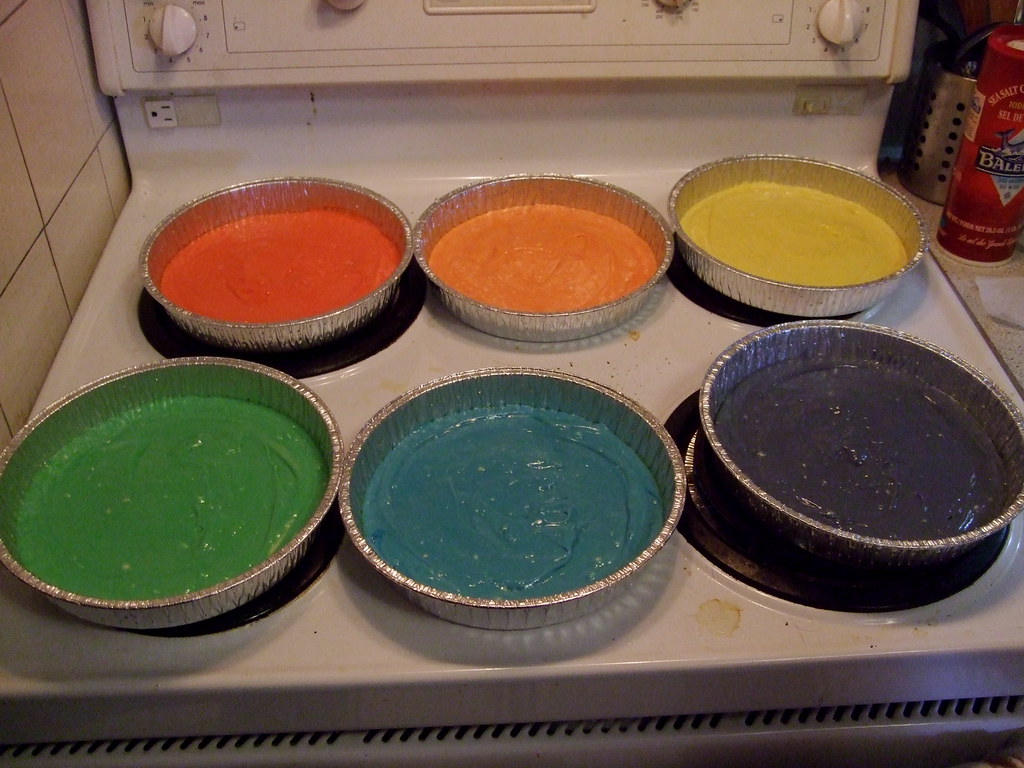
1. Mix your batter according to the directions. Measure the volume of the batter and divide that number by 6 for your six layers. I ended up needing 1 and 1/3 c of batter per colour as I had 8 cups of batter total. Preheat your oven to the indicated temperature. Grease six 8" cake pans well.

2. Divide the batter into 6 glass or ceramic bowls. Plastic might take some of the colour from the food dye - I'd be careful. Add a few drops of gel food colouring to each bowl, according to the colour you want, and mix well. I needed three drops for red, 2 drops of yellow and one drop of red for orange, three drops of yellow for yellow, two drops for green, three drops for blue, and two drops of blue plus two drops of pink for purple.


3. Pour each colour of batter into a cake pan, and bake! Mine took 20 minutes to be done through.


4. Let the cake cool for a long time. The cake must be cool before you start assembling your cake or it will be fail cake. While you're waiting, make your icing. My recipe is a few tbs of butter, a bag of icing sugar, a tbs of vanilla, and enough milk to make it icingy.

5. Using a sharp cerated knife or cake leveller, level off the tops of the cakes. They must be flat or your cake will fall over. Put the purple layer on the tray you're going to serve it on. Tuck a few pieces of parchement paper underneath so that no icing will get on the serving tray. You'll tug them out later when you're done icing. Ice the top but not the sides of the purple layer. Stack the blue layer on top, and ice its top. Repeat with green, yellow, orange, and red.


6. When you get to red, pile lots of icing on the top and spread it evenly, pushing it over the edges. Then ice the sides. Now you can decorate the cake however you like - those icing scribblers they sell are useful for this, or you can put chocolate chips or sprinkles or whatever! I like to make mine as garish as possible. :)


7. Tug out the parchment pieces, and serve your beautiful cake to your adoring fans!


Digg Technorati Delicious StumbleUpon Reddit BlinkList Furl Mixx Facebook Google Bookmark Yahoo

Friday, May 1, 2009

Everybody Let's Get Sconed!

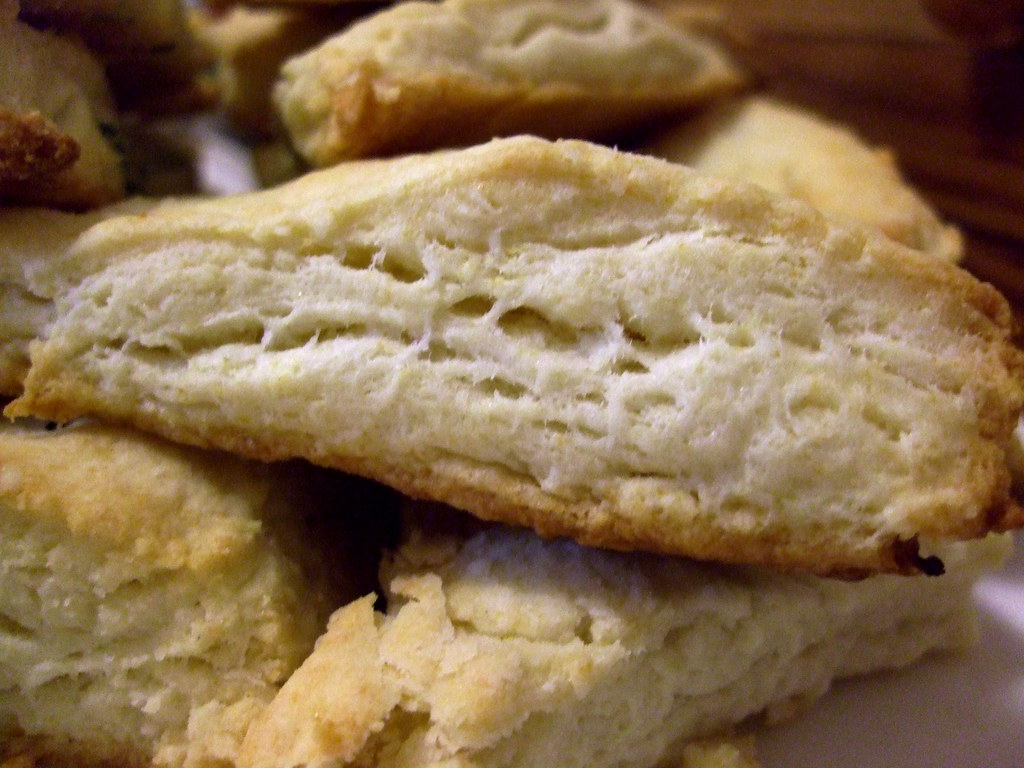
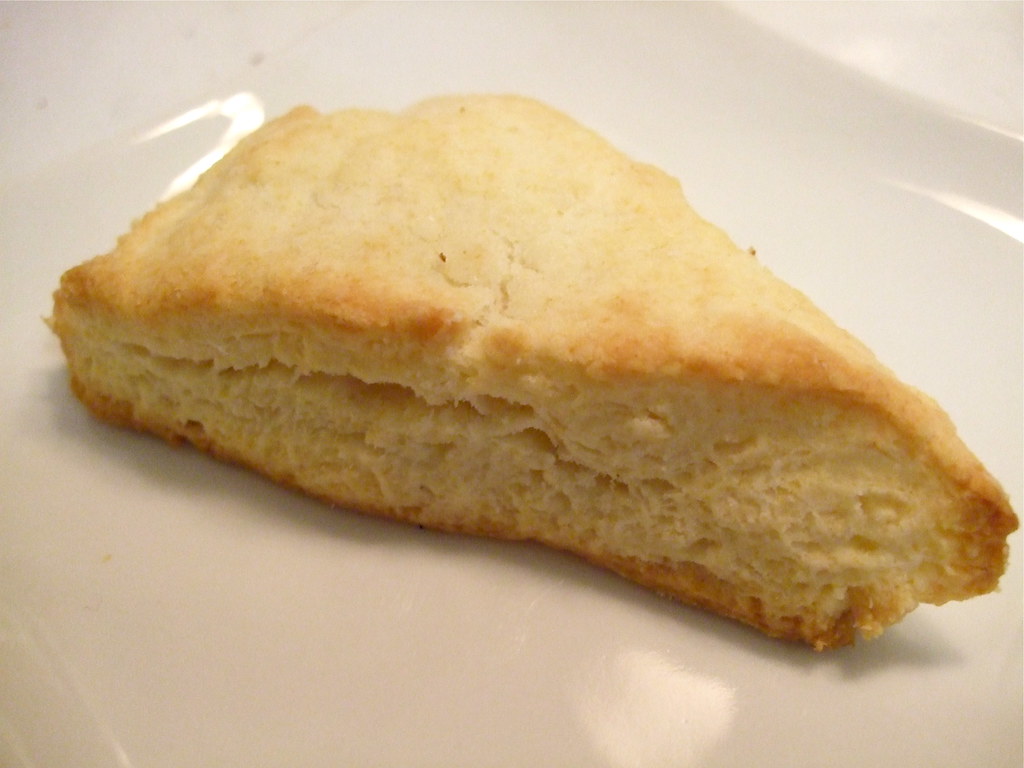
The perfect scone is flaky and creamy, just held together by butter and magic. If I could get my hands on some clotted cream in this here town, I would be eating scones by the dozen, topped with cream and jam.


As it happens I only have butter, but I do have some home-made plum jam from the summer. So scones are allowed. They take about 30 minutes from start to finish, so if you're feeling lazy/pressed for time but still want a treat, this here's your answer.

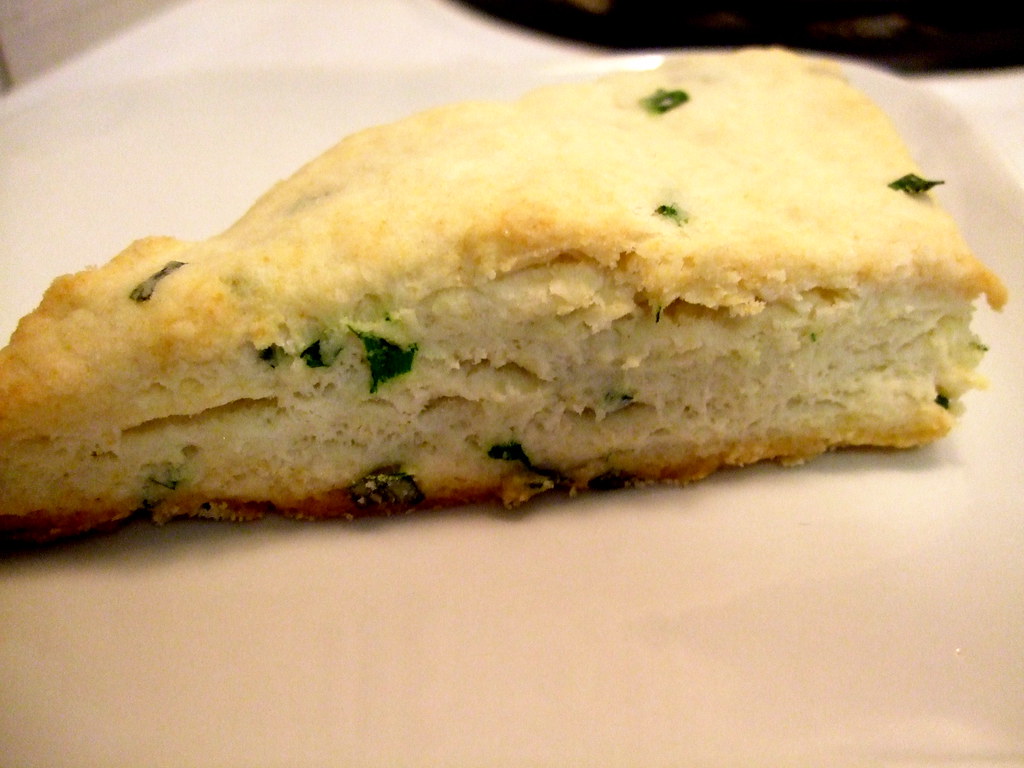
Today I made two kinds: a plain, cream scone which is nice with tea and jam, and a chive scone for M because he likes oniony things and has a very tiny and furtive sweet tooth.

RECIPE THE FIRST: CREAM SCONES


2 c all purpose flour
1 tbs baking powder
1/2 tsp salt
2 tbs sugar
1/4 c + 1 tbs chilled butter, diced
1 c heavy cream

First, mix the first four ingredients well. Then cut in your butter until the mixture resembles crumbs. To cut in butter, you can use two knives or a pastry cutter and just slice through the flour and dough until it's mixed up.

Make a well in the centre and pour in your cream. Here's where things get a little tricky. Not too tricky though - don't give up! Mix the cream into the flour and butter mixture only enough so that you have a shaggy kind of dough. It doesn't have to be perfect, and in fact, should not look perfect unless you want rock hard scones. TOUCH THE DOUGH AS LITTLE AS POSSIBLE.

Press the dough into a sort of rectangle shape, and cut it into evenly-sized triangles. Mine were about 3" by 4.5" by 5". I'm not sure if that's even possible... Pythagorus? Alternately, you can cut them into rounds with a glass or a biscuit cutter, but you'll lose some dough this way. Don't try to reform it - that falls into the category of too much touching.

Lay the scones out on a baking sheet, ungreased, and put them into an oven which has been preheated to 400ºF. They'll be done after about 10 minutes - very lightly golden on the edges, and milky everywhere else. Also, your kitchen will smell like heaven.


RECIPE THE SECOND: CHIVE SCONES!


Basically it's the same as the above, but with 1 tbs less sugar (so only 1 tbs) and you add in about 3 tbs finely snipped fresh chives with the flour and salt etc before you cut in the butter.

These are seriously amazing. The chive flavour is delicate but definitely present. They would be awesome with some sharp cheddar in there too.

Digg Technorati Delicious StumbleUpon Reddit BlinkList Furl Mixx Facebook Google Bookmark Yahoo